
Earlier, we’ve shared you following guide to backup your Windows 10:
How to backup Windows 10 using ‘Backup and Restore’ feature
You can also backup your personal files in Windows 10 using File History. This feature was actually introduced in Windows 8. Microsoft has enhanced File History with Windows 10.
With File History, whenever changes to your personal files are detected, copy of updated files will be stored to File History drive. The backup drive can be an external drive or network drive/location. By this way, File History feature continuously protect files in your user account folder so in case of system failures/crashes, your personal file can be recovered.
If the File History backup drive is disconnected/not available, your files will be cached to system drive and copied to backup drive, once it is available again.
For your convenience, we’ve divided this guide into two parts. First part will show steps to backup your files. While second part will show how to restore already backup files.
Page Contents
How To Backup Using File History In Windows 10
PART 1 – Backup Your Files With File History In Windows 10
1. Open Control Panel and select File History.
2. In File History window, windows will automatically detect external or network drives. If it doesn’t, you can pick them up manually. Then click on Turn on button to enable File History.

3. For few moments, you’ll see File History is saving copies of your files message. Let this work and be careful, don’t hit Stop link until it disappears.
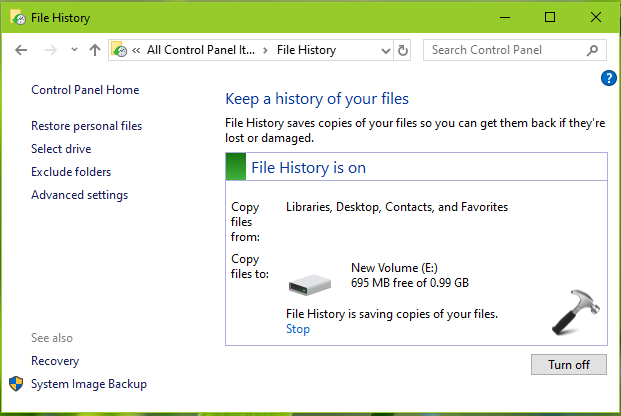
4. Once the backup is set up with File History, you’ve last copied timestamp. This means backup is successfully completed.
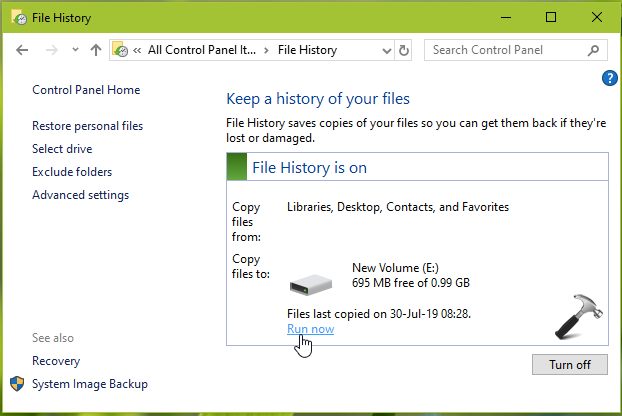
5. If you need to manually update the backup later, simply click Run now link and backup will updated. To disable File History feature anytime, simply click Turn off button.
To restore file you back up, refer PART 2 below.
PART 2 – Restore Your Files With File History In Windows 10
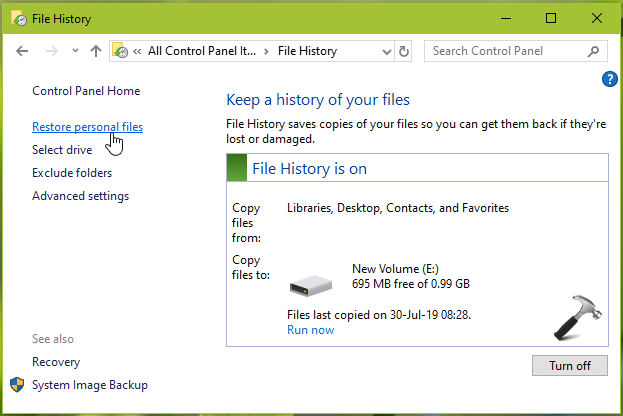
1. Open Control Panel and select File History.
2. In File History window, click on Restore personal files link in left pane.
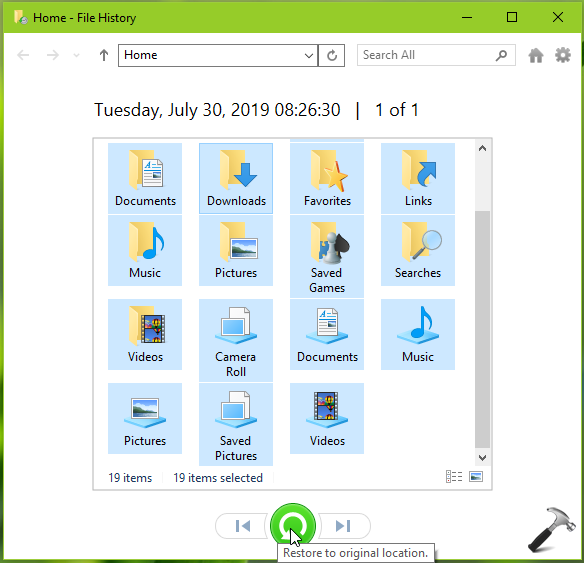
3. Now in File History configuration window, select the folders/files which you want to restore and hit restore icon displaying ‘Restore to original location‘ at bottom.
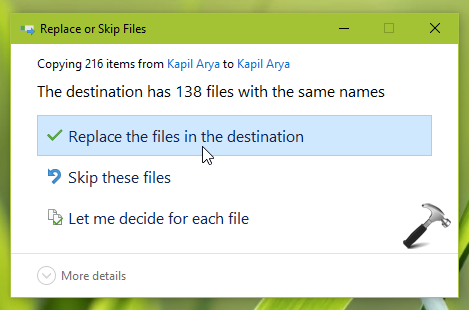
4. In Replace or Skip Files, select Replace the files in the destination.
So this is how you can use backup using File History in Windows 10.
That’s it!

My name is Alex and I cant turn on File History. This is the message: “COULD NOT enable File History. the service cannot be started, either because it is disabled o because it has no enabled devices associated with it “. But in the box that shows that the file history is off, appears the drive that I want to copy and when I want to turn it on appears the message shown above.
^^ Open Services snap-in, locate Volume Shadow Copy and Windows Backup services and make sure they’re running plus not disabled.