
Whenever you’re making critical changes to Windows 10, such as upgrading version, doing hardware change etc., you’re recommended to backup your system. The backup will be very helpful, when something goes wrong during critical change. It will be the only way to restore your system to previous configuration.
In Windows 10, you can perform backup via File History or via old backup method we’re using since Windows 7. We’ll be discussing the later one in this article. The older method is quite simplified and easy to use for beginners.
So here’s how to backup your Windows 10 to external/network drives:
How To Backup Windows 10 To External Hard Drive/Network Drive
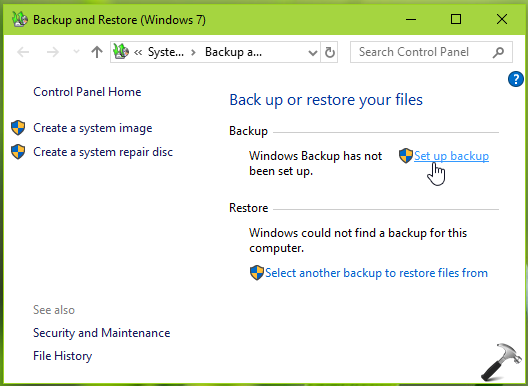
1. Open Control Panel, go to System and Security > Backup and Restore (Windows 7). Alternatively, you can press  + X keys, click Settings app > Update & Security > Backup > Go to Backup and Restore (Windows 7).
2. In Backup and Restore (Windows 7) window, under Backup, click Set up backup link.
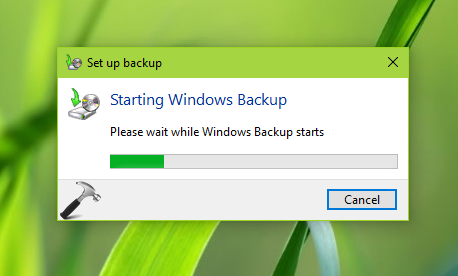
Wait for few moment, until Windows Backup initializes. See this fix, if you can’t start Windows Backup application.
3. Now in Set up backup screen, choose the drive where you want to store backup files and click Next. In this case, if you’re saving backup to external drive, make sure you’ve created a disk volume on it and it is recognized in File Explorer, otherwise the drive will not appear here.
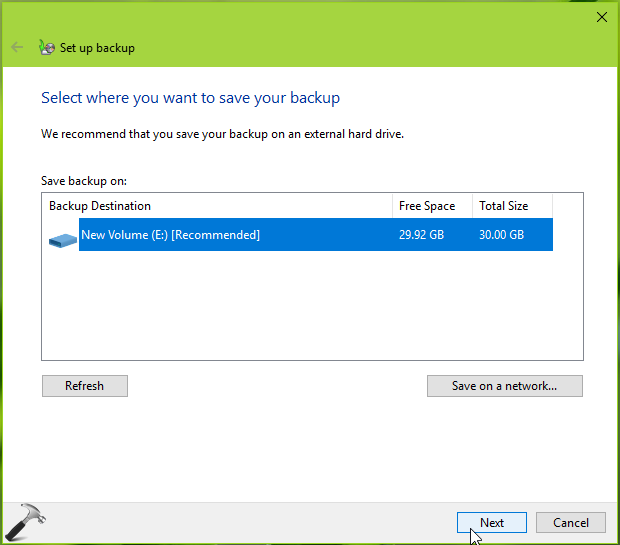
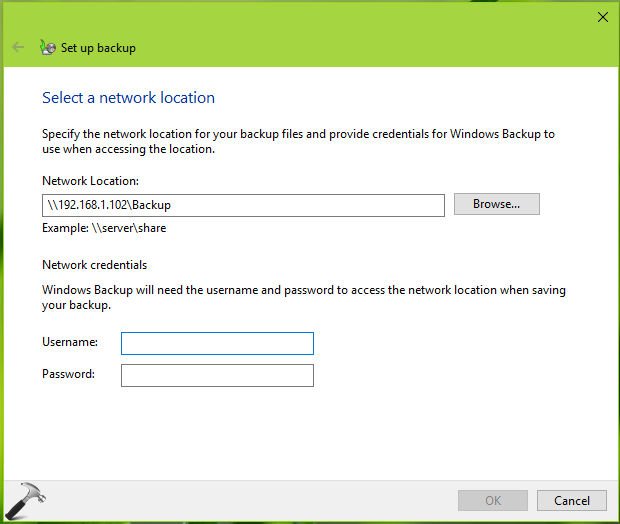
4. If you want to backup to your network drive, click Save on a network button in above shown window. Then provide a network location and credentials (refer below screenshot). Click OK.
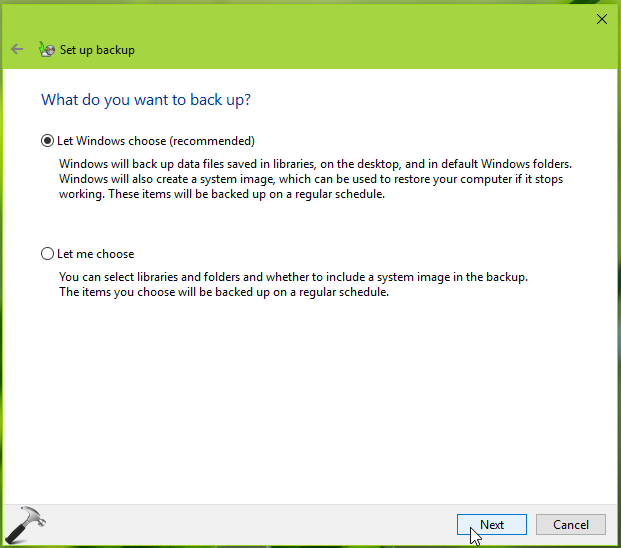
5. Then select how you want to backup files. We recommend you to select Let Windows choose option here. Click Next.
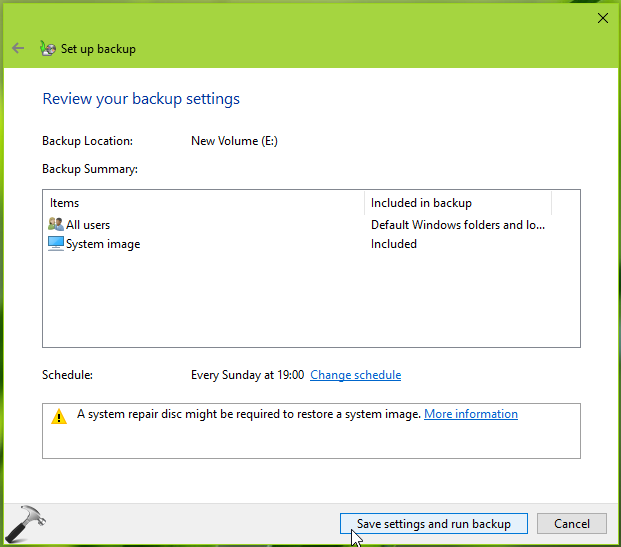
6. Now review your backup settings, and in case if you want to re-configure setting, use back icon. Note that you can also schedule backup in this window. By default, Windows scheduled automatic backup at every Sunday at 19:00. Click on Change schedule link to modify the settings.
If your settings are correct, hit Save settings and run backup button.
7. Now backup will run and you’ll see ‘Backup in progress‘ screen. This may take some time, so let it complete. See this fix, you receive ‘Windows backup did not complete successfully‘ message.

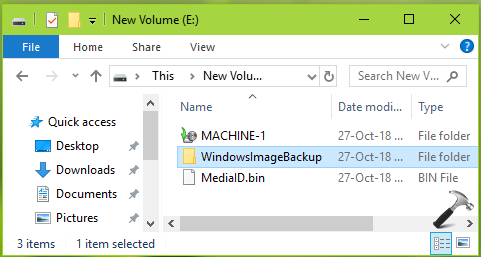
8. Once the backup is complete, you can see the backup contents on your external hard drive or network drive, whatever you’ve chosen for backup.
9. To restore backup at any stage, go to Control Panel > System and Security > Backup and Restore (Windows 7) and click Restore files.
That’s it!
Also see: How to create and restore System Image in Windows 10.

I finally got my computer backed up. thanks for your help
^^ Glad to help david 😎