Changing the boot time in Windows 11/10 can be a useful customization to improve your computer’s startup experience. By adjusting the boot menu timeout, you can control the length of time your computer waits for user input before automatically booting into the default operating system. Whether you want a shorter delay for a faster startup or a longer timeout to provide more time to select a different operating system, adjusting the boot time is a straightforward process. In this guide, we will walk you through the steps to change the boot time using the boot options in Windows 11 or Windows 10, allowing you to tailor your computer’s startup behavior to suit your needs.
Page Contents
How to change boot time in Windows 11/10
Fix 1: Change boot menu timeout using the Command Prompt window
1. Right-click on Command Prompt and choose the Run as administrator option.
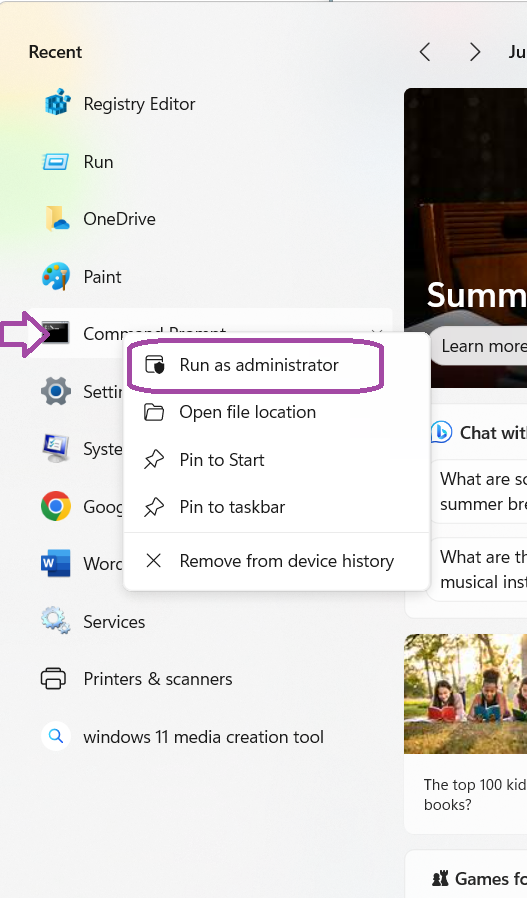
2. Type the below command and press Enter.
Bcdedit /timeout 70
3. You can enter any value between 0 and 999 instead of 70.

Fix 2: Change Boot Menu Timeout using Boot Options in Windows 11/10
1. Turn on Windows 11/10 system and click on Change defaults or choose other options.
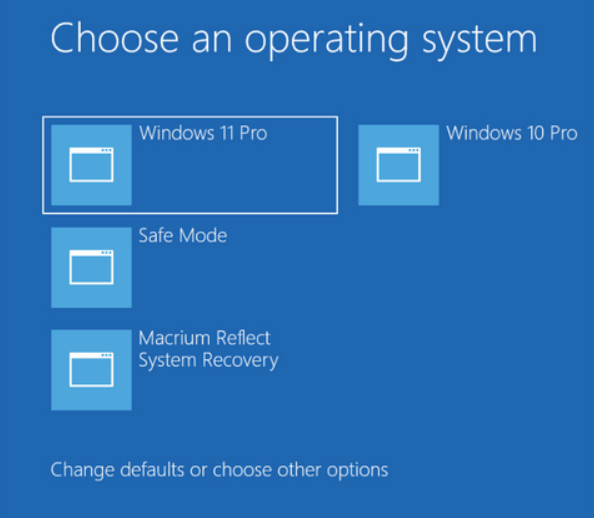
2. Click on the Change the timer option.
3. Select one value from the available timeout values.
4. Click on the back arrow button and select an operating system.
Fix 3: Set Boot Menu Timeout using the System Configuration window (or MSConfig)
1. Type MSConfig in the Run prompt to open System Configuration.

2. Click on the Boot tab.
3. Set Timeout to a value between 3 and 999.
4. Check on the Make all boot settings permanent option.

5. Click Apply > click yes > OK.
6. You will get a prompt to Restart your system or the option of Exit without restart. Choose any.
Fix 4: Select Boot Menu Timeout using the System Properties window to change boot time in Windows 11/10
1. Open Settings by pressing Win + I keys
2. Click on System > About.

3. Click on Advanced system settings.

4. Click on the Advanced tab and then click on Settings in Startup and Recovery section.

5. In the Startup and Recovery window, select a default operating system.
6. Tick on Time to display a list of operating systems.
7. Enter timeout value between 0 to 999. Choose a timeout value that will give you sufficient time to select the operating system in the boot menu OS selection.

8. Press OK.
That’s it!