
Are you looking for a way to change DNS settings in Windows 11? With the new Windows Update, it could be cumbersome for some users to update these settings on their PC. Before moving on, it is important to know what DNS settings do. DNS refers to Domain Name System, which lets you translate domain names to IP addresses and vice versa. For loading a website, systems run well with IP addresses. However, it could be difficult for users to remember the IP address of every website they visit.
That’s why, you need DNS servers. These servers try to locate the domain name of a website you visit and then, load the same back to the browser. Thus, your ISP (Internet Service Provider) usually provides two DNS server addresses. Now, it is important that you rightly assign these server addresses on your PC. So, if you are wondering how to change DNS settings in Windows 11, this guide is for you.
Page Contents
How to change DNS Settings in Windows 11
Method 1 – Change DNS Settings on a Wi-Fi connection
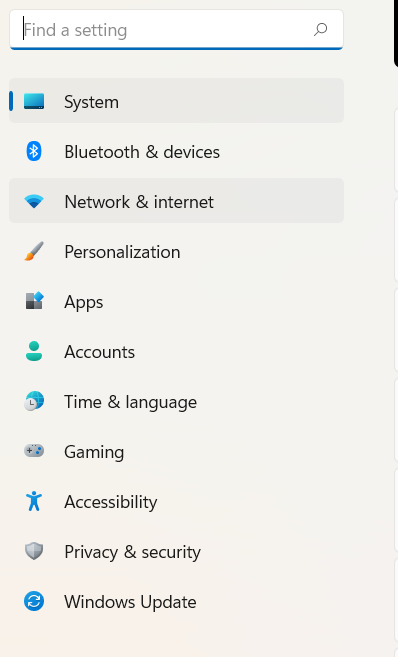
Step 1: Tap on the ‘Windows’ tab on the keyboard and enter “settings”.

Step 2: Next, tap on the ‘Settings’ option from the results showing up on your screen.
Step 3: After that, choose ‘Network & Internet’ from the window’s left menu.
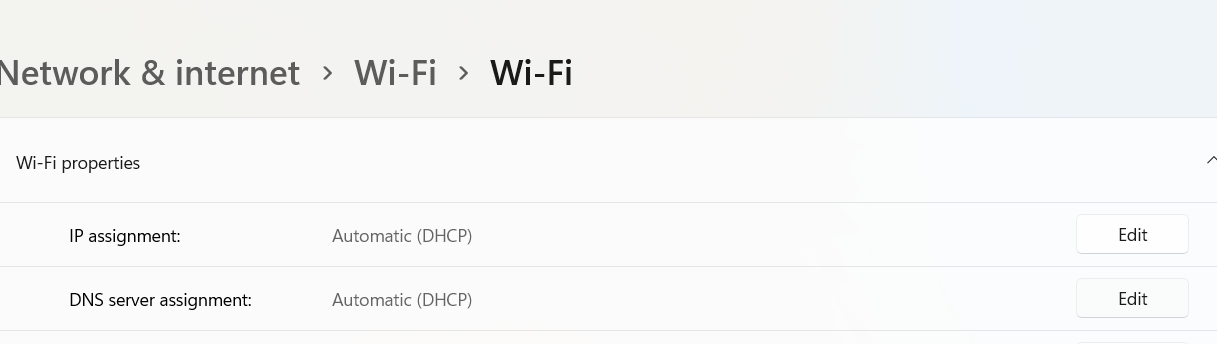
Step 4: Tap on ‘Wi-Fi’ and then, choose the ‘Hardware properties’ option.


Step 5: Now, select the ‘Edit’ tab present next to the ‘DNS server assignment’ option.
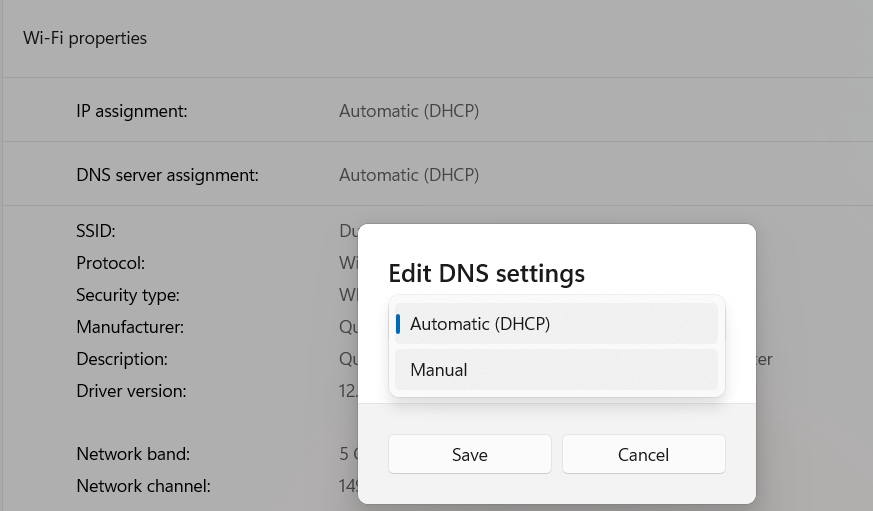
Step 6: In the ‘Edit IP settings’ tab, choose ‘Manual’ present in the dropdown menu.
Step 7: Once done, you will come across two toggle tabs, IPv6 and IPv4.
Step 8: Tap on the ‘IPv4’ toggle tab for turning it on.
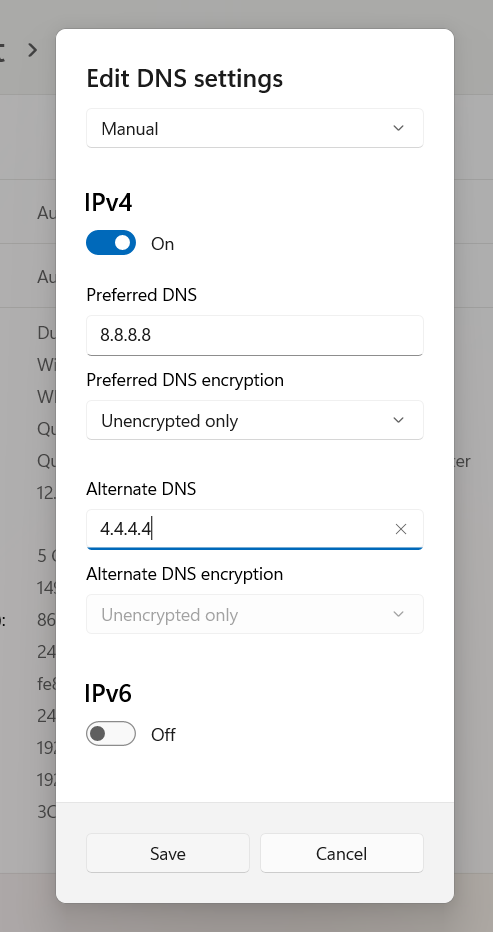
Step 9: Next, put in your DNS server address in the column named ‘Preferred DNS’ and your alternate DNS server address in the column named ‘Alternate DNS’.
Step 10: Without making any changes to other fields, tap on ‘Save’. Lastly, close the Settings tab.
Now, you have successfully changed DNS settings in Windows 11. It is one of the easiest ways to change DNS settings if you are using Wi-Fi on your Windows system. Users who are using Ethernet, they can change DNS settings in the following way.
Method 2 – Change DNS Settings when using Ethernet connection
Step 1: Firstly, press ‘Windows’ + ‘I’ tabs for opening settings.
Step 2: Then, tap on the ‘Network & Internet’ tab.
Step 3: Now, choose ‘Ethernet’ and keep scrolling to find the ‘Edit’ option. This option will be present next to DNS server assignment.
Step 4: After that, choose the ‘Manual’ option from the dropdown menu.
Step 5: Next, there will be two options available, IPv6 and IPv4. Tap on the ‘IPv4’ toggle tap for switching it on.
Step 6: Once done, put in your DNS server address in the column named ‘Preferred DNS’ and the alternate one in the column named ‘Alternate DNS’.
Step 7: Do not make any other changes. Now, click on the ‘Save’ tab for changing the DNS settings in Windows 11. Close the Settings tab.
Now, you have successfully changed the DNS settings in Windows 11.
Related: How to reset network in Windows 11.


