How to check network connection speed in Windows 11? Are you wondering how to do this? If yes, then you are at the right place. A network adapter connects your computer to the local area network or Internet. Sometimes, you may have to see your the link speed of all your network adapters. This helps you to know whether the network adapters are performing at specs. This even helps to troubleshoot network performance issues.
In this article, learn about various methods to check the link speed of your network connection. So, let’s get started without further ado!
Page Contents
How to check network connection speed in Windows 11
Method 1: See Network Connection Speed Using Settings
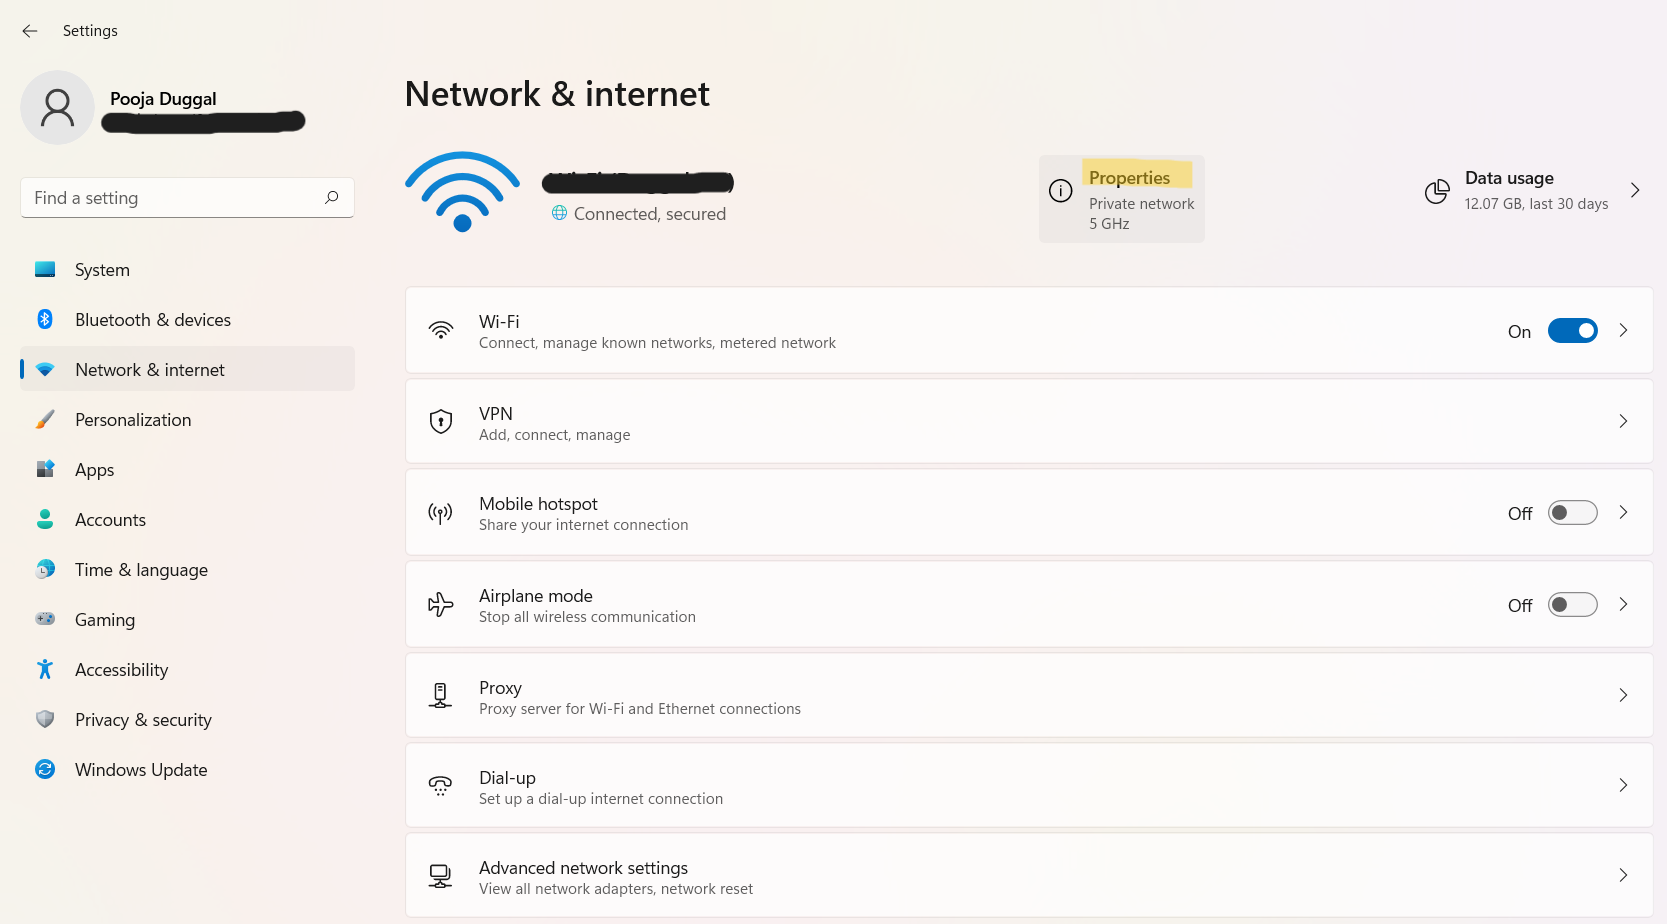
1. Firstly, open Settings by pressing the Windows + I hotkey. After that, go to Network & internet and then, select the Properties tab.
2. In the next window, look at the Link speed for your connected network adapter.
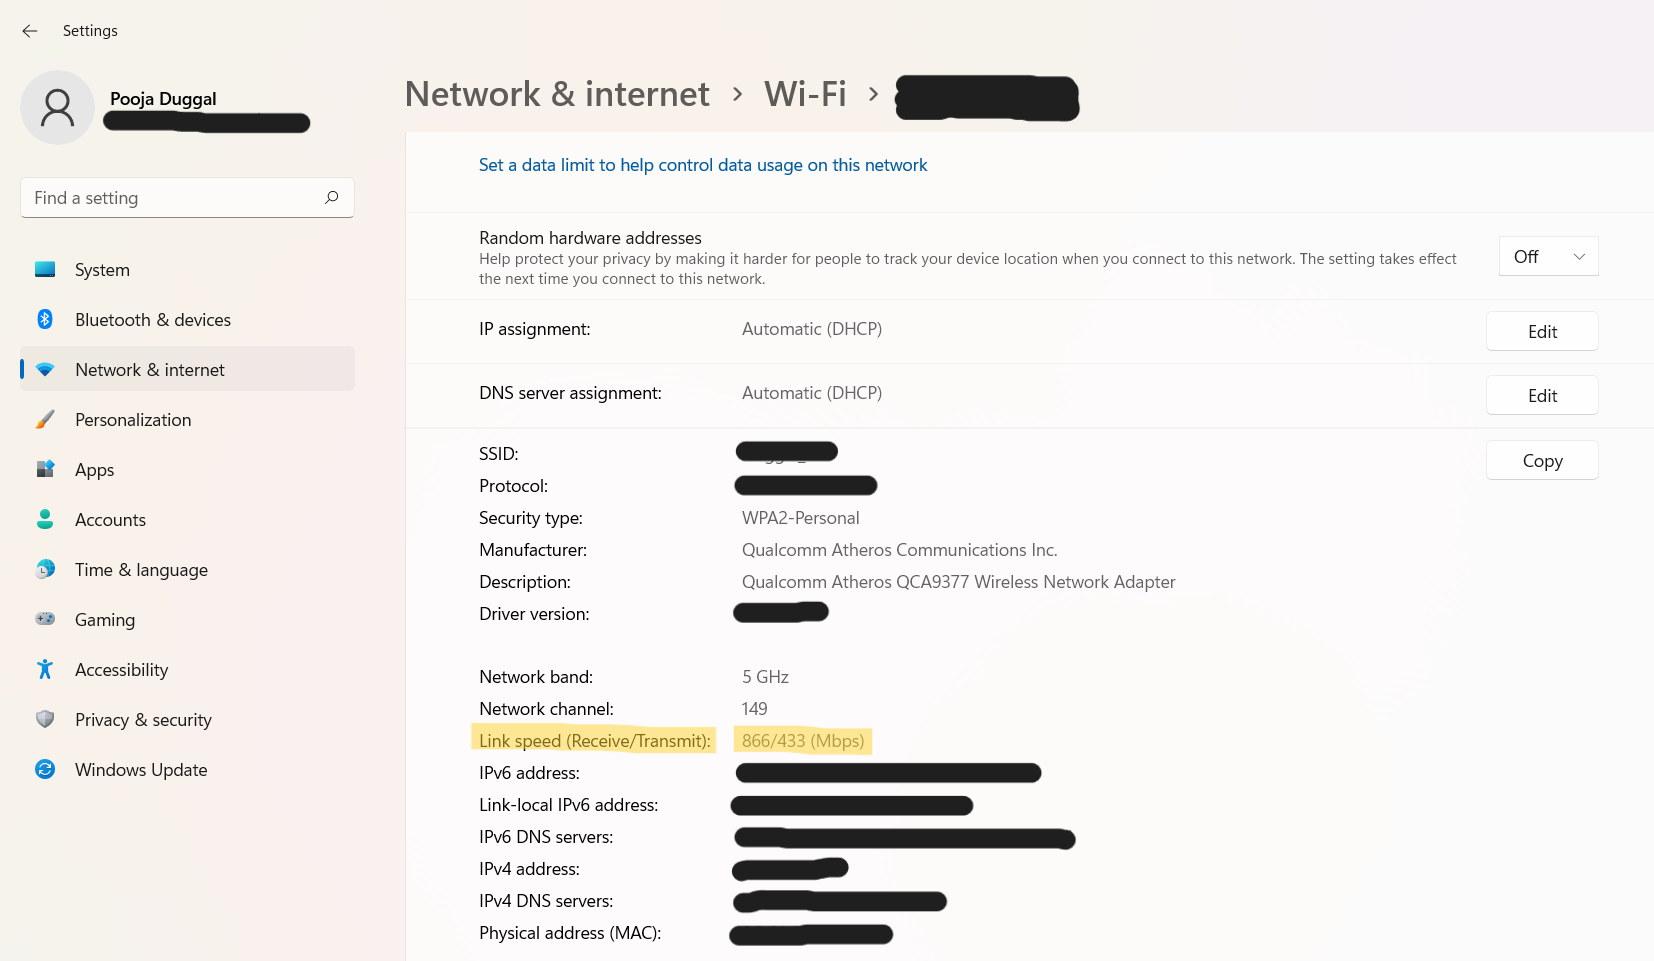
So, this is how to examine your network speed through Settings easily.
Method 2: Examine Network Connection Speed Using PowerShell
Through Windows PowerShell, you can check your network speed in the following way.
1. In the first place, open Windows PowerShell through the Start tab.
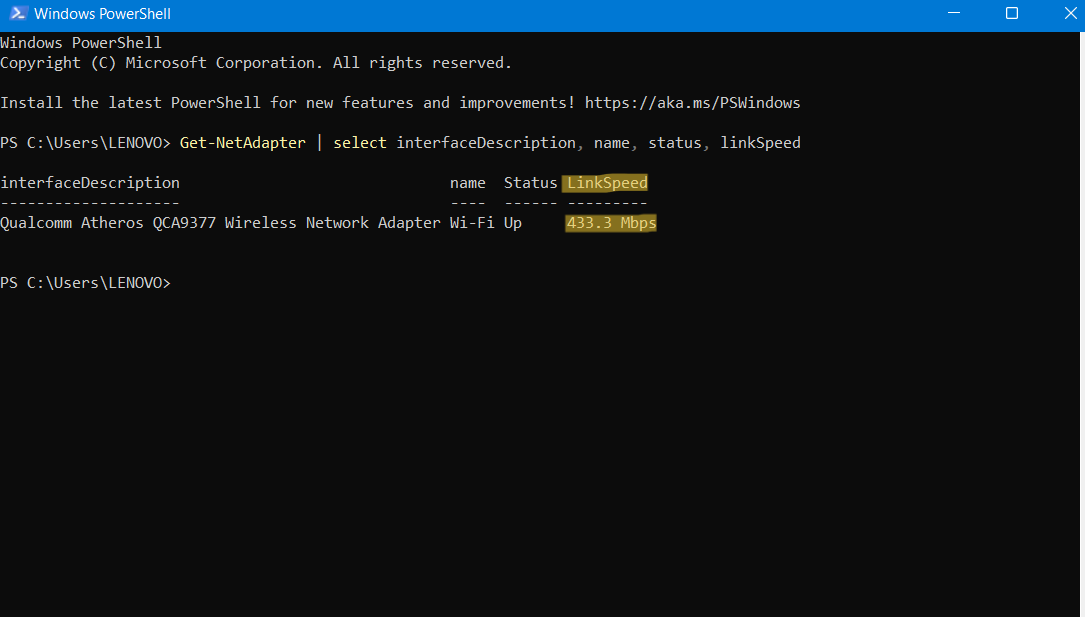
2. Now, copy and paste the following command into PowerShell:
Get-NetAdapter | select interfaceDescription, name, status, linkSpeed
3. Once done, hit Enter and check the LinkSpeed column for all the connected network adapters.
Method 3: View Network Connection Speed Using Control Panel
To see the network link speed through Control Panel, go through the following instructions.
1. Initially, open Control Panel and then, go to the Network & Internet tab.
2. After that, select the Network and Sharing Center tab.
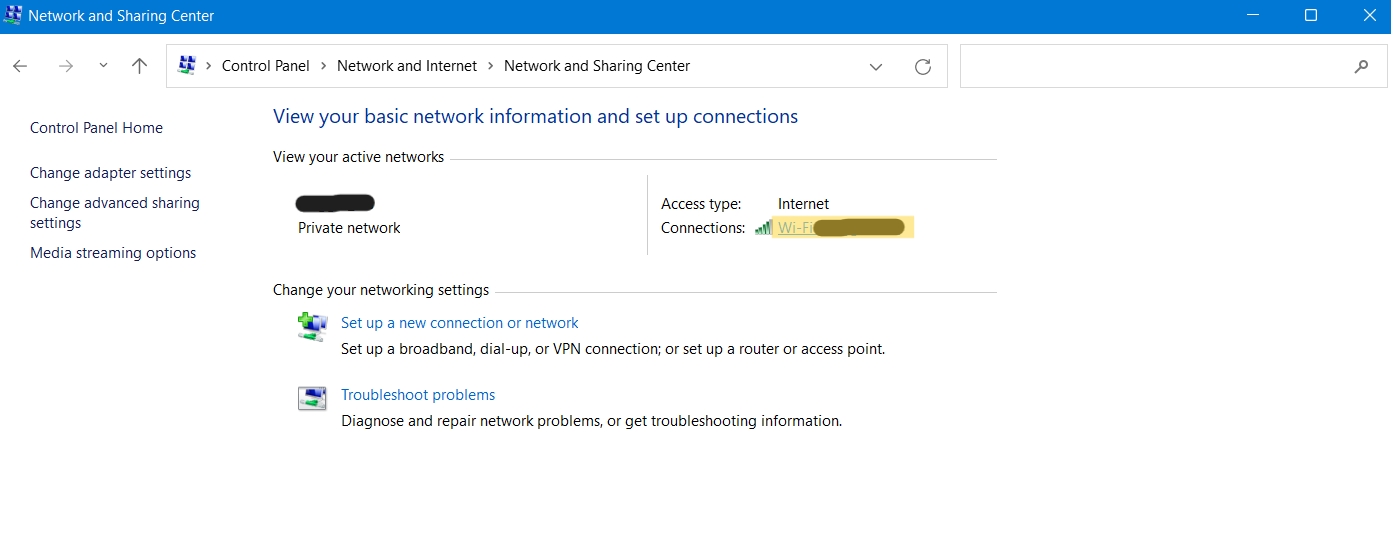
3. Next, click on the network connection present next to Connections for checking its speed.
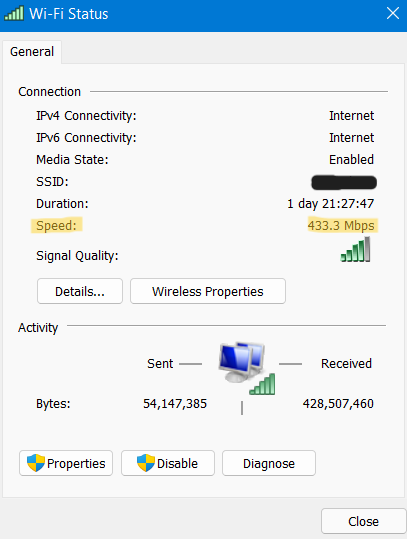
So, these are a few ways to check out the link speed of your network connection in Windows 11. All of these methods are effective for checking the link speed. You can try any of them now.
Read next: Manually Assign a Static IP Address in Windows 11.




![The mapped network drive could not be created [Detailed fix]](https://www.kapilarya.com/assets/Network-Drive-768x511.jpg)