
Basically, Static Internet Protocol (IP) Address does not modify its address at random. It is provided by your network company. This comes handy for users who have web hosting servers. This is because it helps their clients to find them easily. Do you have a static IP address? If so, find here how to manually assign a Static IP address in Windows 11.
Page Contents
Manually Assign a Static IP Address in Windows 11
Method 1: Manually Assign a Static IP in Windows 11 Through Settings
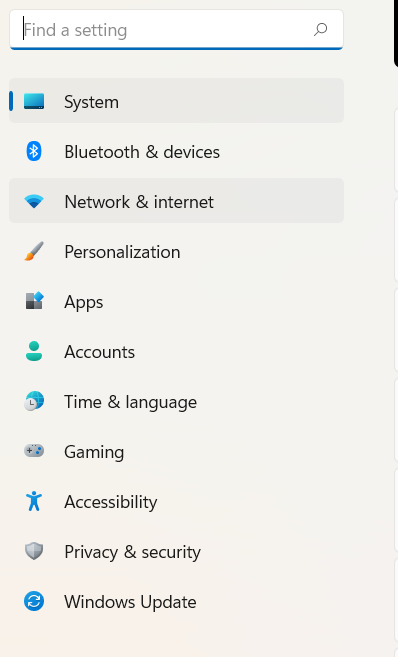
1. Open Settings by pressing Windows + I tabs simultaneously.
2. Next, tap on Network & internet and then, select the Wi-Fi option. In case, you are using Ethernet, then choose the Ethernet option instead of Wi-Fi.
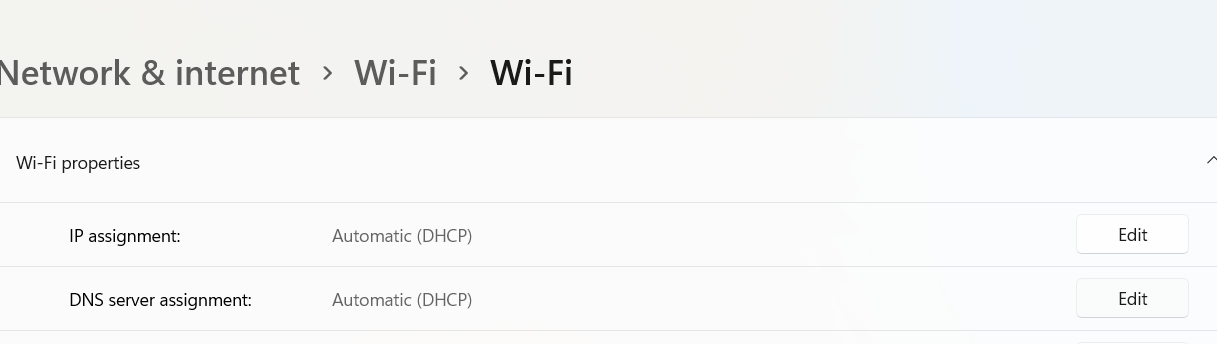
3. Once selected, tap on your current Wi-Fi Properties. After that, tap on the Edit tab present next to IP assignment.
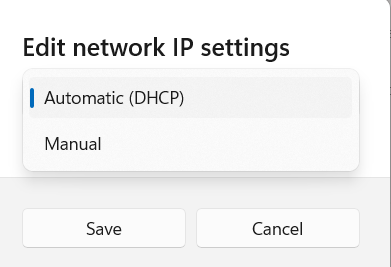
4. Choose the Manual option from the dropdown menu. Now, you will come across two options named IPv6 and IPv4.
5. Turn the toggle On present next to IPv4.
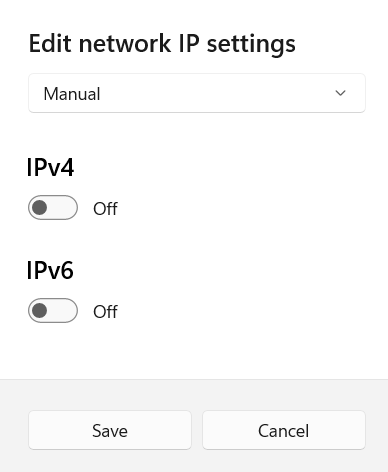
6. Now, enter the values for IP address, Subnet mask and Gateway values given by your network service provider.
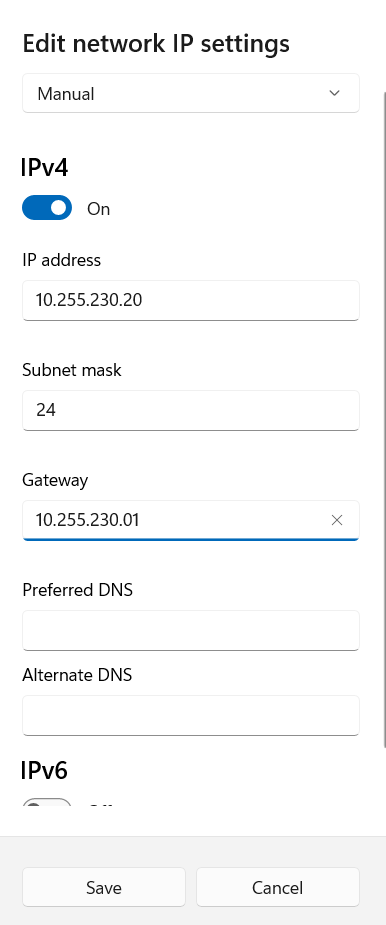
7. Tap on Save for applying changes. Lastly, exit the Settings tab.
Method 2: Manually Assign a Static IP Address in Windows 11 Through PowerShell
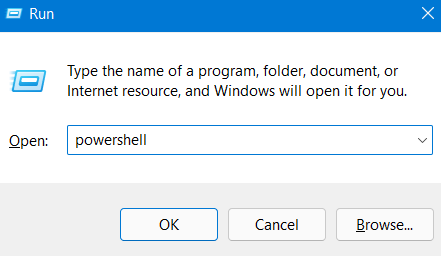
1. Open the Run dialog box by pressing Windows + R tabs simultaneously.
2. Now, type in powershell and hit Ctrl+Shift+Enter tabs together for opening PowerShell as admin. If a prompt shows up, tap on Yes.
3. Next, copy-paste the following command and press Enter.
Get-NetIPConfiguration
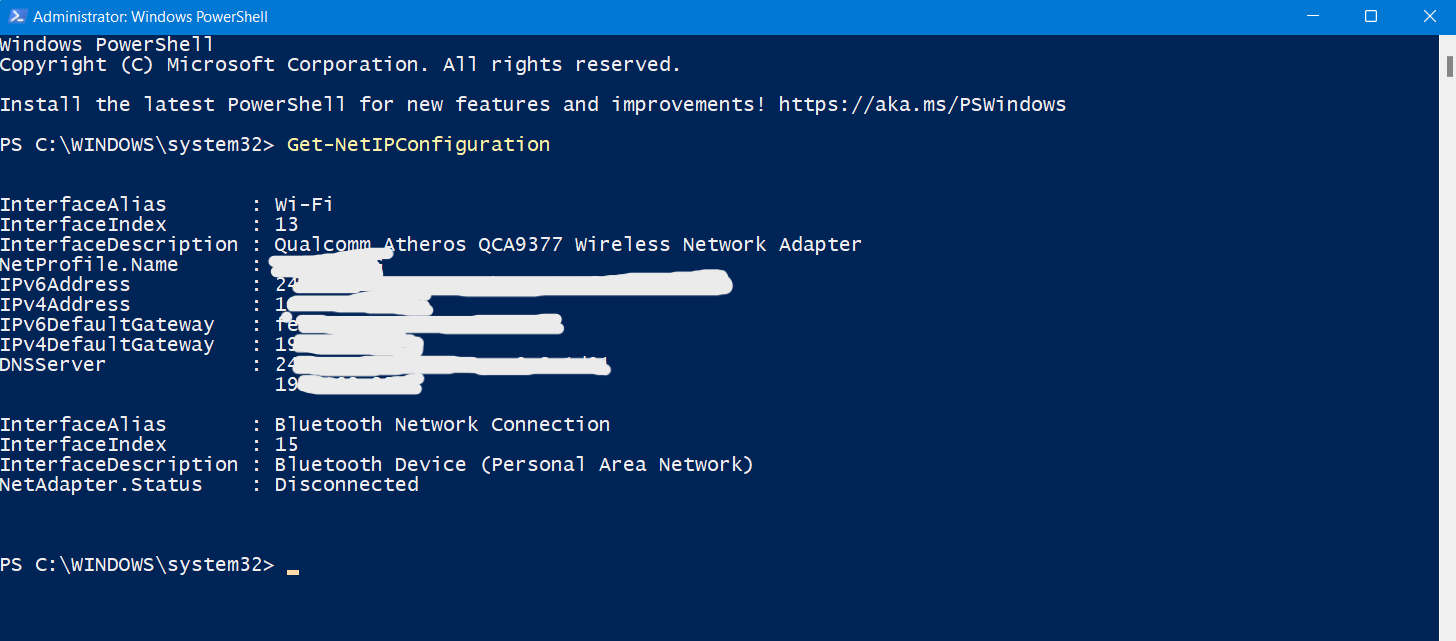
4. Once done, execute the following command by replacing the values provided by your network service provider.
New-NetIPAddress -InterfaceIndex 5 -IPAddress 10.1.2.220 -PrefixLength 24 -DefaultGateway 10.1.2.1
Note: Change the values, 5, 10.1.2.220 and 10.1.2.1 with your Interface Index, IP Address and Default Gateway address respectively.
5. After that, copy-paste the following command and press Enter. Before you do so, remember to change the values for InterfaceIndex and DNS server address.
Set-DnsClientServerAddress -InterfaceIndex 5 -ServerAddresses 10.1.2.1
6. Once done, execute the following command after changing the values of InterfaceIndex and alternate DNS server address.
Set-DnsClientServerAddress -InterfaceIndex 5 -ServerAddresses 10.1.2.1, 8.8.8.8
7. Finally, exit PowerShell.
Method 3: Manually Assign a Static IP Address in Windows 11 Through Command Prompt
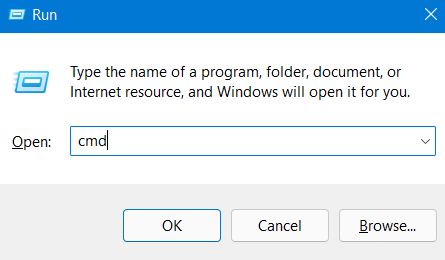
1. Open Run by pressing Windows + R tabs simultaneously.
2. Now, type in cmd and press Ctrl+Shift+Enter tabs simultaneously for opening Command Prompt as admin. Tap on Yes if a prompt shows up.
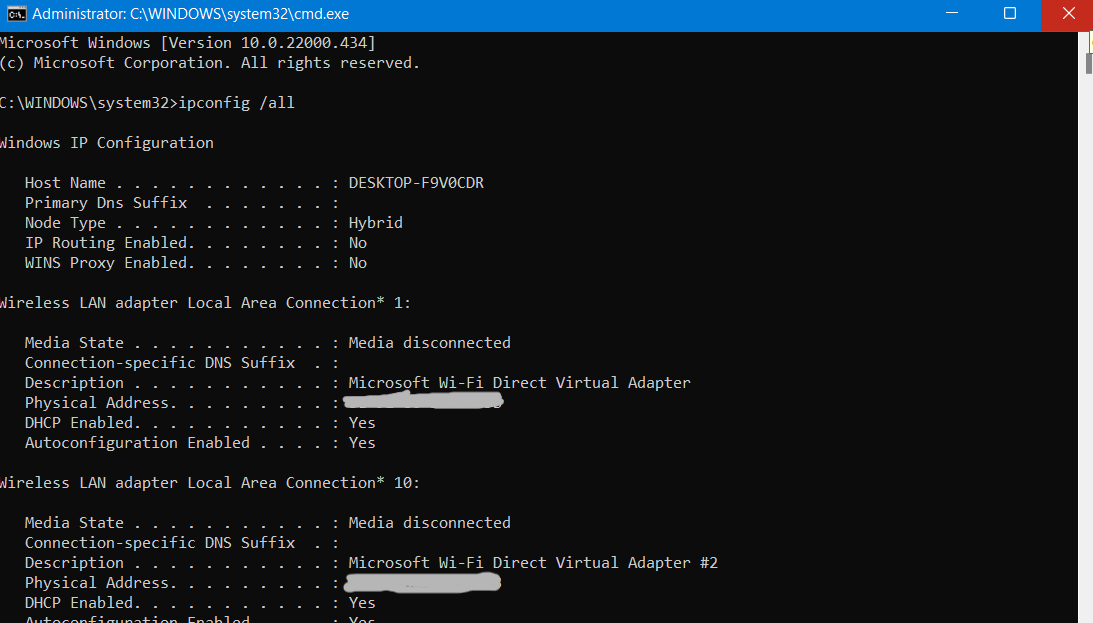
3. After that, copy-paste the below-given command and press Enter. This will show all your IP configurations.
ipconfig /all
4. Now, copy-paste the following command after modifying the values and press Enter.
netsh interface ip set address name="Wi-Fi" static 10.1.2.220 255.255.255.0 10.1.2.1
Note: Change Wi-Fi with your network adapter’s name and 10.1.2.220, 255.255.255.0 and 10.1.2.1 with your static IP address, subnet mask and gateway address respectively.
5. Once done, run the following command after replacing the Wi-Fi name and DNS server address.
netsh interface ip set dns name="Wi-Fi" static 10.1.2.1
6. For adding your alternate DNS server address, copy-paste the following command and press Enter.
netsh interface ip add dns name="Wi-Fi" 8.8.8.8 index=2
Here, replace Wi-Fi with your network adapter name and 8.8.8.8 with your alternate DNS server address.
7. Once executed, exit Command Prompt.
So, these are some different methods to manually set a static IP address on your Windows system.
Related: How to change DNS settings in Windows 11.


![The mapped network drive could not be created [Detailed fix]](https://www.kapilarya.com/assets/Network-Drive-768x511.jpg)

![Stop sharing a folder in Windows 11 [Guide]](https://www.kapilarya.com/assets/Network-768x522.png)