Earlier, we shared this guide to create a domain on Windows Server. Now in this article, we are addressing the reverse. If you ever need to remove the domain you created on your Windows Server, this article is for you. In this article, we’ll see the detailed process to demote a domain controller in Windows Server. There could be many reasons why you want to do that. In that case, the only thing matters is how you can do that. So here is the complete guide for demoting the domain controller.
Before you demote a domain controller:
- Make sure you transfer all Flexible Single Master Operation (FSMO) roles in AD to other servers.
- Ensure that other global catalog servers exist in the forest to handle the load, if the server you’re demoting is a global catalog.
You can demote a domain controller either using Server Manager and using PowerShell. In this guide, we’ll use Server Manager for this purpose.
How to demote a domain controller in Windows Server
Here’s the step-by-step process to demote a domain controller in Windows Server. These steps are illustrated on Windows Server 2019.
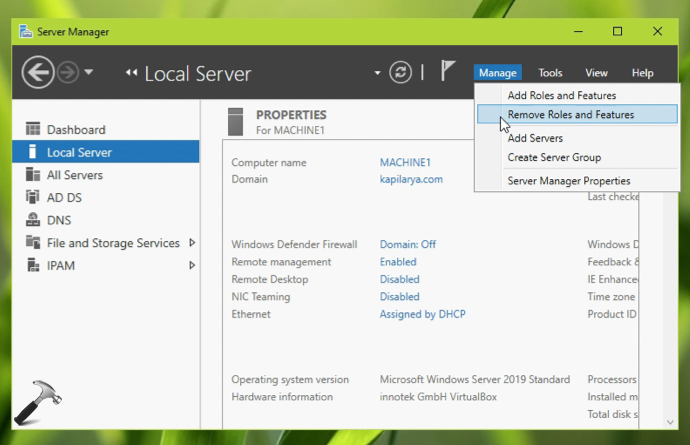
1. Open Server Manager. Click on Manage > Remove Roles and Features.
2. In Remove Roles and Features window, under Server Selection, select the server you want to demote and hit Next.

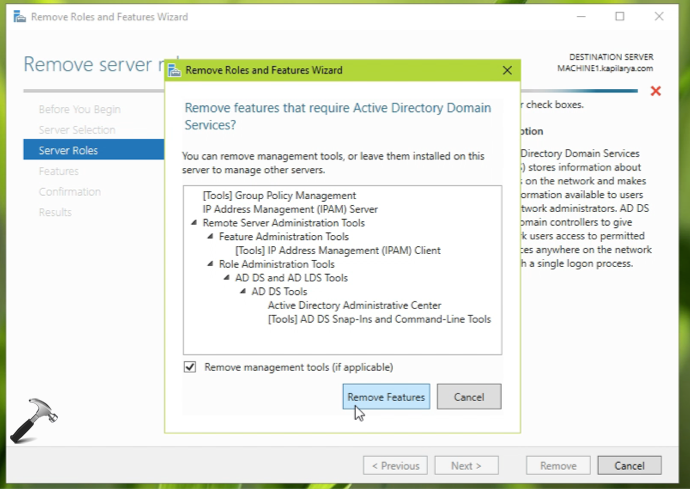
3. Moving on, under Server Roles, uncheck Active Directory Domain Services.

4. Once you uncheck that option, you will receive a pop-up window to confirm removal of the related features. Click on Remove features here and then click Next.
5. Next you will receive Validation results. Here, you will be advised that Active Directory domain controller needs to be demoted before the AD DS role can be removed. So click on the Demote this domain controller link there.

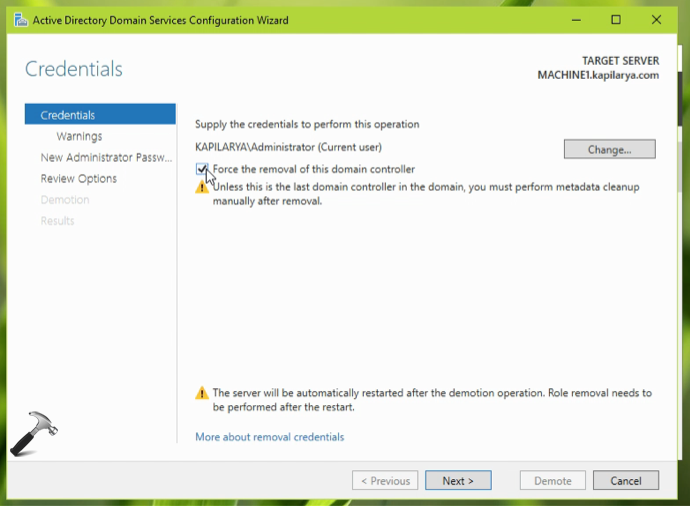
6. Moving on, in the Active Directory Domain Services Configuration Wizard, check Force the removal of this domain controller and hit Next.
7. Then under Warnings, check Proceed with removal and click Next.

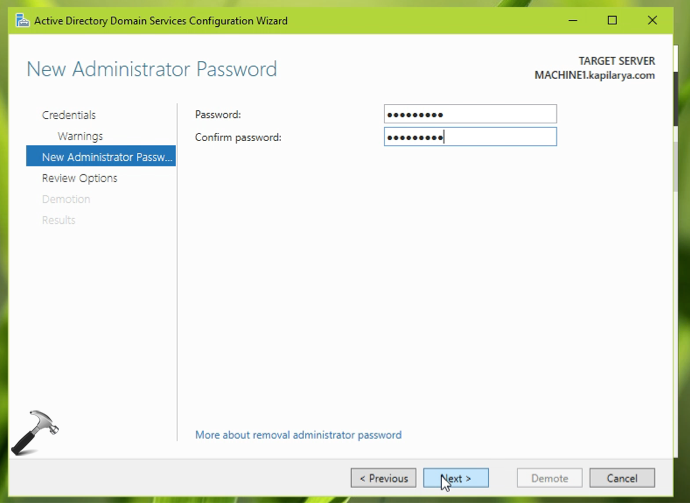
8. Now you should be asked to create a new administrator password. Create a strong password, like you’ve previously created for your current administrator account. Hit Next then.
9. Then under Review Options, click Demote. This will finally initiate the process to demote the domain controller.

10. After few moments, you will receive ‘Successfully demoted the Active Directory domain controller’ notification which confirms that the demotion process was successful. You may need to remove additional features, if mentioned as a warning in this window, for example in below screenshot, DNS Server service.

11. Your Windows Server will now restart automatically to make above changes effective. After reboot, you can login with the new administrator password we created in step 8.
See the complete process in this video:
That’s it!