
Whenever Windows resumes from sleep or hibernate mode or when you logon, lock screen is something that you see at these stages. Windows 10 have enhanced lock screen as compared to predecessors and it displays more information. It supports to slideshow feature that displays your desired images with cool animations. Also you’ll find the lock screen in Windows 10 supports Windows Spotlight feature.
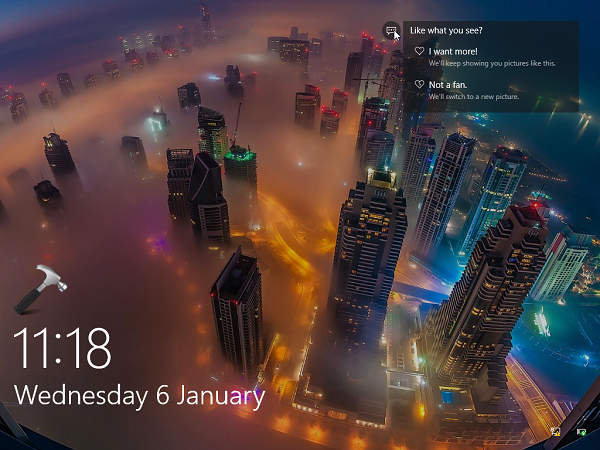
Inspite of these facilities with lock screen, there are still some users who may want to disable lock screen. According to them, lock screen slide show feature is power consuming feature. They may also find Windows Spotlight feature data consuming. So for miscellaneous reasons, if you too want to disable lock screen on your Windows 10, you can perform the quick registry manipulation described below.
How To Disable The Lock Screen In Windows 10
Registry Disclaimer: The further steps will involve registry manipulation. Making mistakes while manipulating registry could affect your system adversely. So be careful while editing registry entries and create a System Restore point first.
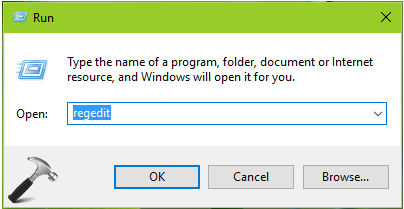
1. Press  + R and put regedit in Run dialog box to open Registry Editor (if you’re not familiar with Registry Editor, then click here). Click OK.
2. In the left pane of Registry Editor, navigate to following registry key:
HKEY_LOCAL_MACHINE\SOFTWARE\Microsoft\Windows
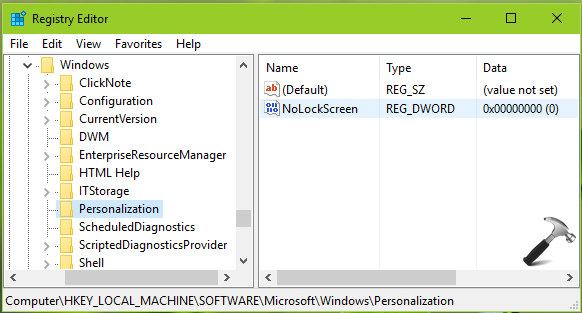
3. Now highlight Windows key and right click, select New > Key. Name the newly created sub-key as Personalization. Highlight Personalization and come to its right pane. In the blank space, right click and select New > DWORD Value. Name the registry DWORD (REG_DWORD) so created as NoLockScreen. Double click on this DWORD to modify:
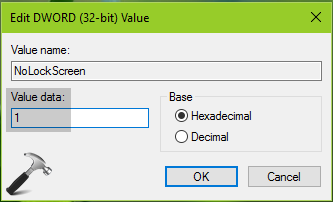
4. Finally, set the Value data to 1 in Edit DWORD Value box shown above. Click OK. You can now restart your machine to make this setting effective. After reboot, you’ll see the lock screen is no longer displayed.
That’s it!


I have no “personalisation” under HKEY_LOCAL_MACHINE\SOFTWARE\Microsoft\Windows
What can I do to bypass this issue ?
I am running Windows 10 – 64 on an Asus X75VC laptop and am trying to bypass the lockscreen !!
^^ Please follow complete instructions mentioned in step 3.