
If you are on the latest preview build, you might be interested to check the live captions feature added to Windows 11 operating system. In this guide, we’ll see how to enable live captions in Windows 11. This feature is available in Windows 11 build 22557 or later.
According to Microsoft, live captions will help everyone, including people who are deaf or hard of hearing, better understand audio by viewing captions of spoken content. With this feature, captions are automatically generated on-device from any content with audio. The captions can be displayed at the top (default) or bottom of the screen, or in a floating window. The caption window can be resized, and caption appearance can be personalized by applying or customizing a caption style. Microphone audio can be included, which can be helpful during in-person conversations.
Here’s how to enable live captions in your Windows 11.
Page Contents
How to enable live captions in Windows 11
Method 1 – Using Settings app
Follow these steps to enable live captions:
1. Press  + I keys to open Settings app.
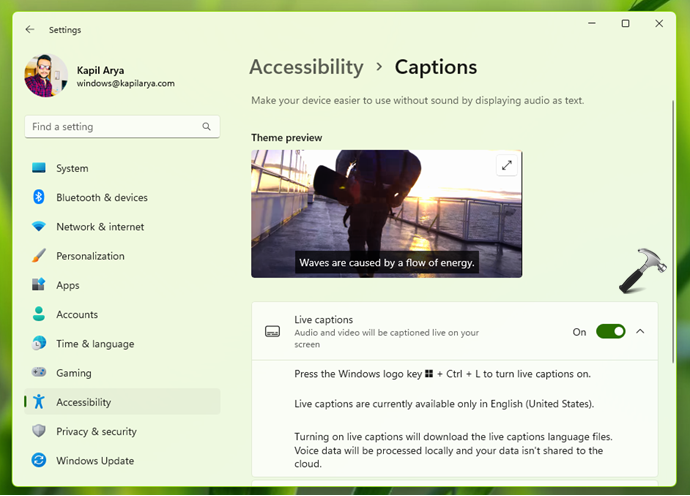
2. In Settings app, go to Accessibility > Captions.
3. Under Captions, you’ll find Live captions option and once you set it to On, you’ll see live captions at the top of your screen.
4. At the very first time, when you enable this option, you will require your consent to enable live captions. Click on I agree to continue.
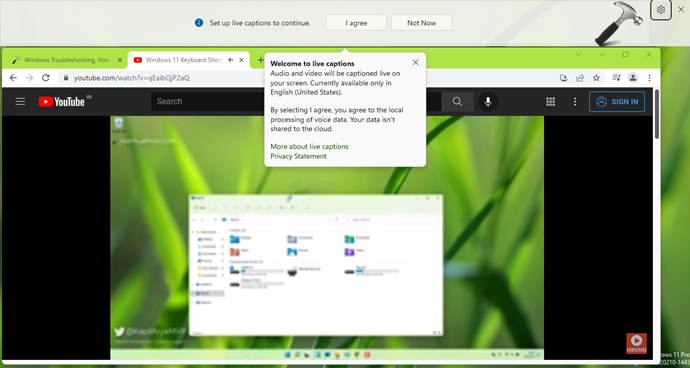
5. Now when you play a video in your web browser, you will find that live captions are auto-generated as shown in the below screenshot.

Kindly note that this feature is being tested as of this writing and it may have many improvements later in upcoming builds.
Method 2 – Using registry
 Registry Disclaimer: It is recommended to create a System Restore point first, if you’re not familiar with registry editing.
1. Run regedit command to open Registry Editor.
2. In left pane of Registry Editor window, navigate to:
HKEY_LOCAL_MACHINE\SOFTWARE\Microsoft\Windows NT\CurrentVersion\Accessibility\Session1

3. In the right pane of Session1 registry key, make sure you’ve SecureConfiguration named registry string (REG_SZ) with empty Value data exists.
4. Once done, close Registry Editor and reboot your system to make changes effective.
That’s it!
Read next: How to enable Voice access in Windows 11.


