
We all know .NET Framework is a Microsoft technology that developers can use to provide environment for their apps. Till now there are many different versions of .NET Framework available. Some developers may develop their apps in according to a specific .NET Framework version. If you come across any app that requires .NET Framework 3.5 specifically, then this article is for you. In this post, you’ll read how to enable .NET Framework 3.5 in Windows 11.
There are two most common methods that users can use to enable .NET Framework 3.5. In the first method, you can enable this feature using Turn Windows features on or off. While in the second method, you can enable this feature using some commands at Windows Terminal. The first method works with the help of Internet while the latter one can be used offline.
Page Contents
How to enable .NET Framework 3.5 in Windows 11
Method 1: Using Turn Windows features on or off
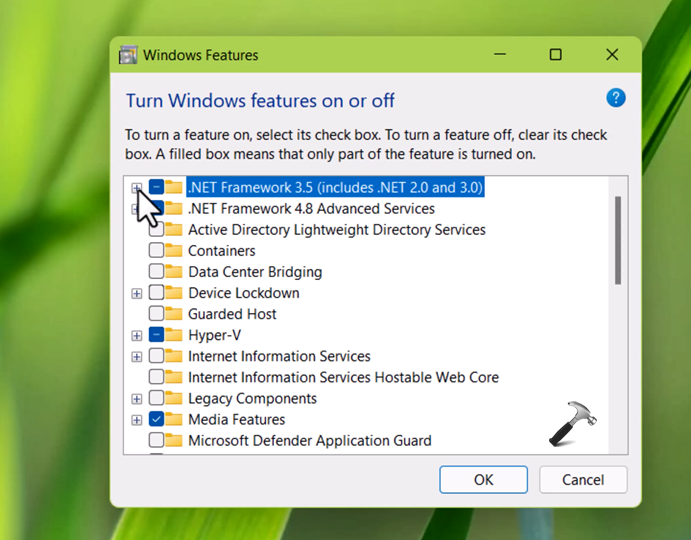
1. Search for Turn Windows features on or off and open it.

2. Check .NET Framework 3.5 (includes .NET 2.0 and 3.0). Click OK.
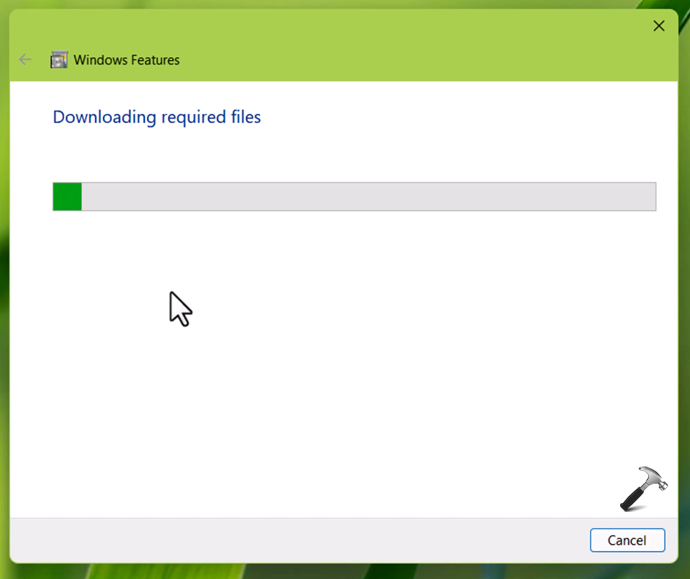
3. In next window, select the option Let Windows Update download the files for you.

4. Let the files be downloaded and stay connected to Internet during this time. Once done, you can close the window, and reboot the system.
After reboot, you will find that .NET Framework 3.5 is now enabled on the system.
Method 2: Using Windows Terminal
1. Download Windows 11 ISO and then locate it in File Explorer. Right click on it and select Mount.

2. When it is mounted, you’ll be taken to a DVD drive. Open sources folder and then locate sxs folder inside it. Copy the sxs folder.
3. Go to C: drive and create a new folder named Temp. Paste sxs folder from previous step inside Temp folder.

4. Press  + X keys and select Windows Terminal (Admin).
5. Under Windows Terminal, administrative Windows PowerShell opens by default.
6. Paste this command and press Enter:
dism.exe /online /enable-feature /featurename:NetFX3 /All /Source:c:\temp\sxs /LimitAccess
In above command, replace c:\temp\sxs with the actual location of sxs folder on your system, in case if you moved it at different location.
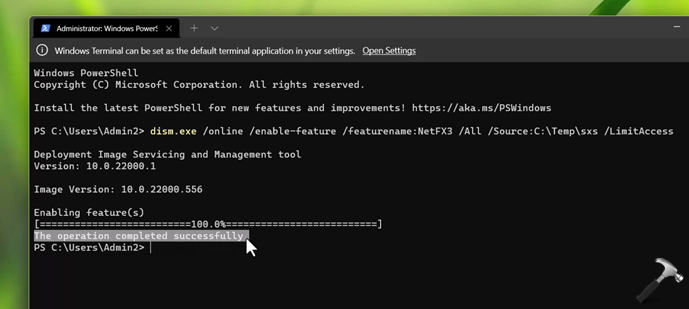
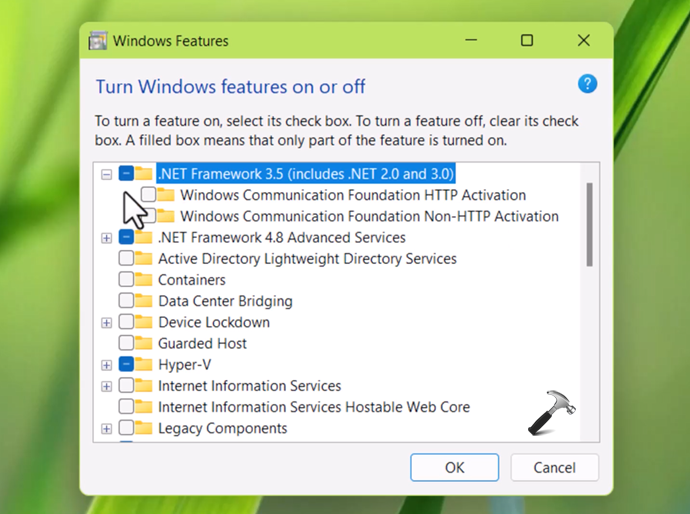
7. Once the command has been executed successfully then .NET Framework 3.5 will be enabled on your system and you can confirm same from Turn Windows features on or off window.
Video guide
You can also check out following video to illustrate above steps:
That’s it!


I have been through every process I can find to enable net.framework 3.5 . None of them work, in desperation, including Method 2 above.
I have a new computer with Windows 11 installed and have 2 apps which require net.framework 3.5 to run.
I am at my wits end and clearly need some help please.
The DSIM log file ends with the comment, as with all my other attempts, with the error code 800F0922
I can provide the log file if needed but there does not seem any way to attach it.
Thanks. . .
Hi Do you have one that works with SCCM TASK SEQUENCE windows 10 works Windows 11 doesn’t. Thsnks
Hi, I have the same issue in enabling .NET 3.5 I have tried everything including your option (2) with no luck. When I try enabling the feature, I get an error 0x800F0831. any help would be much appreciated.
The error code that I (eventually) got from “Turn Windows features on or off” was 0x80d02002. None of the above steps fixed the problem for me. What finally did fix the problem was running the Windows Update Troubleshooter (Windows 11). After that I ran dism.exe again, as suggested above, although with the image from a separate installer USB as opposed to the local c drive, and it worked.
1. Sign into the system
2. Mount your iso
3. Make note of the Drive letter assignment for the .iso disk (example uses E:)
4. Right click on Start and launch Windows Powershell (Admin)
5. Type the following command: Get-WindowsCapability -online and press enter
6. Browse up to the line that is in reference to NetFX3 and copy the name NetFX3~~~~
7. Then type the following command and press enter to get .NET 3.5 installed. The drive letter is the drive letter that was assigned to the .iso disk.
DISM /Online /Add-Capability /CapabilityName:NetFX3~~~~ /Source:E:\ /LimitAccess
8. Once you get a command completed successfully message, it would be good to verify that .NET shows as installed now
9. Hit your up arrow at the prompt and go to Get-WindowsCapability -online and press enter
10. Scroll up and verify NetFX3~~~~ is showing as Installed now
11. You can close Powershell once you’re done
12. Go into Windows Explorer, right click on the mounted .iso disk and select Eject
13. You’re all done
I get to “Enabling Features” but it never loads. I don’t even have a percentage
You are a life saver. Method 2 worked flawlessly!
^^ Glad it helped 😎
To avoid Error 0x800f0818 or 0x800f081f, use an ISO which Version is equal to the Windows Version (e.g. 22H2).
^^ Thanks for sharing this!