Windows devices can be used by variety of users. Some users may be using windows just for their day-to-day work. While there are some users, also called as power users who owns the ability to fix their Windows if something went wrong. But the non-technical users, may not fix their system if there is an issue. In that case, they can take help of some other Windows expert or any technical user. In order to take this help, one need to enable remote assistance in Windows 11. This article will show you how to do this.
Here’s the screenshot of the window, which allows you to get help from someone when remote assistance is enabled.
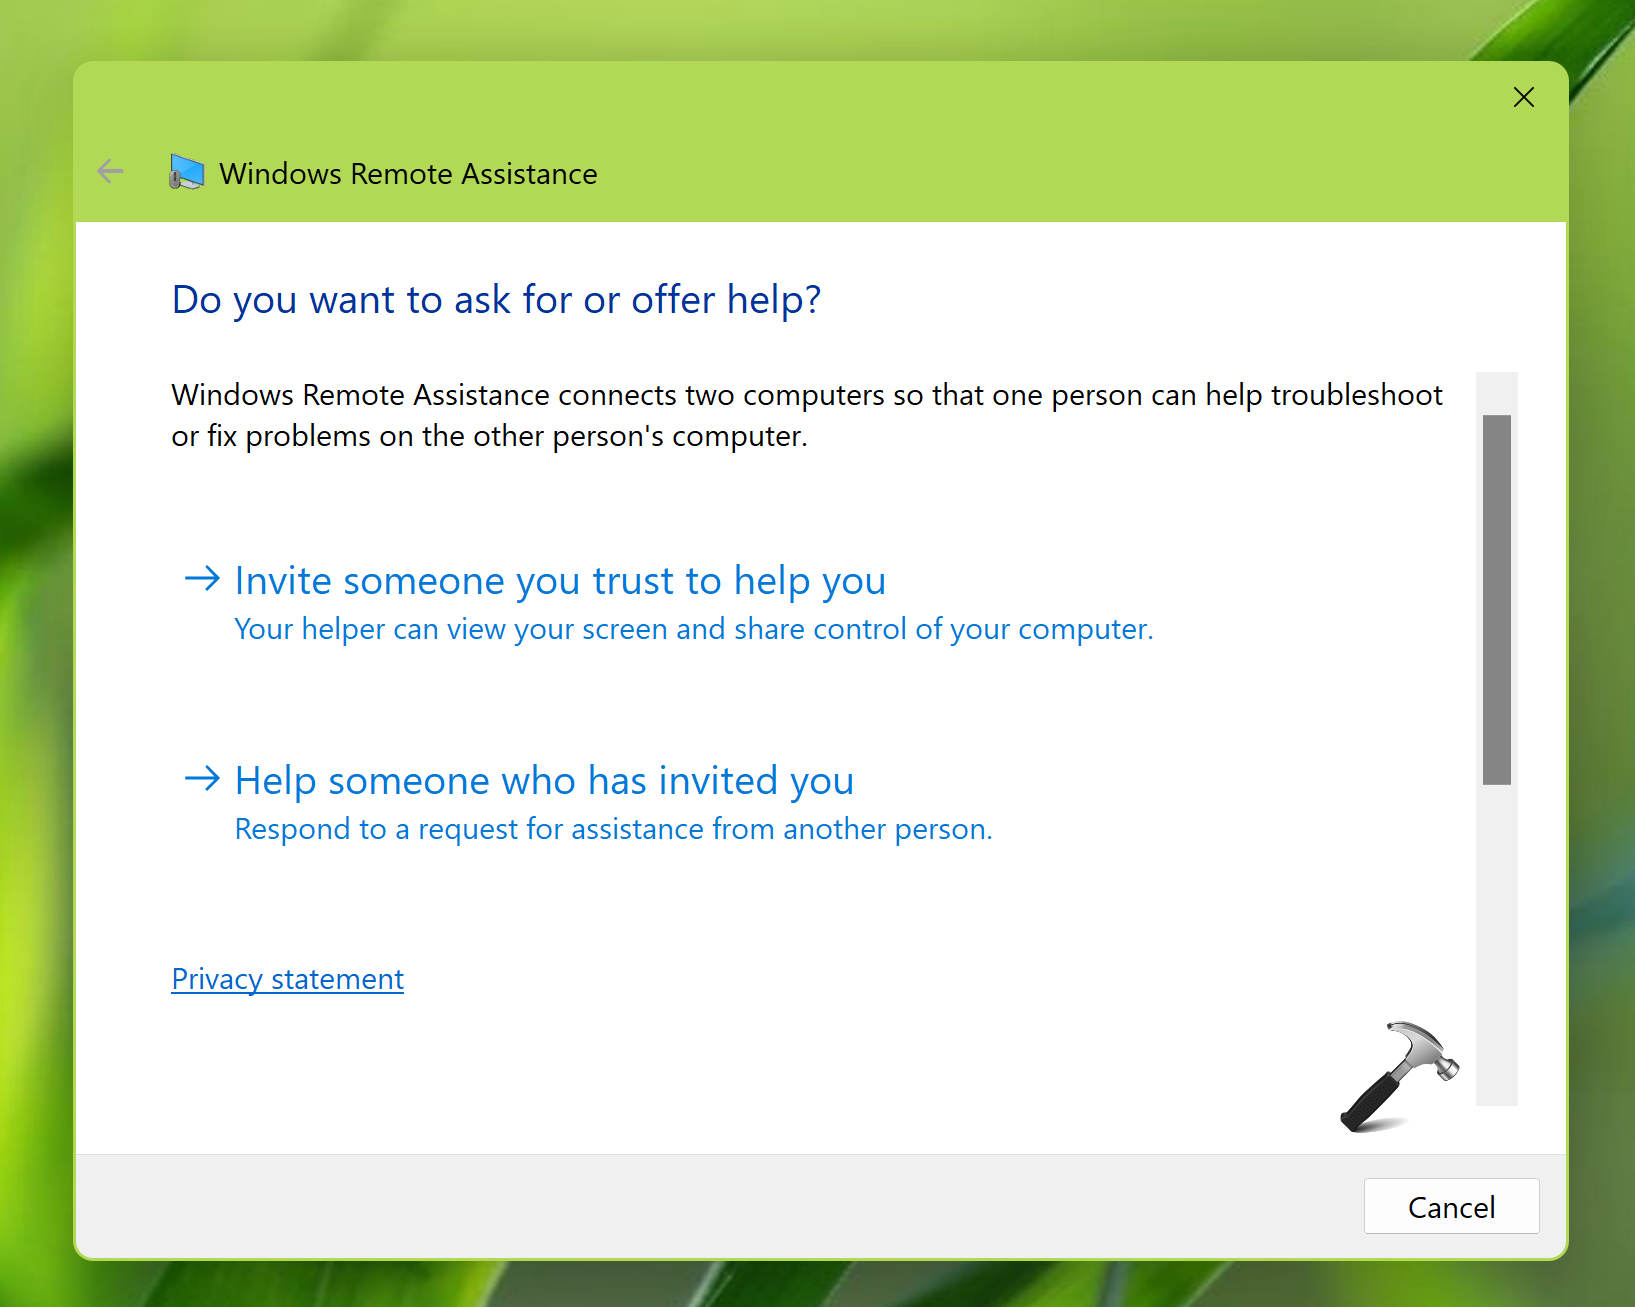
See, there are different methods you can use to enable remote assistance in Windows 11. All of these methods are mentioned below and you can try them as per your convenience.
Page Contents
How to enable Remote Assistance in Windows 11
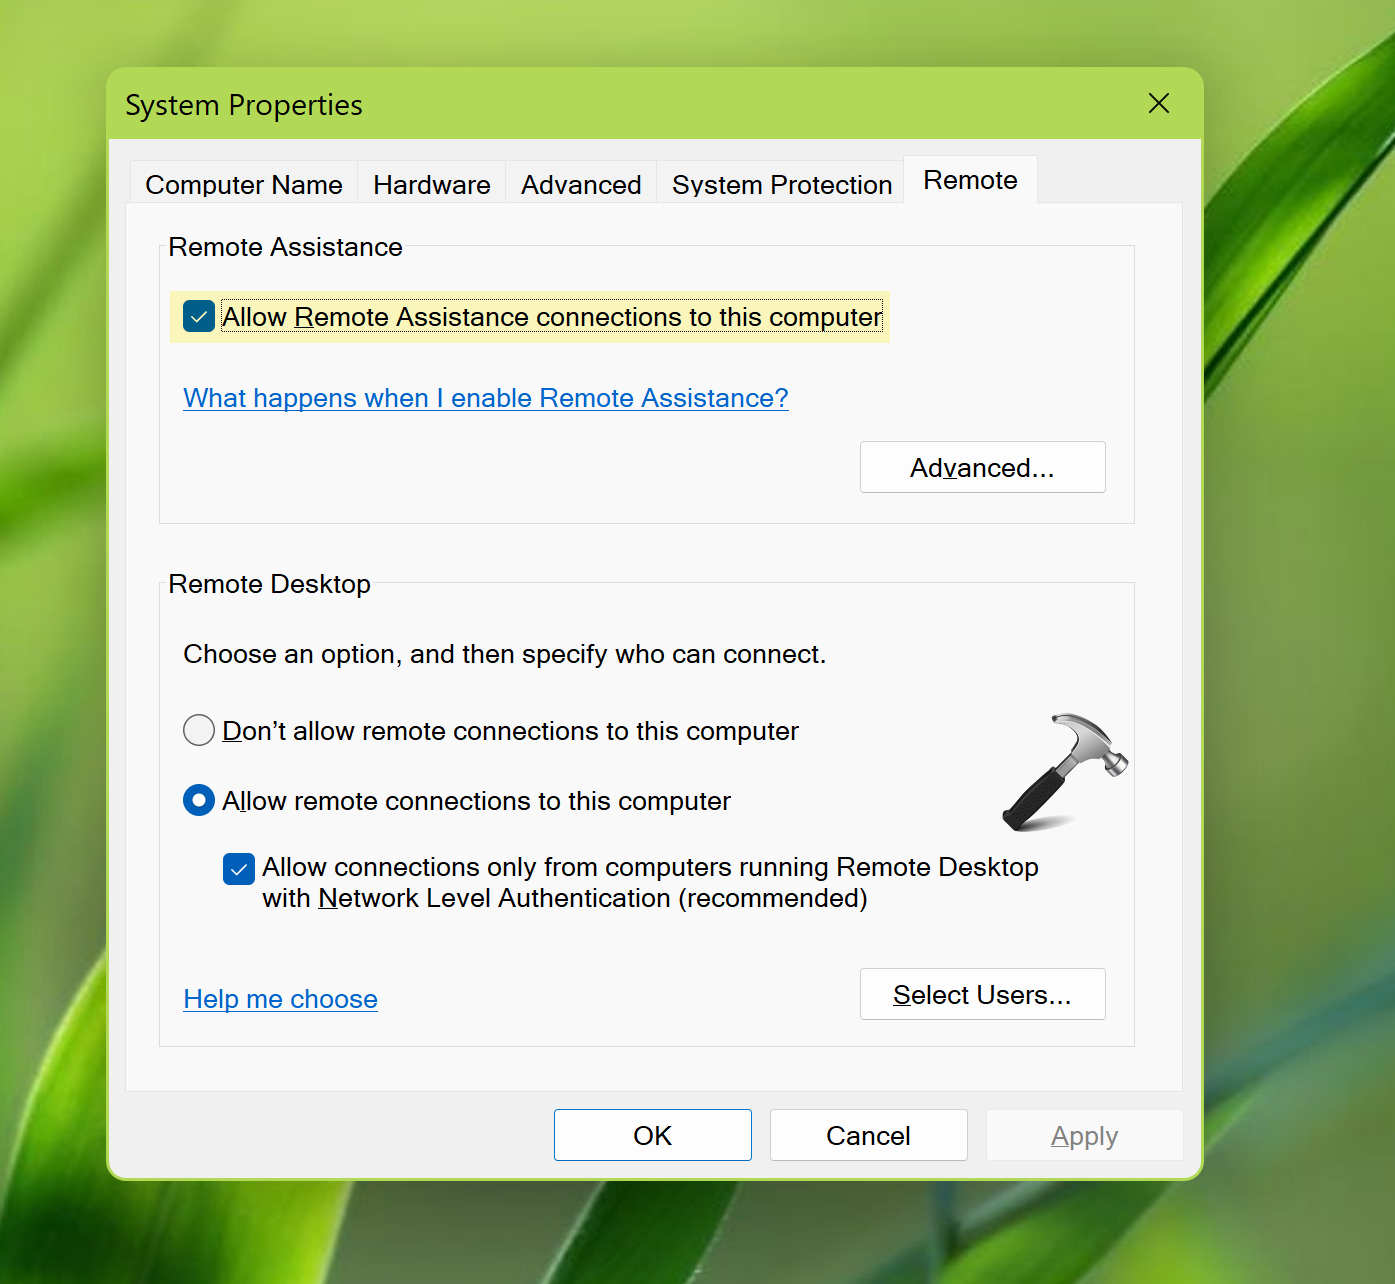
Method 1: Using System Properties
- Press Windows + R keys and select Run.
- In Run, type
SystemPropertiesRemote.exeand click OK. - In System Properties window, check the Allow remote assistance connections to this computer option.
- Click Apply followed by OK to save your changes.
Method 2: Using Registry
- Open Run and execute
regeditcommand to open Registry Editor. - Go to
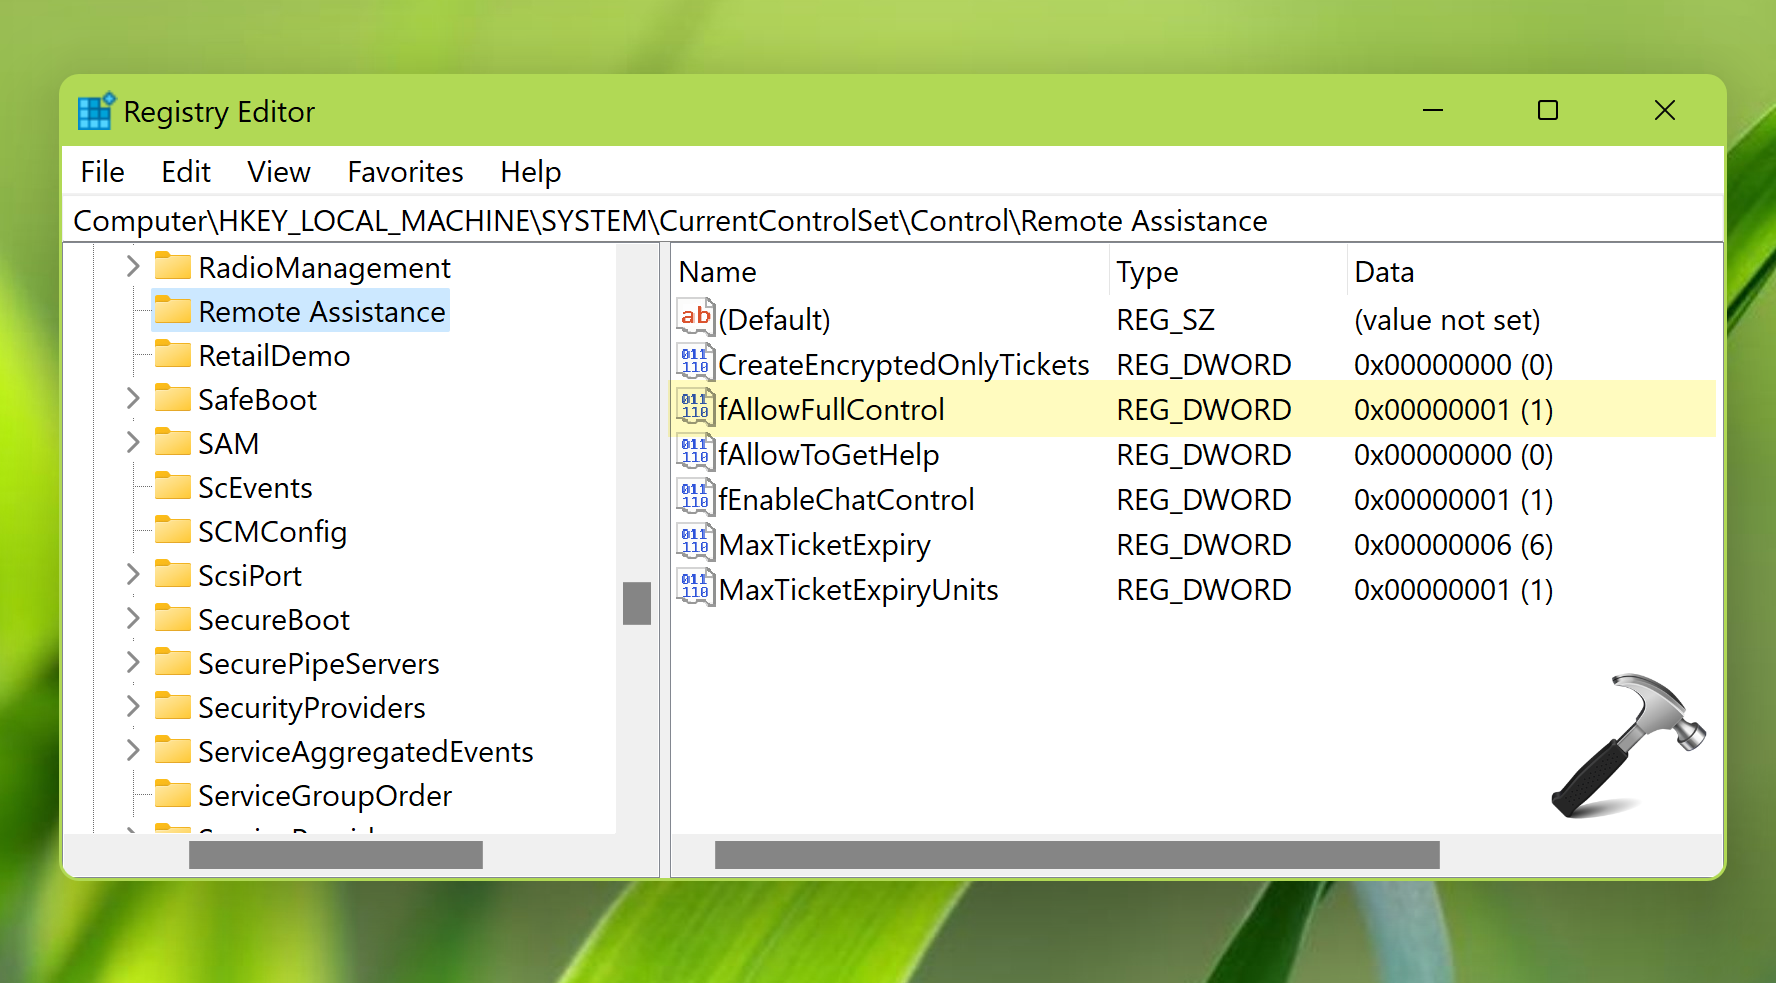
HKEY_LOCAL_MACHINE\SYSTEM\CurrentControlSet\Control\Remote Assistance. - Under Remote Assistance registry key, you’ll find
fAllowFullControlregistry DWORD (REG_DWORD). Set this DWORD to 1 value data to allow remote assistance.
Method 3: Using Group Policy
- Open Local Group Policy Editor using
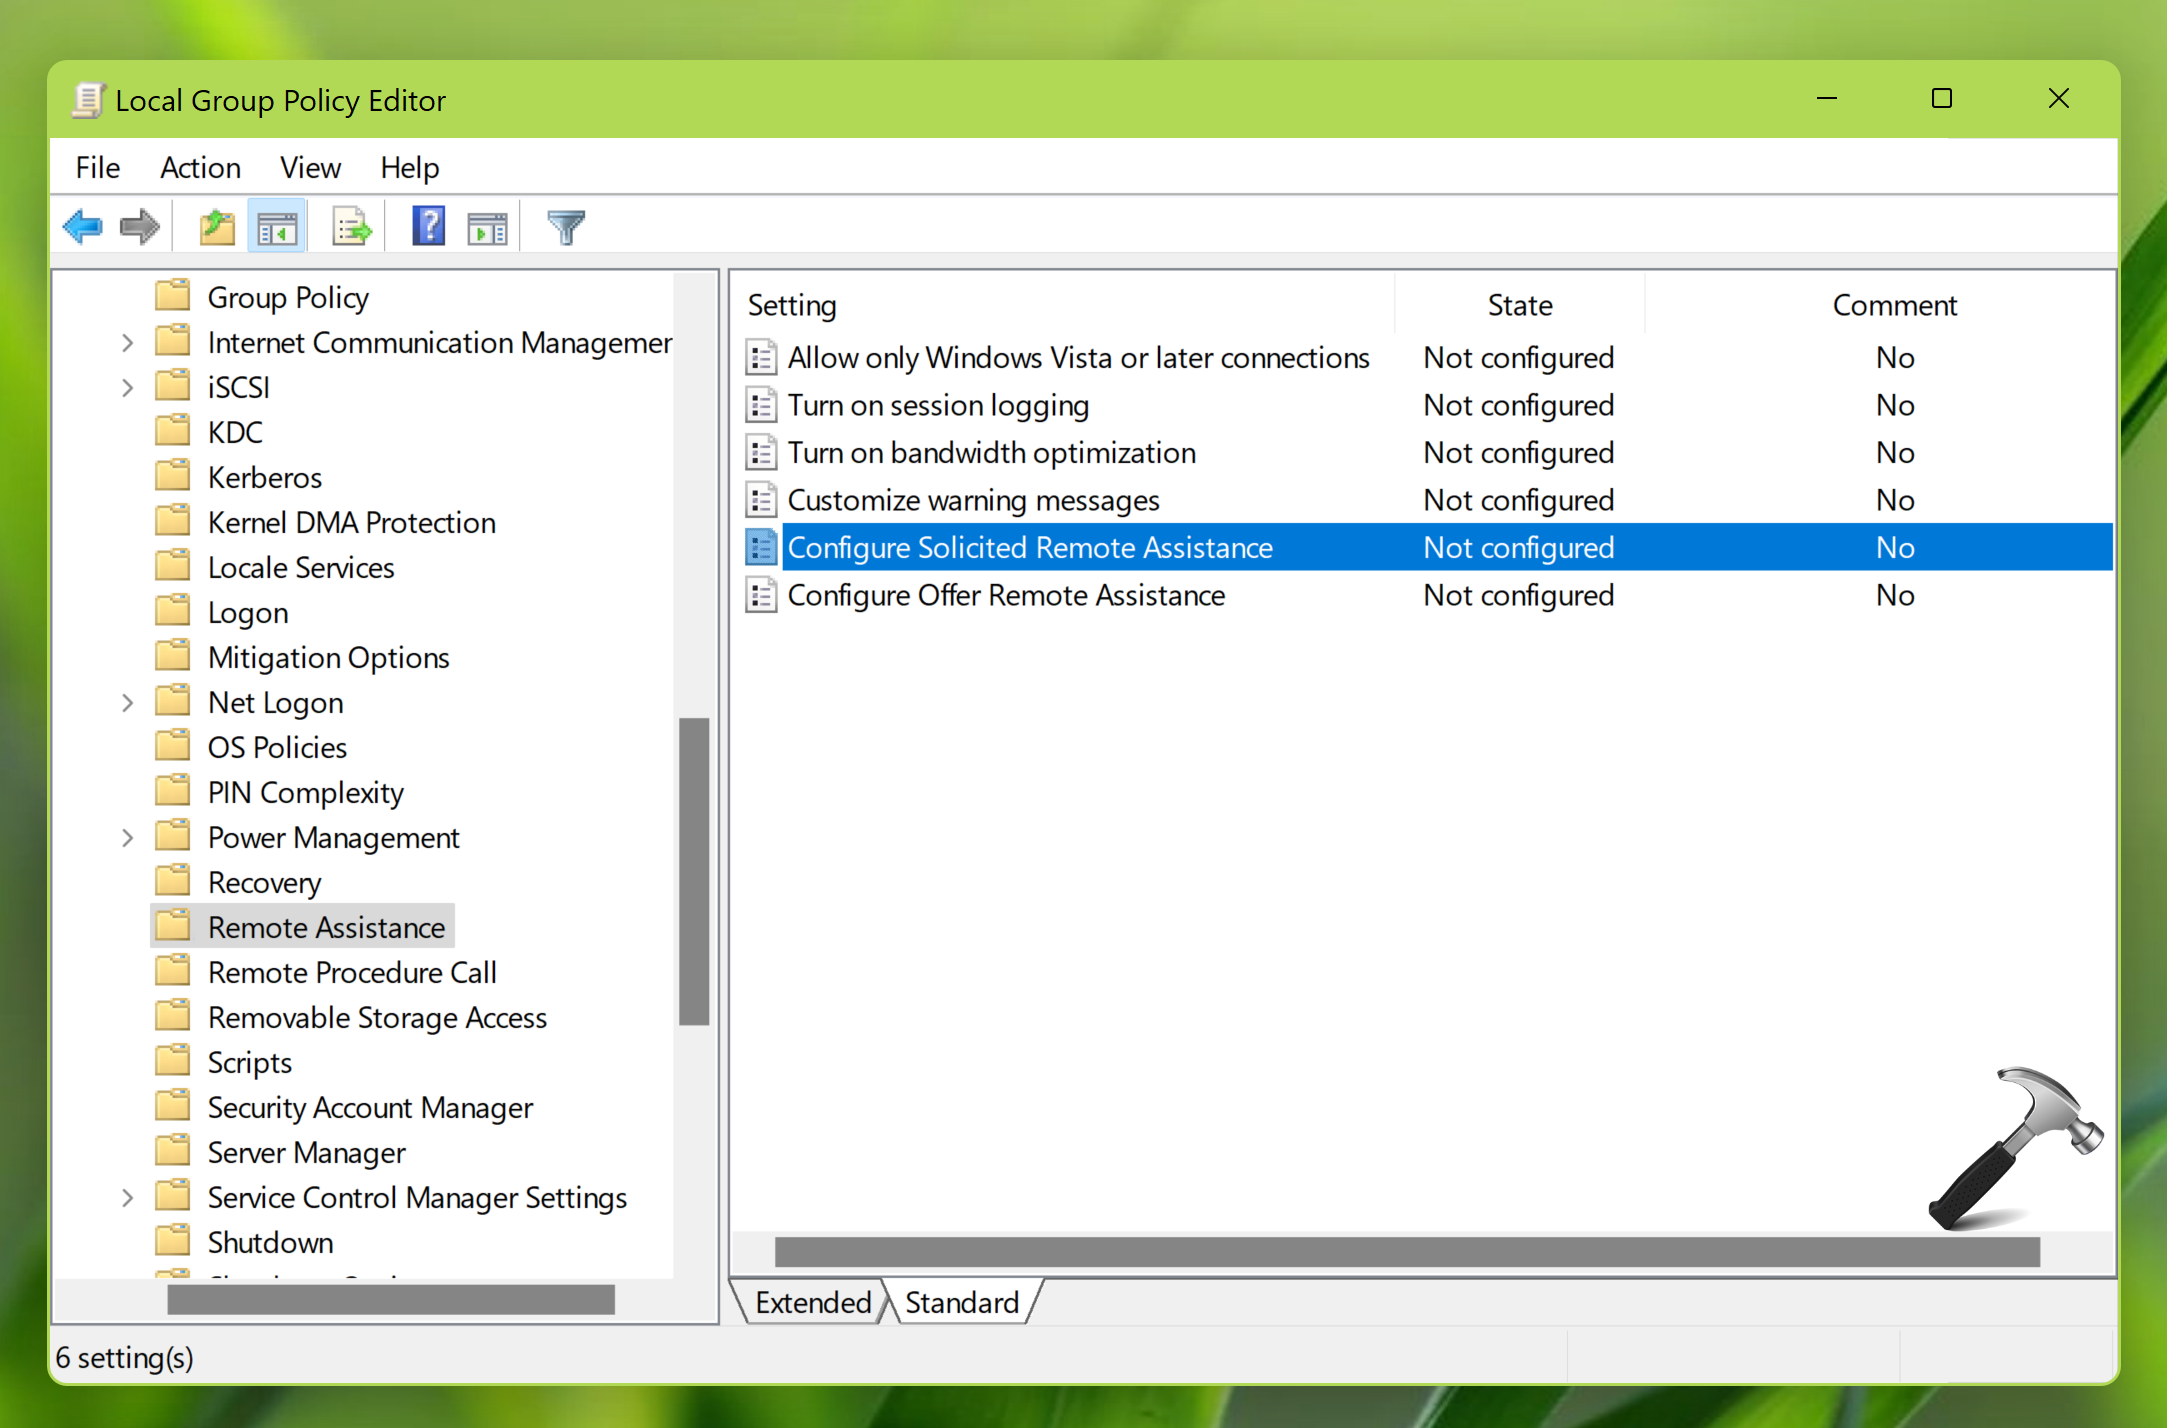
gpedit.msccommand. - Go to Computer Configuration > Administrative Templates > System > Remote Assistance.
- Under Remote Assistance, locate the policy setting named Configure Solicited Remote Assistance. Double click on this policy setting to modify its status.
- In the policy configuration window, send it to Enabled to allow remote assistance. Click Apply followed by OK.
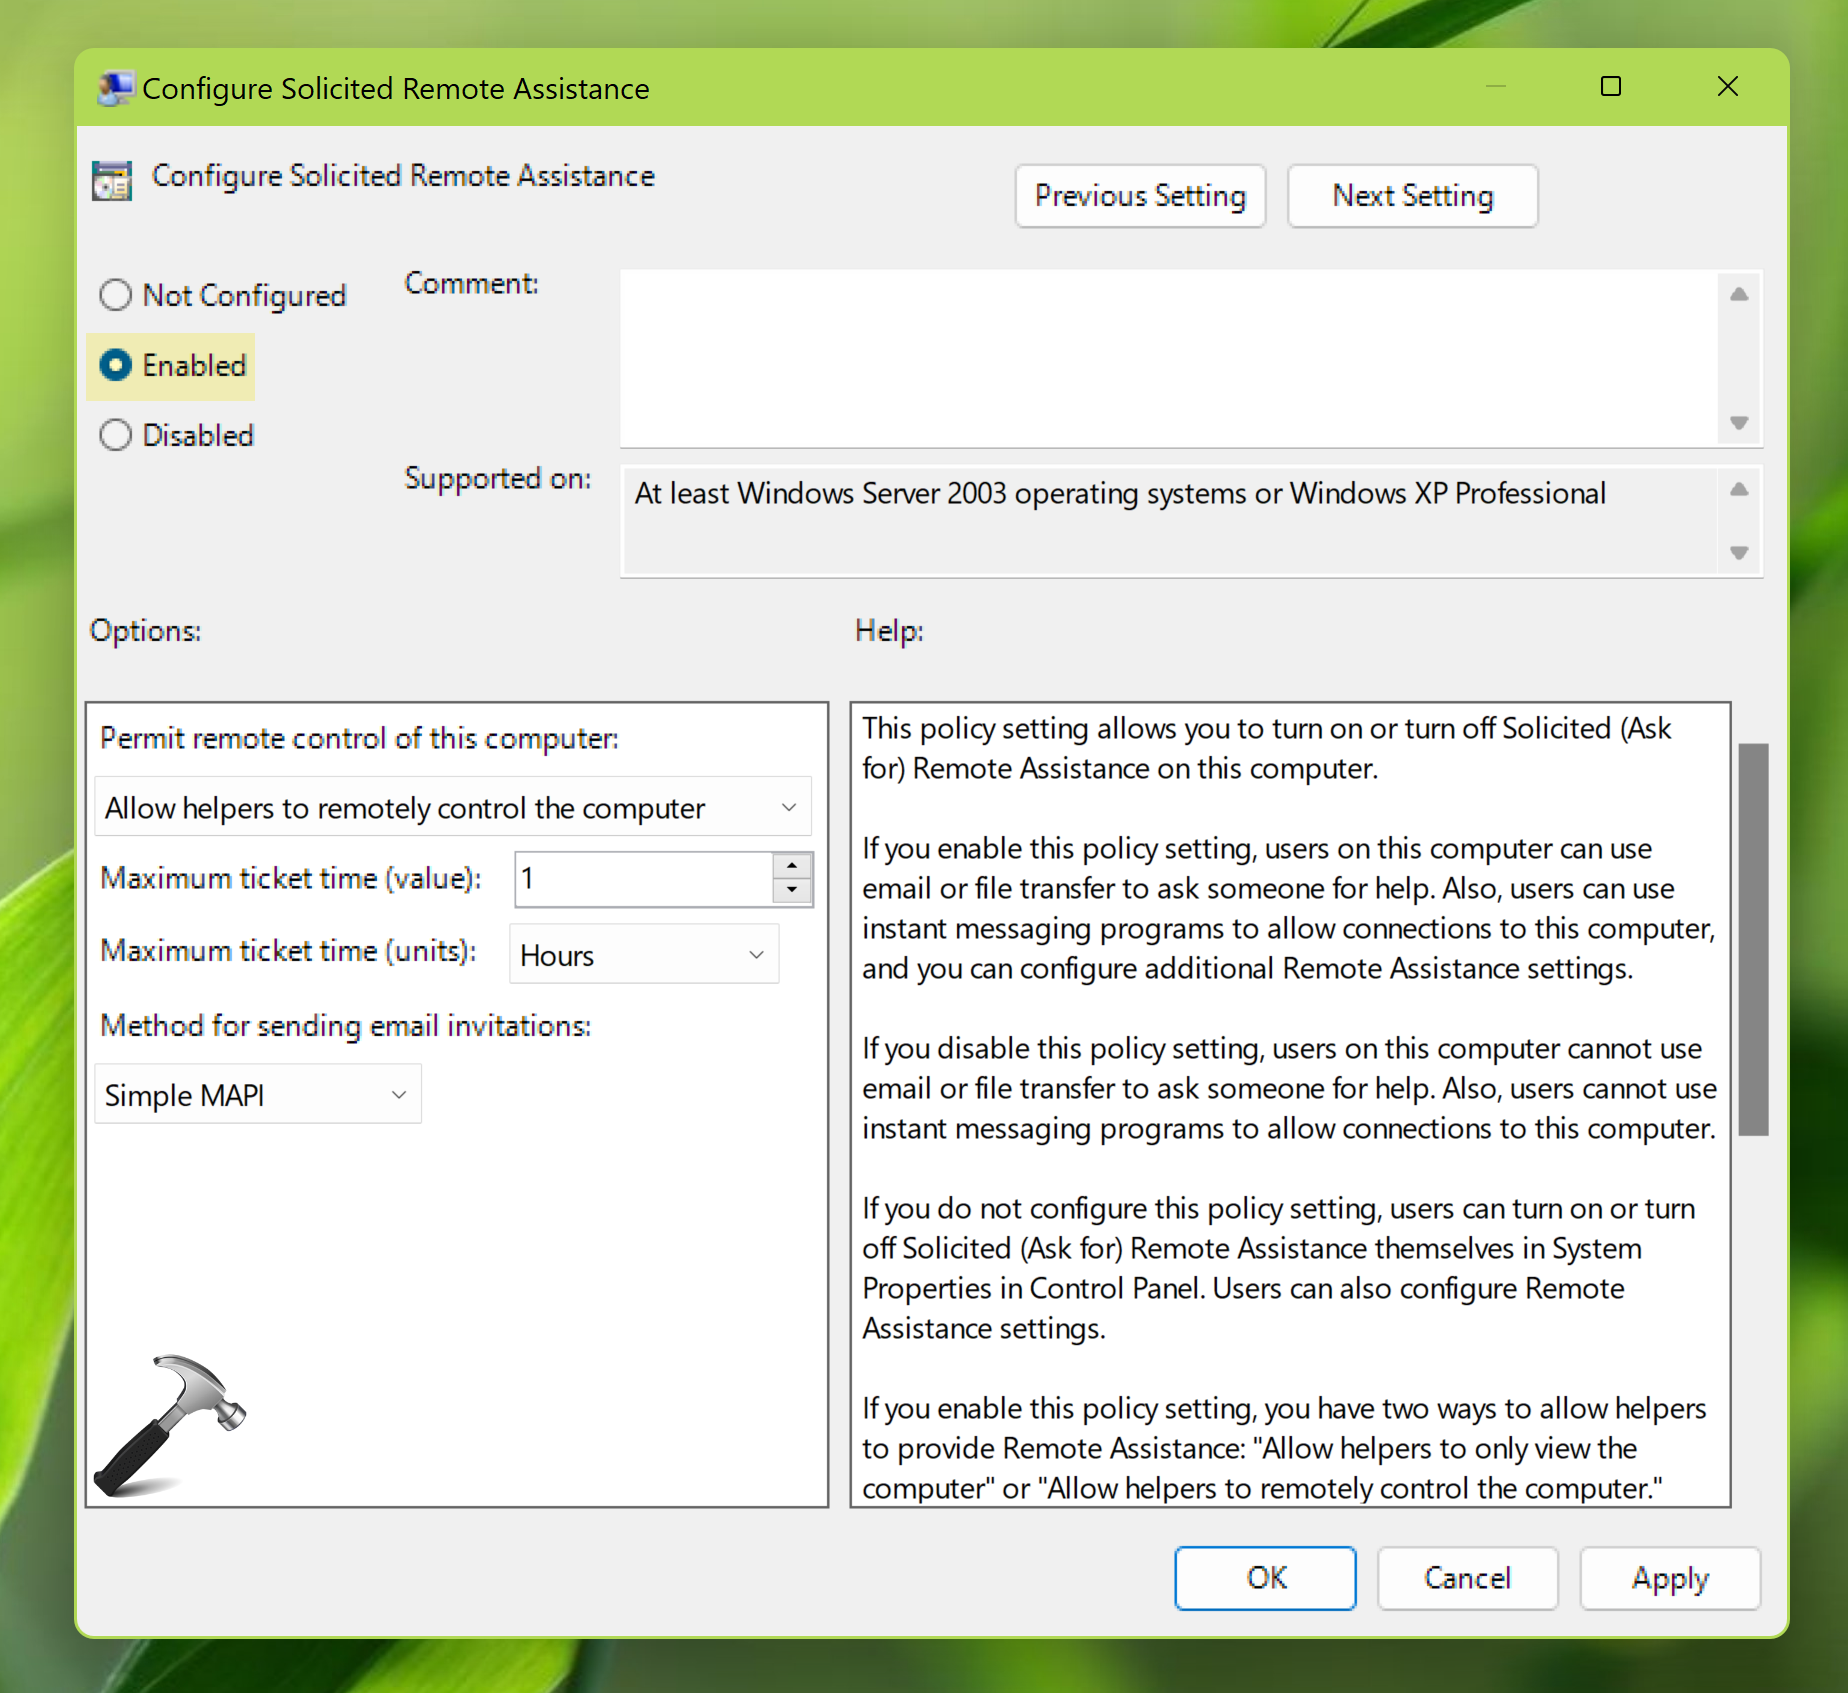
- You can now close Local Group Policy Editor snap-in and run
gpupdate /forcecommand to update group policy engine.
To get help from someone, just type remote assistance in the search engine and select Invite someone to connect to your PC and help you, or offer to help someone else.
That’s it!
![Remote Desktop Keeps Freezing or Disconnecting [6 Fixes]](https://www.kapilarya.com/assets/remote_dekstop_icon_1781340032.jpg)