
Windows 10 comes with different credential providers. The credential providers available in Windows 10 at the moment are:
- Automatic Redeployment Credential Provider
- Smartcard Reader Selection Provider
- Smartcard WinRT Provider
- PicturePasswordLogonProvider
- Generic Provider
- TrustedSignal Credential Provider
- FIDO Credential Provider
- NPProvider
- Secondary Authentication Factor Credential Provider
- CngCredUICredentialProvider
- PasswordProvider
- FaceCredentialProvider
- Smartcard Credential Provider
- Smartcard Pin Provider
- WinBio Credential Provider
- IrisCredentialProvider
- PINLogonProvider
- NGC Credential Provider
- CertCredProvider
- WLIDCredentialProvider
Since there are so many credentials providers available, this raises the requirement of managing default credential provider. But there is no direct setting to manage default credential provider in Windows 10. Hence you need to apply a GPO setting for this.

You can perform below mentioned steps to assign or manage default credential provider for your Windows 10 machine.
How To Manage Default Credential Provider In Windows 10
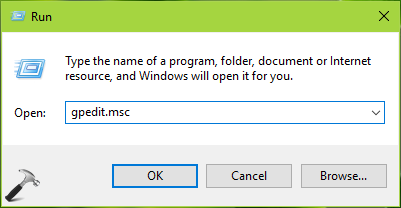
1. Press  + R and put regedit in Run dialog box to open Registry Editor (if you’re not familiar with Registry Editor, then click here). Click OK.

2. In left pane of Registry Editor window, navigate to following registry key:
HKEY_LOCAL_MACHINE\SOFTWARE\Microsoft\Windows\CurrentVersion\Authentication\Credential Providers
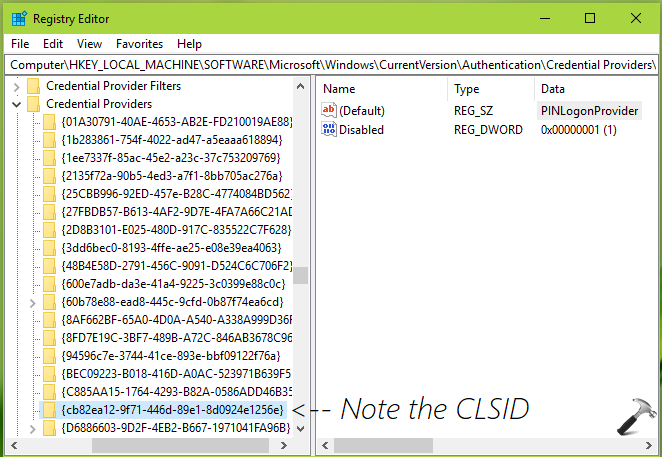
3. Expand Credential Providers registry key. Then each of the sub-keys will correspond to a specific credential provider. To identify which sub-key correspond to which provider, you can check the Data for (Default) registry string (REG_SZ) in the corresponding right pane.
For example, as in above shown screenshot, {cb82ea12-9f71-446d-89e1-8d0924e1256e} registry sub-key corresponds to PIN credential provider.
Note down the sub-key name, which is actually a CLSID. We’ll use this CLSID later here.
4. Press + R and put gpedit.msc in Run dialog box to open Local Group Policy Editor. Click OK.
5. Next, in the GPO snap-in window, navigate here:
Computer Configuration > Administrative Templates > System > Logon
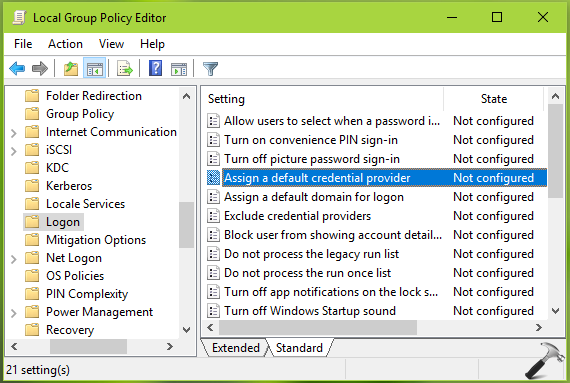
6. In the right pane of the above-shown window, look for the policy setting named Assign a default credential provider. The policy is Not Configured by default. Double click on it to get this window:
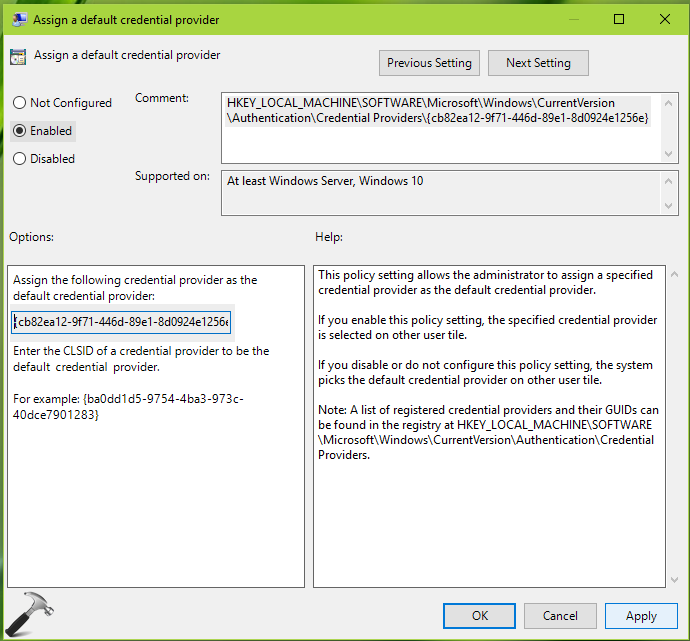
7. Finally, set the policy to Enabled state and in the Assign the following credential provider as the default credential provider input box, input the CLSID we got in step 3. Click Apply followed by OK.
Close the Group Policy snap-in and reboot the machine to make changes effective.
In this way, you can assign or manage the default credential provider in Windows 10.
You can also checkout this video with updated information:
That’s it!


Nice article thank you.
a)
I assume it would be possible to to take care of the manual gpedit process programatically as part of an app install process ?
b)
I assume then having created my own VCP and registered that, the UID would appear in
HKLM\Software\ …. \Credential Providers and it is that UID that is added to the LGP > Logon > Assign … ?
Cheers
Check HKEY_LOCAL_MACHINE\SOFTWARE\Policies\Microsoft\Windows\System for the value DefaultCredentialProvider there must be the guid named after you apply the group policy.
{0B5BFDF0-4594-47AC-940A-CFC69ABC561C} if you want to use Google Credential Provider as default.