If you often need to access a network shared folder (located on other system) from your Windows 10, you might need to map that folder for easy access. In Windows 10, you can easily map this network folder using File Explorer, which is also referred as mapping network drive.
A mapped network drive is actually a shared network folder located on another system. Usually, mapping process assigns a drive letter to this shared network folder. You may need the network credentials to finish mapping of network drive. Mapping network drive helps you automatically connect the shared network folder, after each login to Windows. This is the benefit of mapping network drive.
So without wasting time, let us see how to map a network drive for easy access to shared folder on network.
Page Contents
How To Map A Network Drive In Windows 10
PART 1 – Mapping Your Network Drive
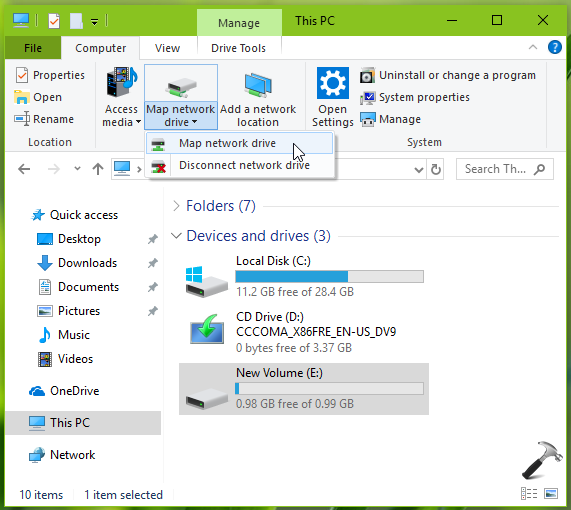
1. Press  + E keys to open File Explorer. Click This PC and under ribbon, click Map network drive option.
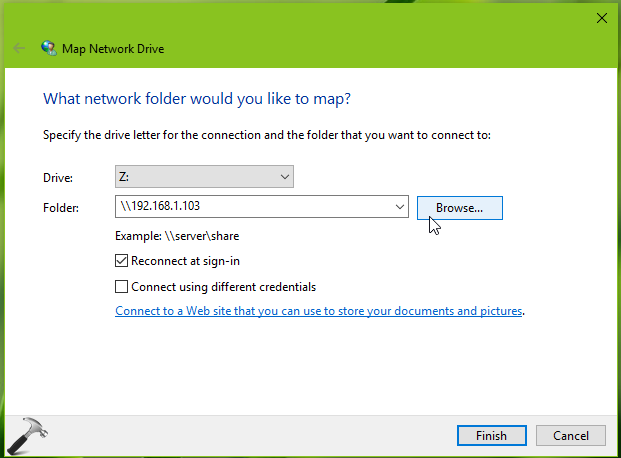
2. Next, in Map Network Drive wizard, select the drive letter as your choice. Then type the location of folder which want to map. If you’ve a network location, type its address and click Browse.
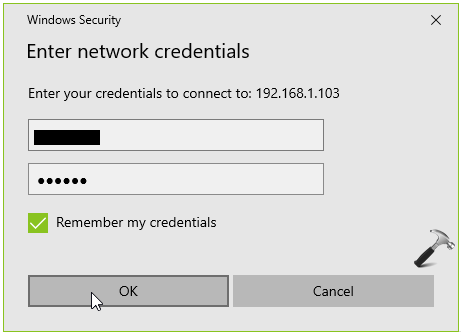
3. Next, provide credentials for the network location. Make sure you check Remember my credentials option here. Click OK.
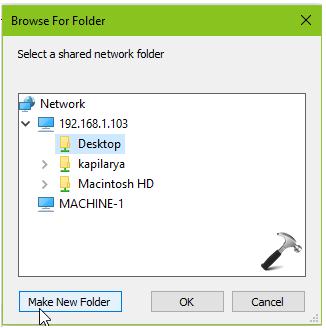
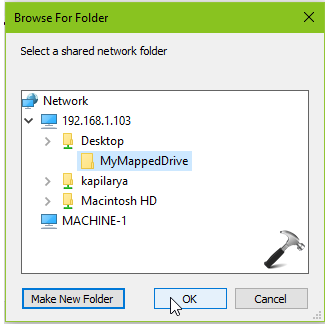
4. Upon validating your credentials, in Browse For Folder, select your network folder for mapping. If you like, you can use Make New Folder button to create new folder.
5. After selecting your network folder for mapping, click OK.
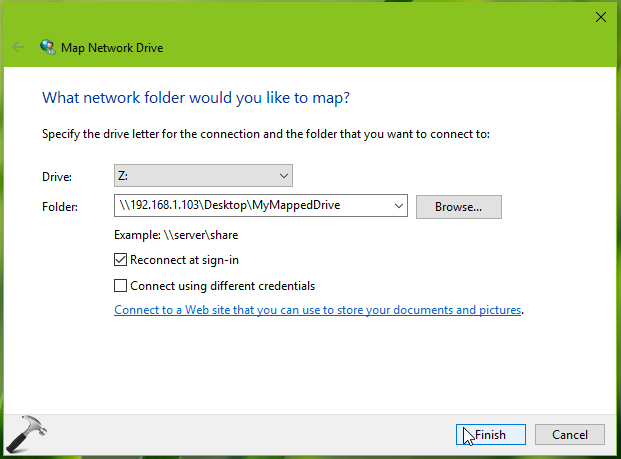
6. Then in Map Network Drive window, make sure you’ve checked Reconnect at sign-in option. This will automatically connect your system to mapped folder, after you login to Windows. Click Finish.
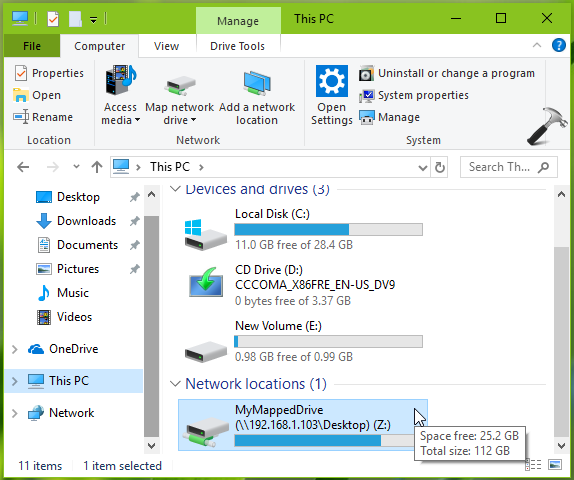
7. So in this way, you’ve mapped the network drive and it should be visible under This PC, as shown below.
PART 2 – Unmapping/Disconnecting Your Network Drive
1. To disconnect your earlier mapped network drive, open File Explorer, go to This PC.
2. Select your mapped drive and right click on it, and click Disconnect.
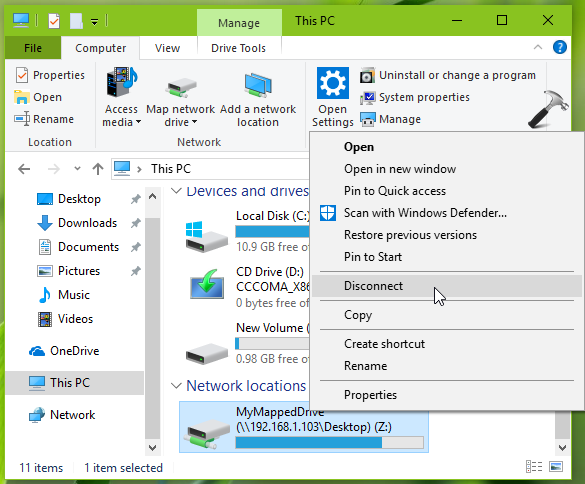
This should disconnect your network drive, finally.
So this is how you can create mapping of network drives in Windows 10.
Check out this video for live demonstration:
Don’t miss to read how to map a drive using Group Policy Preferences.
That’s it!
Also check: Mapped drives not working in Windows 10 V1809.