
When you think you can no longer use your computer because it is slow, or you have low storage, it can be very helpful to know how to remove junk files in Windows 11. In the long run, temporary files, browser power up, and the system remnant data accumulate and slow down performance. However, in this guide, we are going to show you easy and beneficial methods to remove junk files in Windows 11 – step-by-step.
Page Contents
Why You Should Remove Junk Files in Windows 11
Each time you access the web, install programs, or even update Windows, unnecessary files collect in your system. Such files have no use once they were first used; it is just garbage files. It can provide the following to your PC by deleting them –
- Optimize your computer system.
- Clear space in the hard drive or SSD drive.
- Fix the problem of sluggish startup or lag.
- Improve system stability and life.
It is time to immerse ourselves in the optimal methods of clearing junk files in Windows 11.
How to Remove Junk Files From Windows 11
One of the simplest methods of maintaining a good-running PC is learning how to delete junk Windows 11 files. It is a regular ritual to do once a month, and your Windows 11 will remain clean, efficient and faster than light.
Delete Unwanted Files Using Disk Cleanup
Disk Cleanup is a utility software that comes with every Windows, and it can be safely used to remove unwanted files such as system cache, outdated updates, and temporary files.
1. On the first step, you must press Windows + S, type Disk Cleanup, and open it.

2. Select which drive (C:) you wish to clean and click ok. Allow Windows to estimate the amount of free space. Crossmark the selections of files to be deleted (eg, temporary files on the Internet, icons on the Recycle Bin, System Cache).

Click Cleanup system files and afterward, it will delete files.
Remove Junk Files by Deleting Temporary Files
Windows is known to store temporary files, which may consume gigabytes. With system settings, it is safe to delete them.
1. You have to open the Windows 11 Settings > System > Storage.
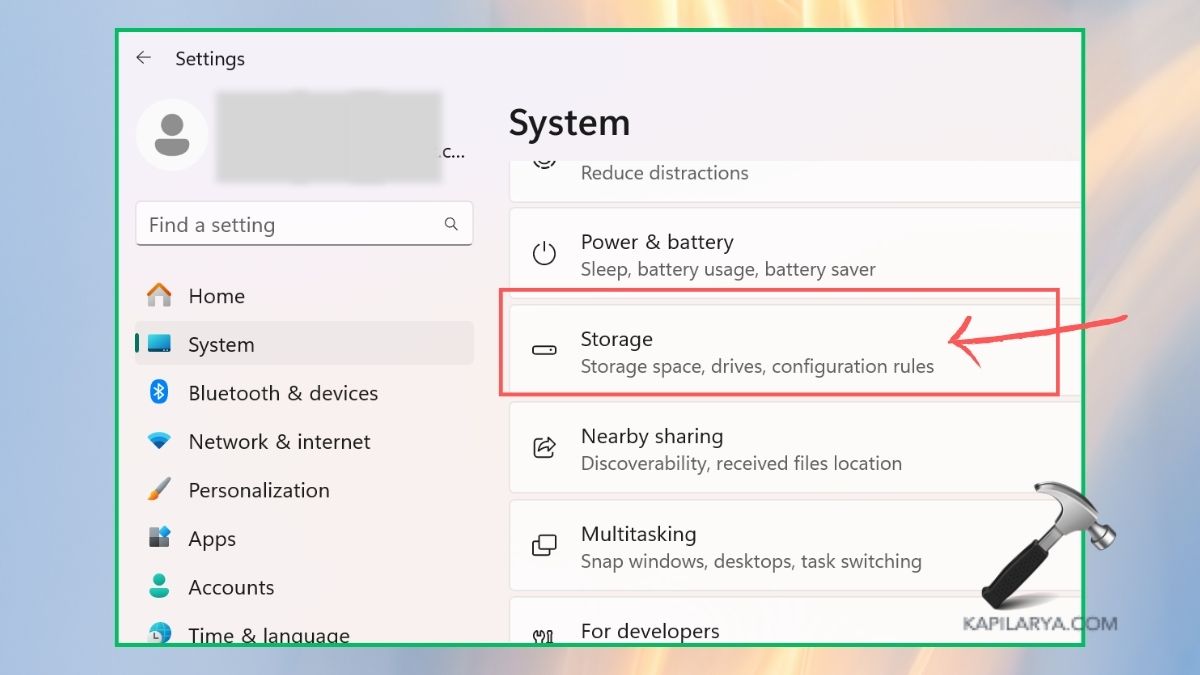
2. Under Storage Breakdown, click on Temporary Files. Verify all extraneous file types (such as Windows upgrade log files, Delivery optimization files, and temporary internet files).

Click on Delete, and the files are permanently lost.
Delete Unnecessary Files by Emptying the Recycle Bin
Recycle Bin contains the deleted files, which consume some space in your drive. It is a quick and simple method of draining junk.
1. Open the Recycle bin icon on the desktop.
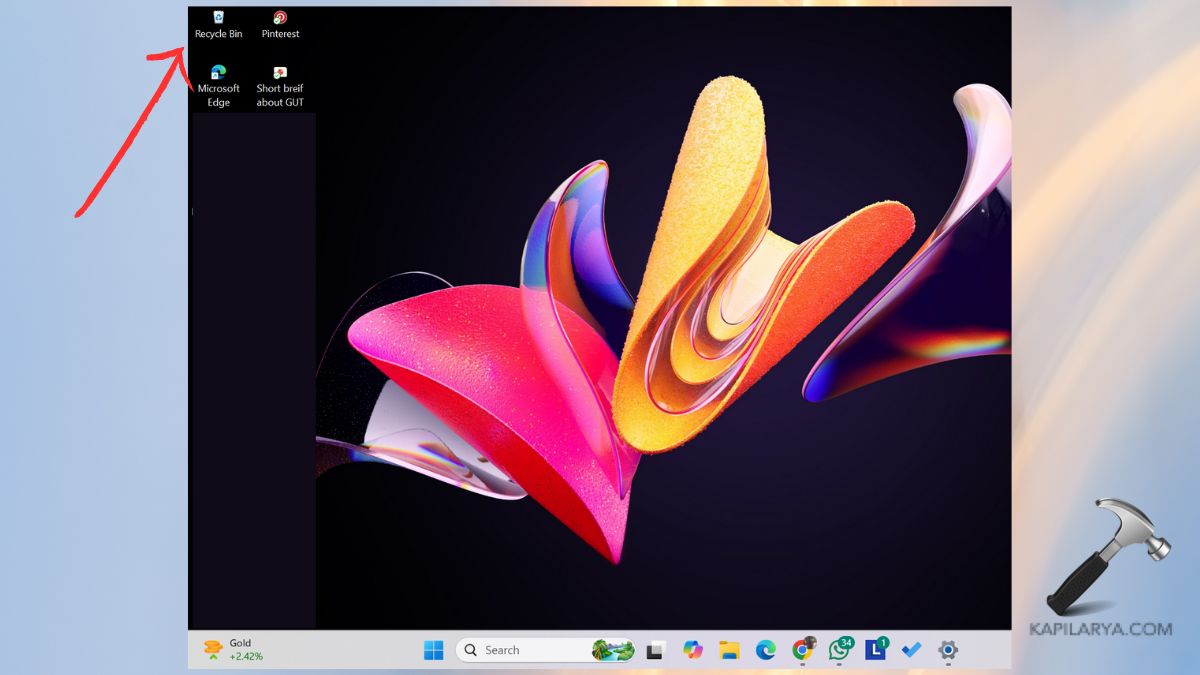
2. Choose Empty Recycle Bin. Confirm when prompted.

Remove Junk Files Using Storage Sense
Storage Sense is a Windows 11 automated feature that removes junk files at intervals, wasting less time and effort.
1. You have to open the Settings, choose System, and then Storage.
2. Turn on Storage Sense.
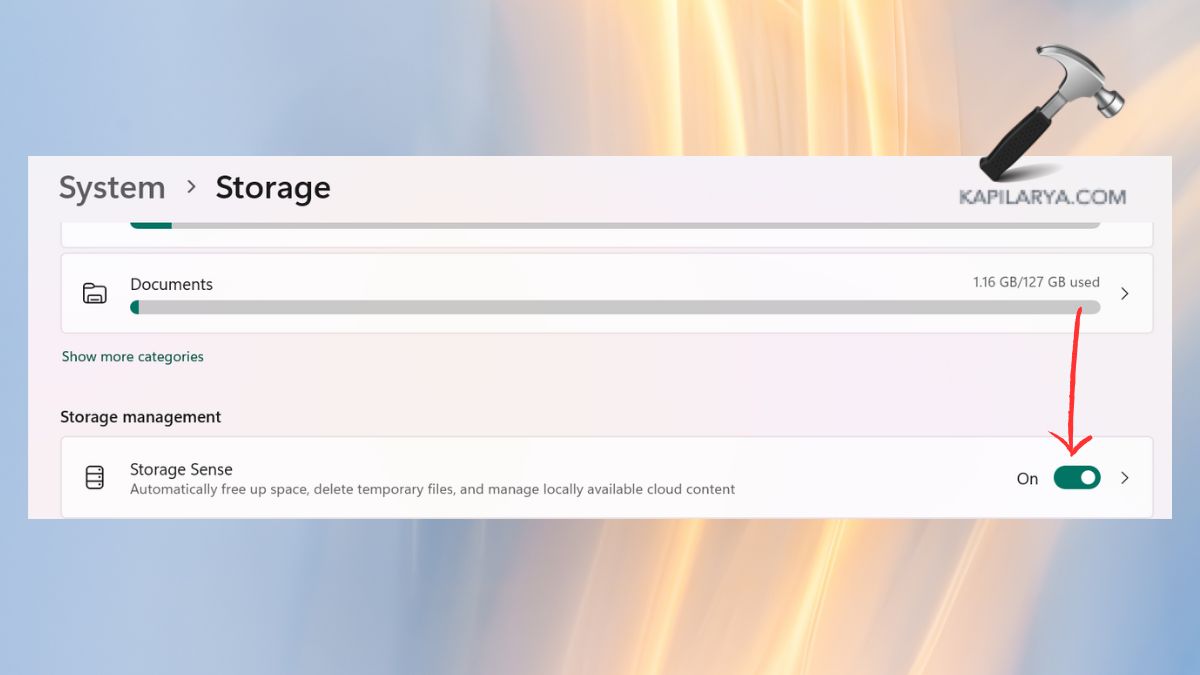
3. Eanble the toggles to set it to be able to clean temporary files, downloads, and the recycle bin contents automatically.

Why It Is Useful: Storage Sense is automatically configured to get rid of junk files in Windows 11 without human intervention after it has been enabled.
Delete Unused Files by Clearing Browser Cache
The browser data will save the data of the websites in your browser cache, enabling them to load faster, but after some time, they become bloated. Removing it can release space and address the problem of browsers.
a. For Microsoft Edge:
1. Open Edge > follow the three dots ( Specifically ⋯) > Settings.
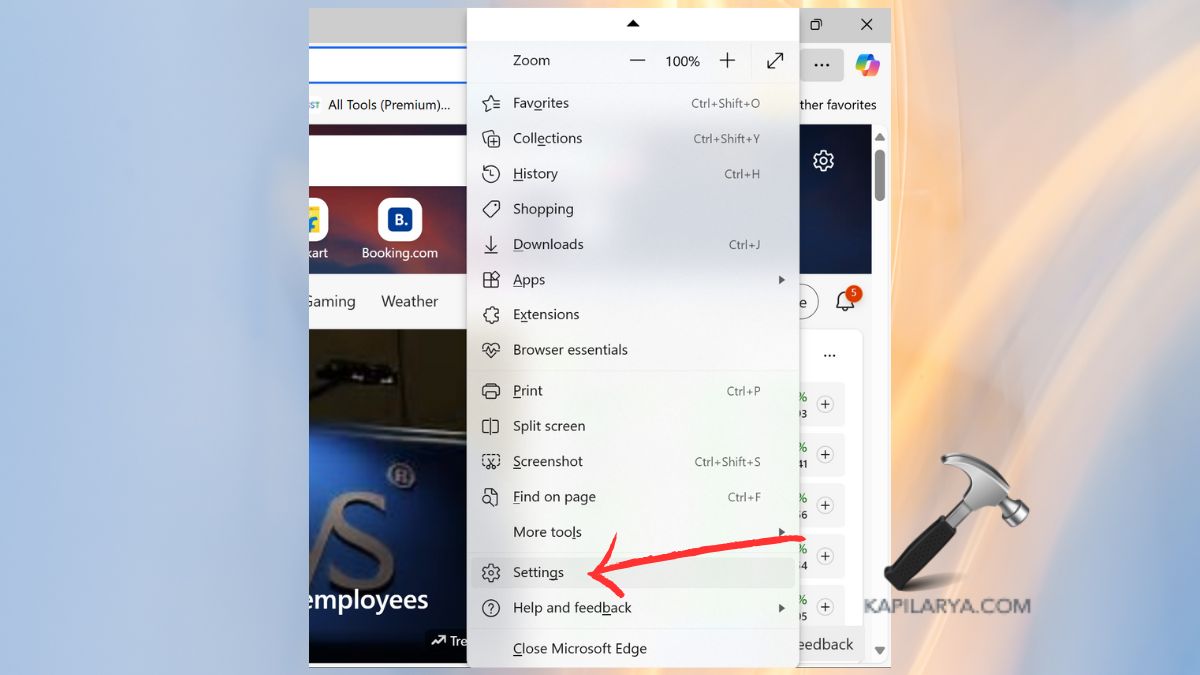
2. Click on Privacy, search, and services. While under Clear browsing data, select Select what to delete.
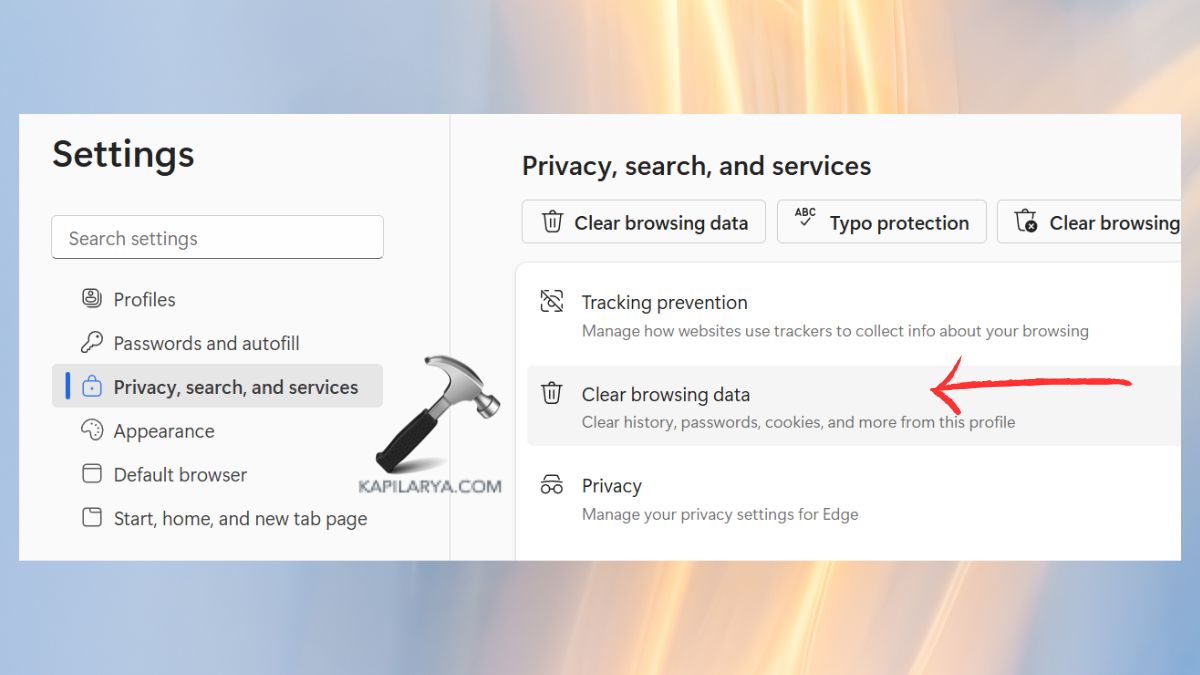
3. Click on “Cached images and files”.

b. For Google Chrome:
1. Open Chrome > Select the three dots (⋯) > Settings.

2. Click on the Privacy and security menu and clear browsing data.

3. Select Cache images and files > Clear route.

Manually Remove Junk Files Using the Run Command
In case you like to work in a more direct manner, then you may use Windows Run commands to delete junk files directly.
1. Hold down the “Windows and R” keys to start the Run box. Input this command and press ENTER.
%temp%
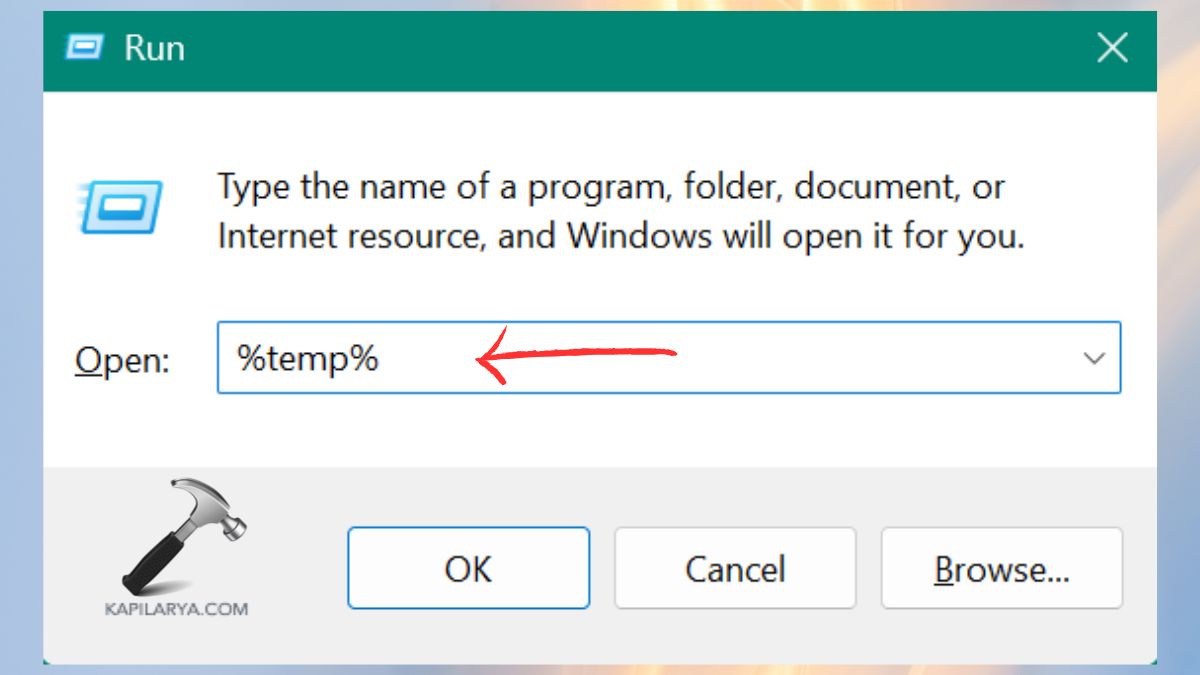
2. You just need to delete all the files in the Temp folder.

3. Re-execute with the following commands in the RUN box:-
temp
prefetch

4. These files should be deleted, and the Recycle Bin should then be emptied.
Frequently Asked Questions (FAQs)
That’s it!


