Windows 11 comes with variety of sign-in options you can use to log into your account. Apart from the traditional password based login, nowadays we have more secure login options to prevent unauthorized access to the device. The biometric authentication in Windows is an enterprise-grade identity verification mechanism that’s integrated into the Windows Biometric Framework (WBF) as a core Microsoft Windows component called Windows Hello. Windows Hello feature includes PIN, Face and Fingerprint sign-in options you can use to login to your account. In this guide, we’ll see how you can setup Facial recognition in Windows 11.
Windows Hello Face authentication or Facial recognition utilizes a camera specially configured for near infrared (IR) imaging to authenticate and unlock Windows devices as well as unlock your Microsoft Passport. The Windows Hello Facial recognition is available only on the devices having an IR camera installed.
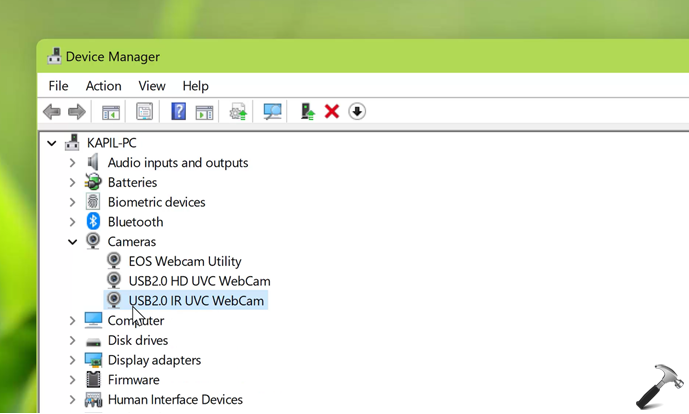
So if you want to enable Facial recognition, you first need to check if your device have the IR based webcam or camera installed. If you do not have this IR based camera, you can also buy it separately and install to your Windows device. Although, some of the devices nowadays comes with this IR based camera pre-installed. Once installed, you can locate it in the Device Manager.
Once you have IR based camera installed, you can follow below steps to set up facial recognition.
Page Contents
How to setup Facial recognition in Windows 11
Manual steps
1. Press  + I keys to open Settings app.
2. In Settings app, go to Accounts > Sign-in options. If you have not set up a password for your account yet, you will first need to set up your password.

3. Then click on the Set up button under Facial recognition (Windows Hello).

4. Next, under Welcome to Windows Hello, click on Get started button.

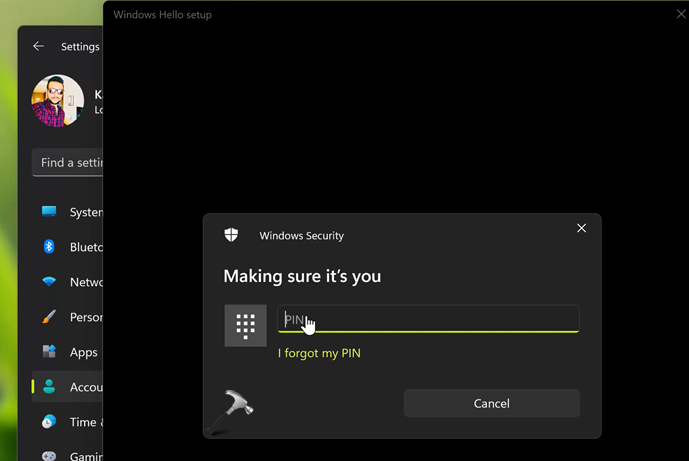
5. All the Windows Hello biometric features requires your Windows Hello PIN for any access. So if you are asked for your Windows Hello PIN at this stage, provide that to continue.
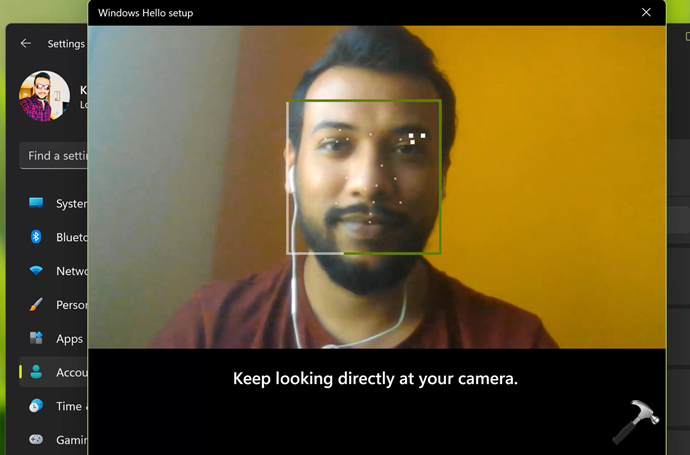
6. In the next screen, keep looking directly at your camera until your face is completely recognized.
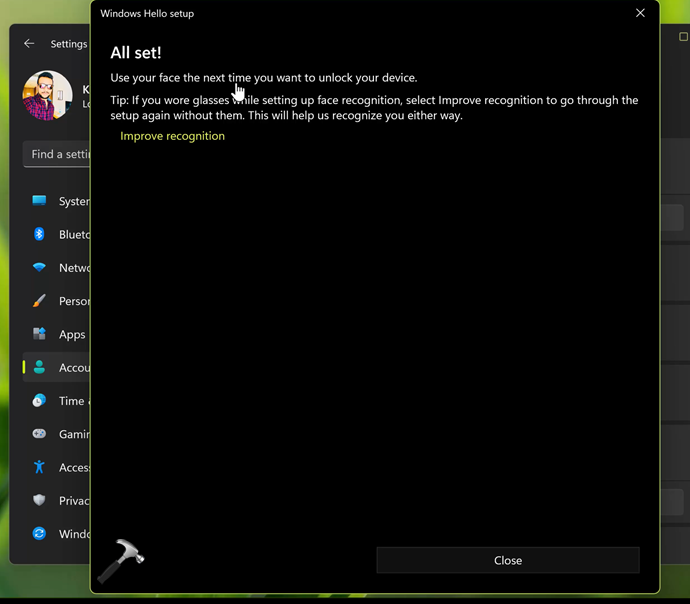
7. Once your face is recognized completely, you will see this screen: All set! Use your face the next time you want to unlock your device.
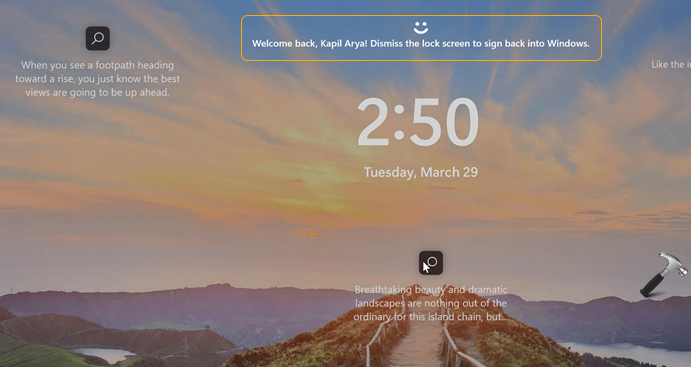
8. So the face login is now enabled on your Windows 11 device and you can press Windows + L keys to check. On the login screen, you will find that the Windows Hello Facial recognition feature is very fast and quickly recognizes your face and immediately logs you in.
Video guide
You can also check live demonstration of above steps in this video:
That’s it!