
There might be many cases when you need to create, delete or modify disk partitions or volumes in Windows. Also, there are many third-party software available as well to manage the disk partitions. But in this beginner’s guide, I’ll show how to manage disk partitions simply using built-in Disk Management snap-in for Windows 10.
For the convenience of readers, this guide is divided into two parts. First section show how you split your hard-drive partition into two and assign the drive letter to newly created volume. In second part, we’ll delete the newly created volume and merge it back to original volume. So let’s get started…
Page Contents
How To Split And Merge Disk Partitions In Windows 10/8.1/8/7
Part 1 – Split Or Separate Disk Volumes
In this first half of this guide, we’ll see how to split an existing disk volume. Let us understood this with an example. Suppose you bought a new Windows 10 PC with C: drive of around 500 GB. Obviously, Windows will be already installed on C: drive. But, there comes a point when you need to move some of your data to some other drive. Or in another case, you want to create new partition to load different operating system. Since you’ve only C: drive, you need to create a partition on this drive by splitting it into two parts. So here is what you need to do:
1. Press  + R to open Run and type diskmgmt.msc in it to open Disk Management. Click OK or press Enter.

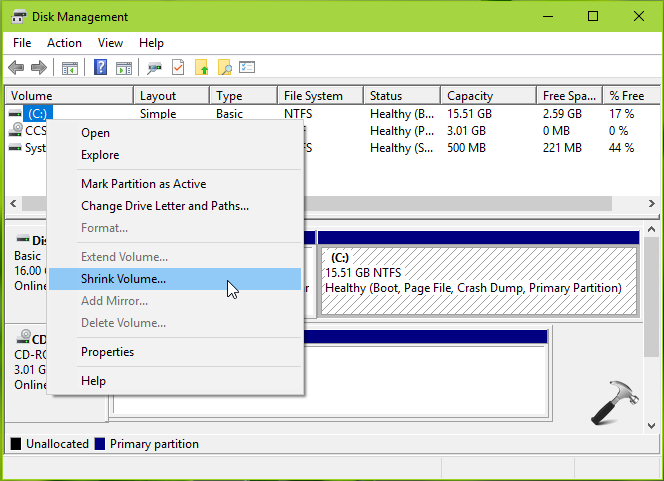
2. In Disk Management window, right click on the disk partition which you want to split, and select Shrink Volume.
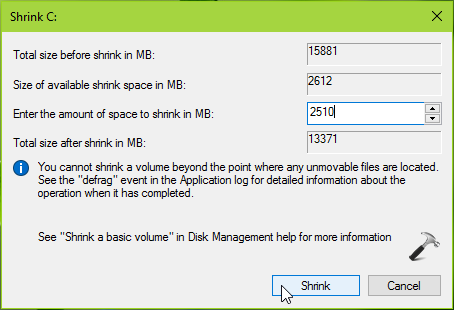
3. Then in next window, type the custom size of which another partition should be created. In other words, the size you enter here will be removed from existing partition and can be later allotted to new disk partition. Click Shrink.
4. In few seconds, you’ll see the volume size you entered is removed from existing partition and is labelled as “Unallocated“.
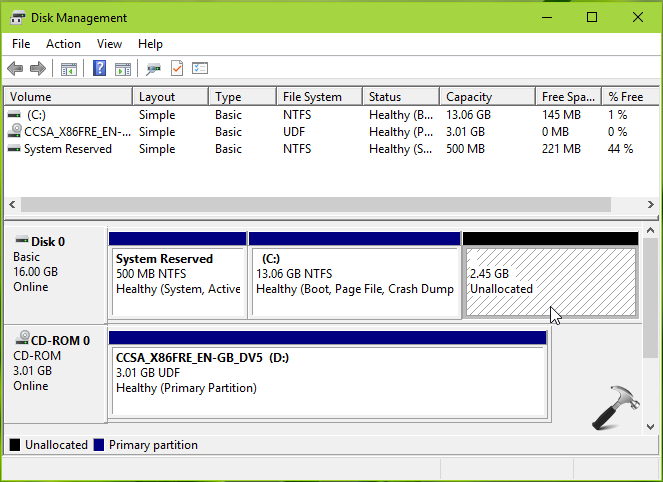
So in this way, the C: drive is separated into two volumes. You can follow the steps of this guide to assign a drive letter to this Unallocated volume and make a disk partition of it.
Steps to create disk partition in Windows 10
Now we’ll see, how to restore the newly created volume to pre-existing volume.
Part 2 – Merge Disk Volumes
You may need to merge volumes to keep file management simpler and easy to access. Here’s how:
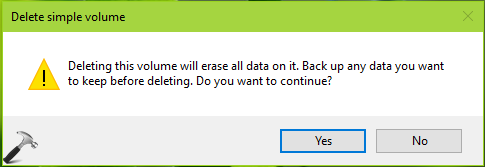
1. Open Disk Management. Select the volume you want to merge and right click on it, select Delete Volume. This will simply remove the drive letter and partition formatting from it.
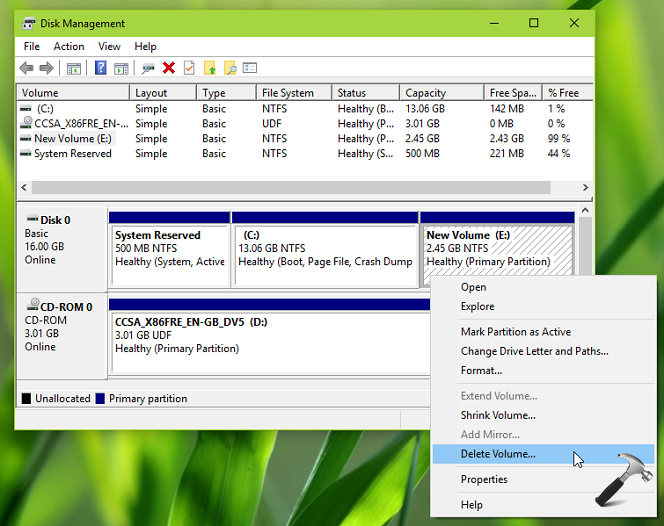
It will also remove if any data exists on partition. Click Yes to confirm for deleting volume.
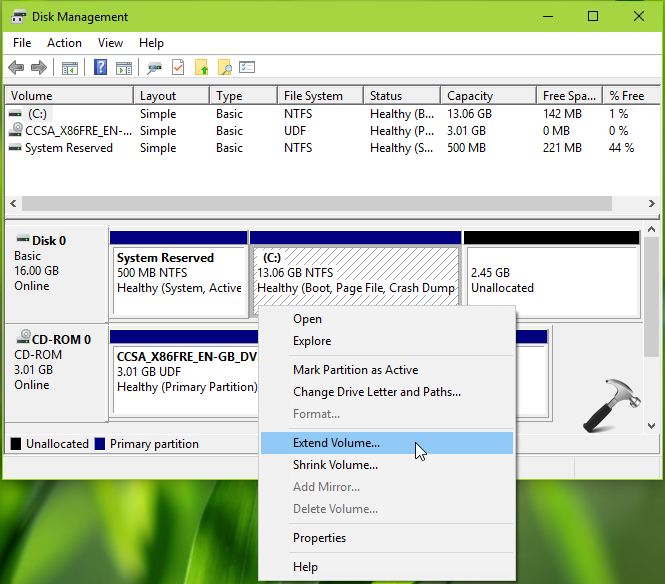
2. Once volume is deleted, you’ll see same size of Unallocated labelled volume. Now right click the volume to which you want to merge Unallocated volume and select Extend Volume.
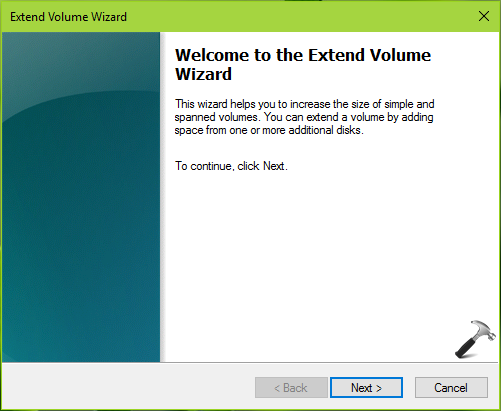
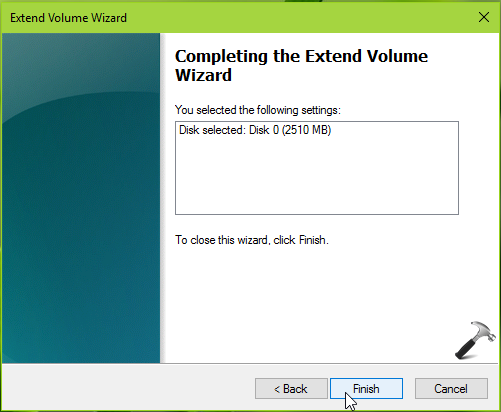
3. Click Next in this window:
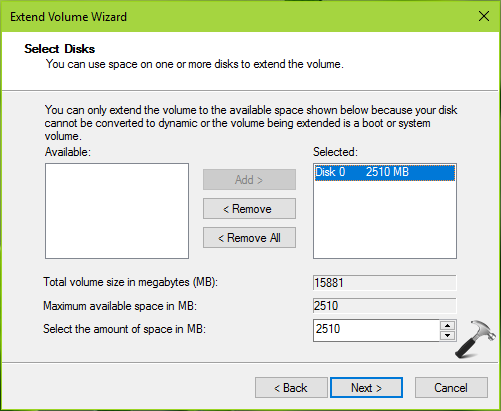
4. Then in next screen, Windows will automatically select Unallocated labelled volume. Just confirm it with the size or enter custom one, and hit Next.
5. Then click Finish.
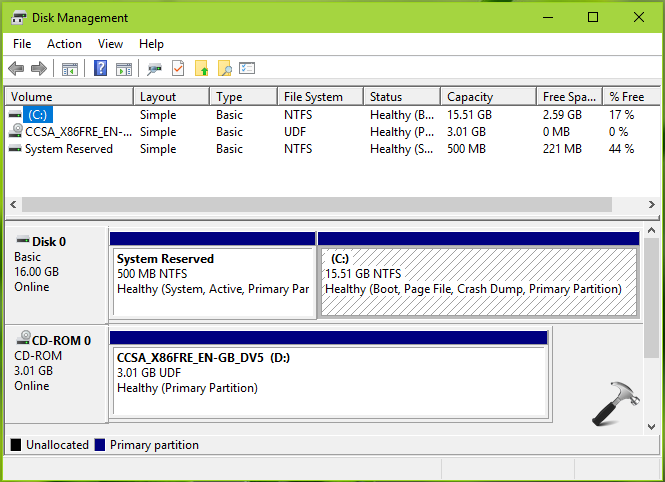
6. You’ll now see that the size of pre-existing volume is increased as Unallocated volume is merged into it.
So this is all about manipulating disk volumes in Windows 10!


These instructions are useless because data is lost. I need to expand an existing volume to use all the space on the drive, because copying existing data from a failing hard drive via an image copy (which was necessary because programs and user profiles were installed on the hard drive that was failing–the SSD that I boot from is only large enough for the Windows OS. Now that I have rescued my program and user profiles from the failing drive to a new drive with double the space, I need to expand the defined partition to include the added space without loss of data.