Usually, whenever we have to select multiple items in Windows 10, we hover cursor over those items until they’re selected. In order to select few items, we can select one item and hold Shift key and click on other items to select. These are the usual selection methods for multiple items you might be already using. Now, in this article, I’ll show you a more easy way to select items and that is via check boxes. Yes, you can use check boxes to select items more easily on your Windows 10. This would be helpful for those who has to manage or move hundreds of items on their File Explorer.
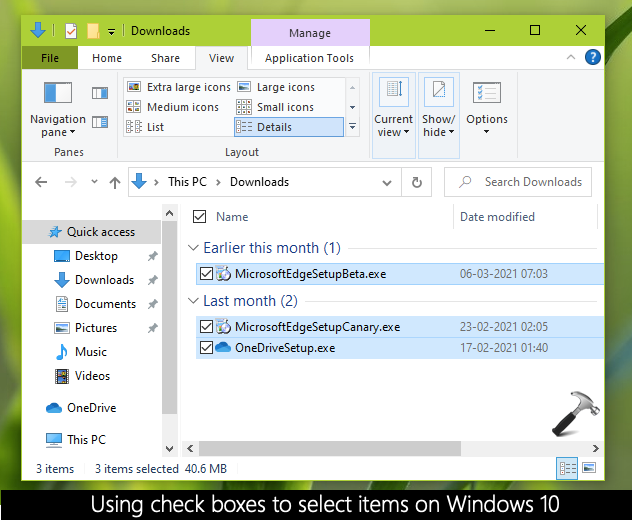
As you can see in the screenshot above, I can select items very easily by clicking on corresponding check boxes. By default, check boxes are hidden for items. But you can quickly configure a setting to show them. Here’s how to do this.
Page Contents
How to use check boxes to select items in Windows 10
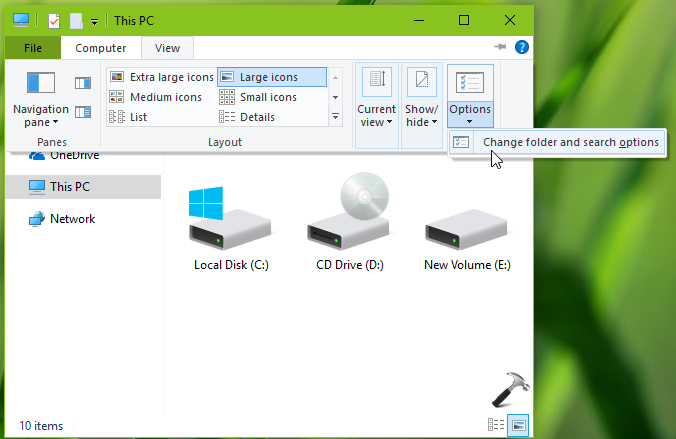
Method 1 – Using Folder Options
1. Press  + E to open File Explorer.
2. Under File Explorer ribbon, click View > Options > Change folder and search options.
3. In Folder Options window, switch to View tab. Under Advanced settings, check Use check boxes to select items option. Click Apply, OK.

Your settings should be immediately applied. So you can now use check boxes to select items in your Windows 10.
Method 2 – Using Registry
You can also follow these steps to manipulate same setting in registry. IT Pros can deploy this manipulation on client machines using Group Policy.
1. Run regedit command to open Registry Editor.
2. In left pane of Registry Editor window, go to:
HKEY_CURRENT_USER\SOFTWARE\Microsoft\Windows\CurrentVersion\Explorer\Advanced
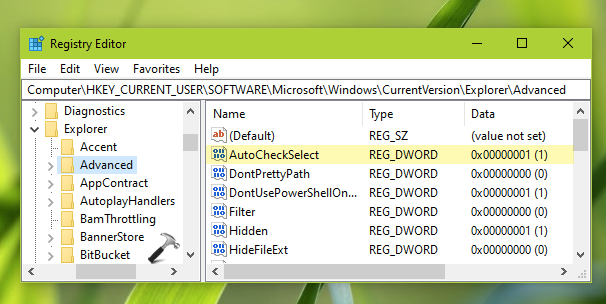
3. In the right pane of advanced registry key, locate the AutoCheckSelect named registry DWORD (REG_DWORD). Double click on it and set its Value data to 1 to use check boxes to select items.
4. Close Registry Editor, sign out and then sign in back to make changes effective.
After signing back, you will find that you can now select items using check boxes.
To revert this setting later, you can simply restore AutoCheckSelect to 0.
That’s it!
Read next: Show/Hide Folder Merge Conflicts In Windows 10.