If you want to compress the zip files and password protect them without using third-party utility in Mac, then this article is for you. Many times there comes a situation when we have to create a zip archive with confidential files. We do not want anyone else to access the data in these confidential files. Plus we want to let this data accessible only by the authorized person.
But when it comes to password protect zip files, usually you have to rely on third-party software. However, if you are using Mac OS, then you can create password protected zip natively using the Terminal. You do not need any third-party software for this purpose in Mac OS. In this article, we’ll see how to password protected zip files in Mac using Terminal app. The resultant zip file can only be opened with correct password, no matter if it is on Mac, Windows or any other device.
Password Protect Zip Files In Mac Using Terminal
Follow these steps to create password protected zip file:
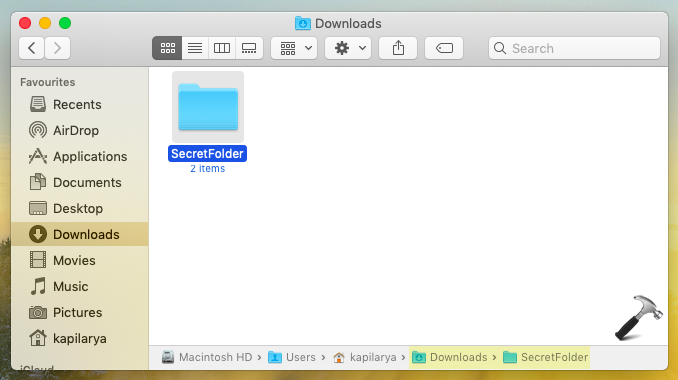
1. Using Finder, create a new folder and put your confidential files in that folder. Name that folder without having spaces so you can easily manage it with Terminal. Place this folder it at a convenient location. In this example, I am placing this folder in Downloads.
2. Now open Terminal using Spotlight Search.
3. In Terminal window, navigate to the parent folder location for the folder we created in step 1. For this example, I would using cd ~/Downloads command for that.
4. You can type ls command to confirm existence of the confidential folder.
5. Then type zip -er <FileName.zip> <FileorFolderNameYouWantToCompress> and press Enter key. In this example, I typed zip -er SecretFolder.zip SecretFolder command to make zip file of SecretFolder and name the final zip archive as SecretFolder.zip.
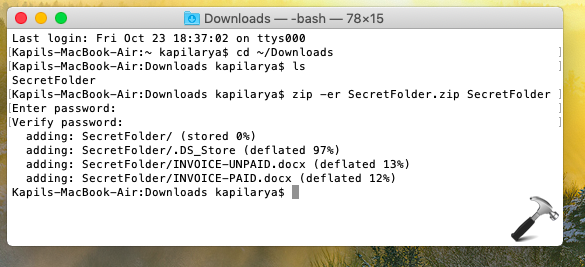
6. Then you’ll be asked to enter the password you want to set. Type that and confirm it. In few moments, you’ll find that command is completed and password protected zip file is now ready. You can close Terminal app now.
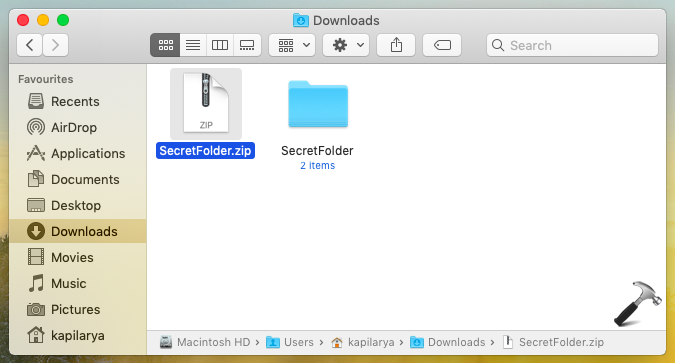
7. Then go to location where you created new folder in step 1 and you should be able to locate the password protected zip archive there with name you provided in step 5.
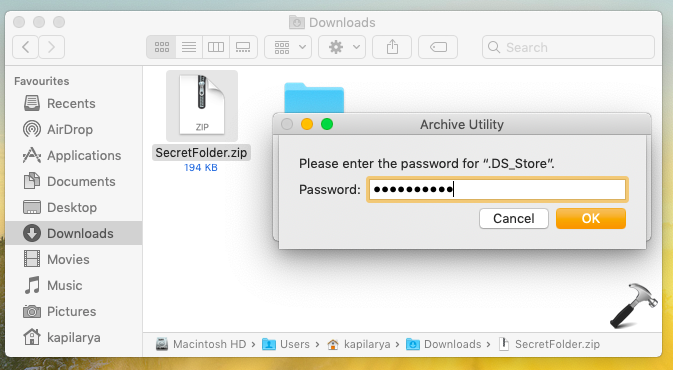
8. When you try to open it, you must be asked for the password. So type in correct password to unzip the file. If you don’t enter correct password, the zip won’t decompress.
Check this video to illustrate above steps:
That’s it!