We all know that Windows Spotlight feature was added by Microsoft in Windows 10 Version 1511. The feature allows dynamic lock screen background image, which refreshes automatically on daily basis. See this fix, if Windows Spotlight is not working for you. Check this guide to save Windows Spotlight images.
Well, Windows Spotlight feature received positive response from users. That’s why Microsoft has added the ability to show Windows Spotlight images as login screen background, in Windows 10 build 14279 or later.
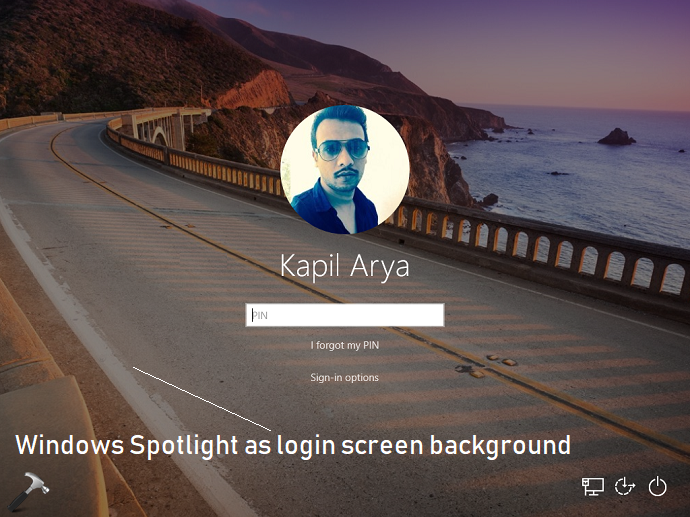
You can try below mentioned ways to enable Windows Spotlight image on your login or sign-in screen.
Page Contents
How To Set Windows Spotlight Image As Login Screen Background In Windows 10
WAY 1 – Via Settings App
1. Right click Start Button or press  + X keys and select Settings.
2. In the Settings app, navigate to Personalization > Lock Screen.
3. Then in right pane of Lock Screen, make sure Background is set to Windows spotlight. Now enable Show lock screen background picture on the sign-in screen option.
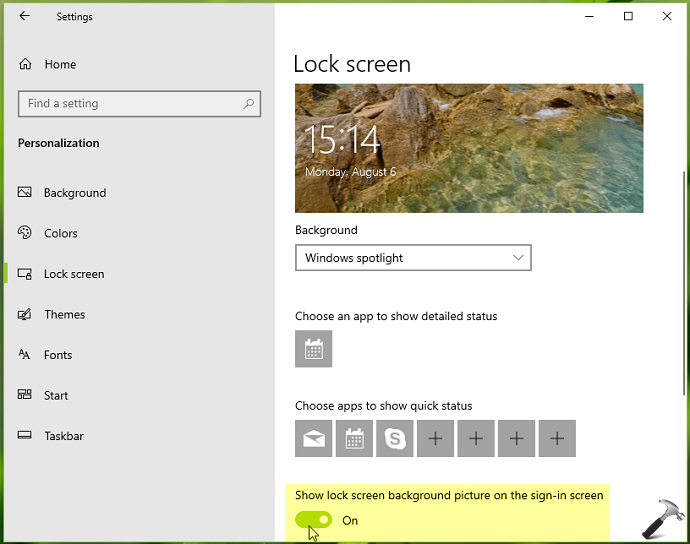
Close Settings app and reboot to check. After restart you’ll find that login screen background is Windows Spotlight image.
You can alternatively perform below mentioned registry tweak, if Settings app not working for you.
WAY 2 – Via Registry
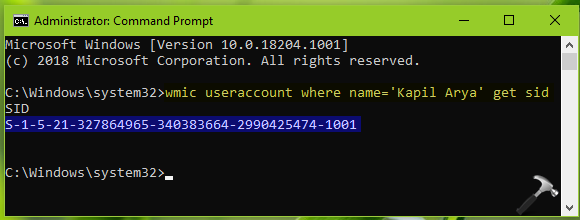
1. Right click on and select Command Prompt (Admin). In the administrative Command Prompt window, type following command:
wmic useraccount where name='<USERNAME>' get sid
* Replace <USERNAME> with your actual user account name.
Once command is executed, note down the security identifier (SID).
Registry Disclaimer: The further steps will involve registry manipulation. Making mistakes while manipulating registry could affect your system adversely. So be careful while editing registry entries and create a System Restore point first.
2. Press + R and put regedit in Run dialog box to open Registry Editor (if you’re not familiar with Registry Editor, then click here). Click OK.
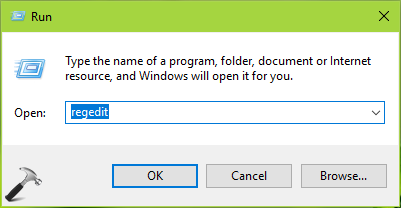
3. In left pane of Registry Editor window, navigate to following registry key:
HKEY_LOCAL_MACHINE\SOFTWARE\Microsoft\Windows\CurrentVersion\SystemProtectedUserData\<USER ACCOUNT SID>\AnyoneRead\LockScreen
* Replace <USER ACCOUNT SID> with your actual user account SID, you got in step 1.
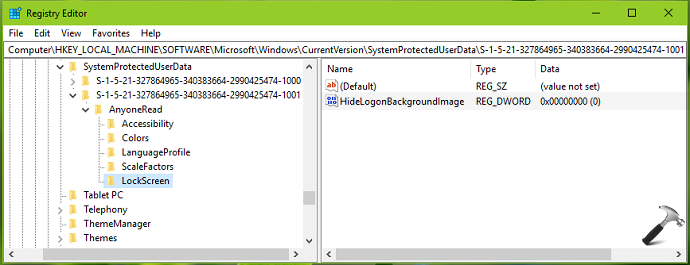
4. In right pane of LockScreen registry key, right click and select New > DWORD Value. Name the newly created registry DWORD (REG_DWORD) as HideLogonBackgroundImage. Since you just created the registry DWORD, its Value data is already 0, which is required to have Windows Spotlight image as sign-in screen background.
5. Close Registry Editor and reboot to make changes effective.
That’s it!