For taking full control of files and folders in Windows 11, the users can add the option of Take Ownership in their context menu. This helps in solving any kind of problem that may arise related to ownership of of files and folders. These issues may include accessing files/folders from old Windows versions, copying files from different system but not having the necessary permissions. Thus, this article consists of the main ways which will allow the users to add Take Ownership option to their right-click context menu.
Page Contents
Add Take ownership to right-click context menu in Windows 11
There exists various ways using which the users can add Take Ownership to their context menu and take ownership of file, folder and registry key. Now, let us check all these methods in details.
Method 1: Using Registry Editor
The foremost and easiest way for adding Take Ownership to context menu is through changing the Registry Editor. Follow the steps below for doing the same.
Step 1- Firstly, press Win + R and open the Run dialog box.
Step 2- Next, write the prompt below and press Enter. The Registry Editor will open.
regedit
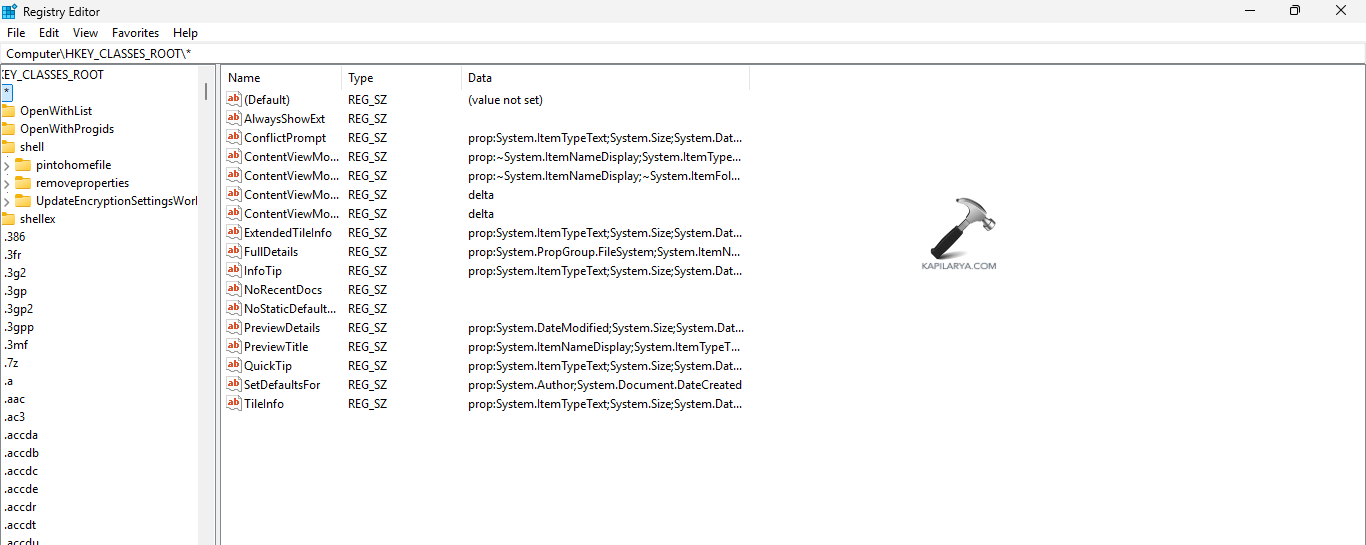
Step 3- Now, in the Registry Editor go to the path below.
HKEY_CLASSES_ROOT\*
Step 4- However, for adding the option to folders in place of files, go to-
HKEY_CLASSES_ROOT\Directory
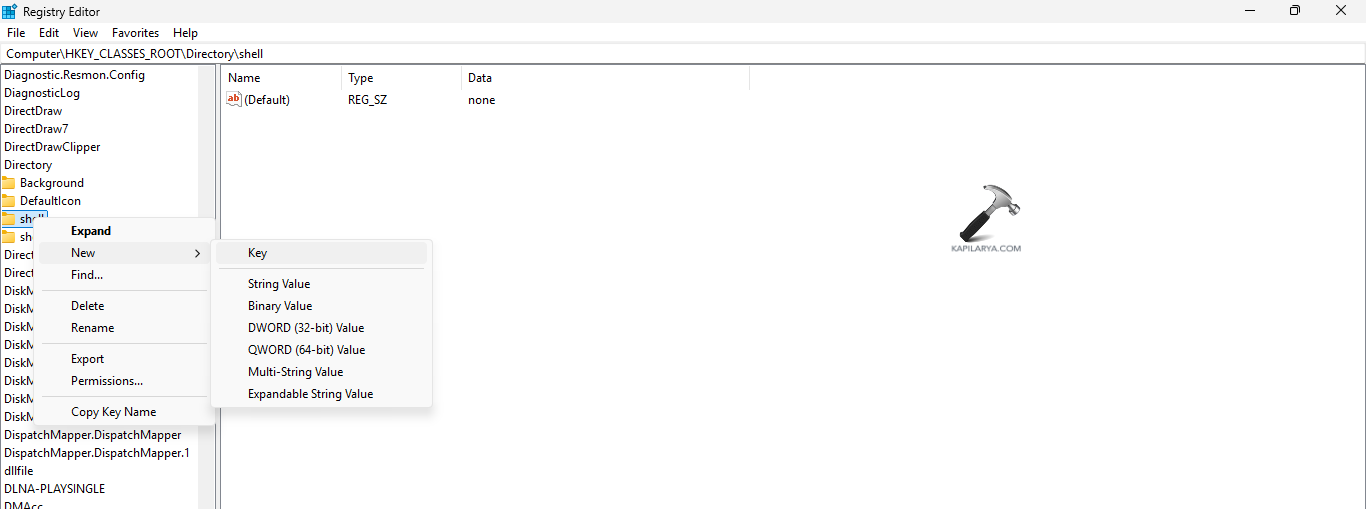
Step 5- Inside the selected path, right-click the shell key. Thereafter, select New > Key and name it as TakeOwnership.
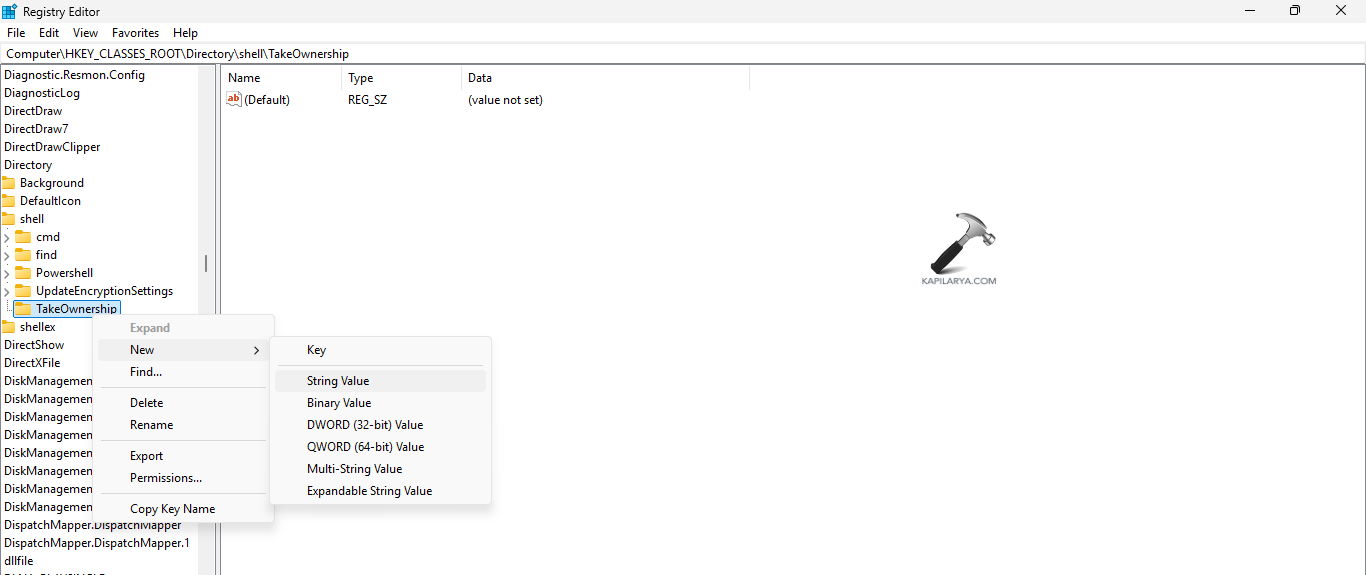
Step 6- Further, in TakeOwnership create a new String Value. Name it “MUIVerb”. Set the value to Take Ownership.

Step 7- Create one more String Value and name it “Icon”. Set its value to imageres.dll, -78. This is done for modifying the icon display. Users can avoid this step if not required.
Step 8- Create a new key in TakeOwnership. Name the key as command.
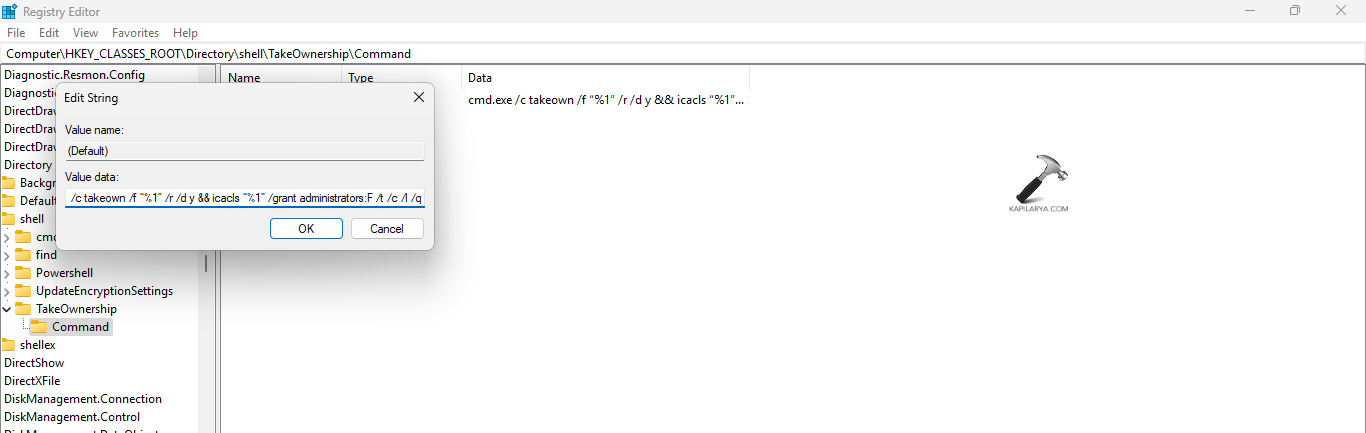
Step 9- Set the Default value of command to the value provided below and exit the Registry Editor.
cmd.exe /c takeown /f “%1” /r /d y && icacls “%1” /grant administrators:F /t /c /l /q
Step 10- Thereafter, go to Task Manager > Windows Explorer. Right-click it and select Restart.
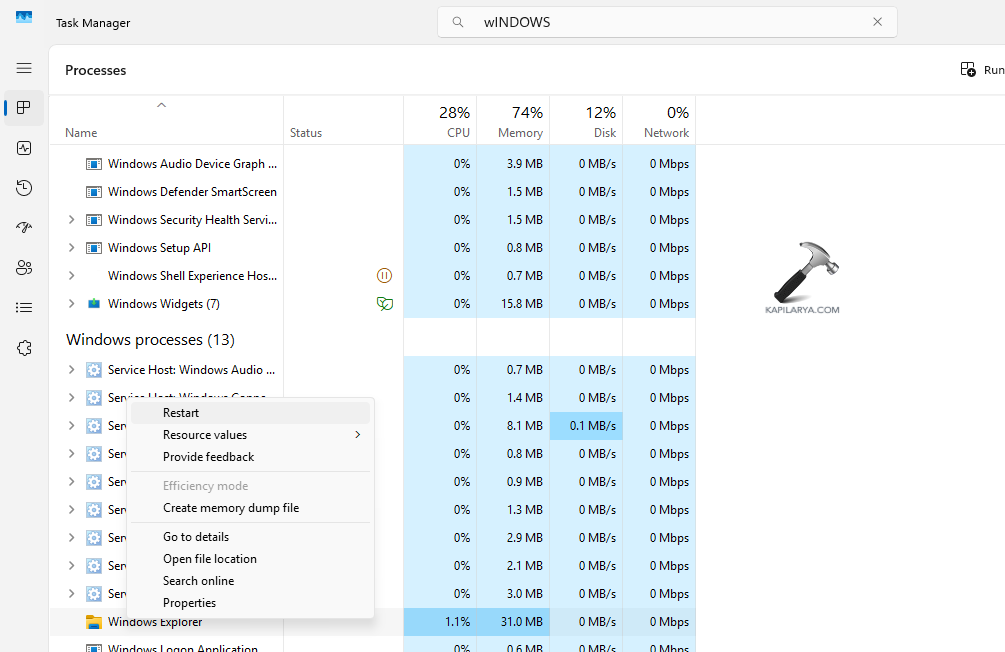
Step 11- Finally, take Ownership options should appear on right-clicking a file or folder.

Method 2: Using Folder Properties
The users can also try changing folder properties for adding Take Ownership.
Step 1- At first, right-click the required file/folder and select Properties.

Step 2- Next, visit Security tab and select Advanced.

Step 3- Now, beside Owner, select Change. A new window will appear.
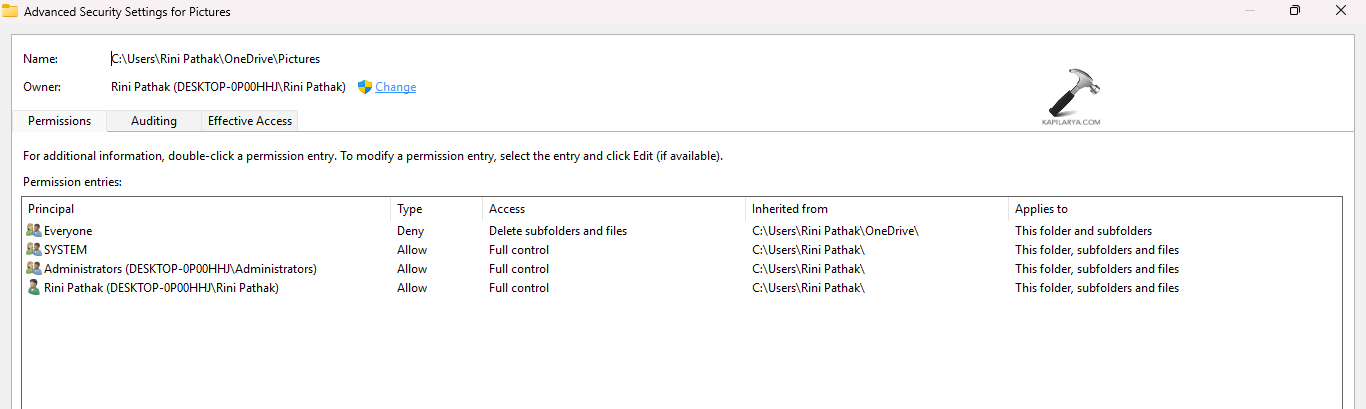
Step 4- Here, in the Enter the object names to select, write Administrator. Thereafter, press Check Names > Ok. This will change the Owner to the previous name of the admin account.

Step 5- Select Replace owner on sub containers and objects > Apply. Lastly, press Ok and close the window.

Method 3: Using Command Prompt
To add Take Ownership using Command Prompt, follow the instructions below.
Step 1- Primarily, run Command Prompt as an administrator.
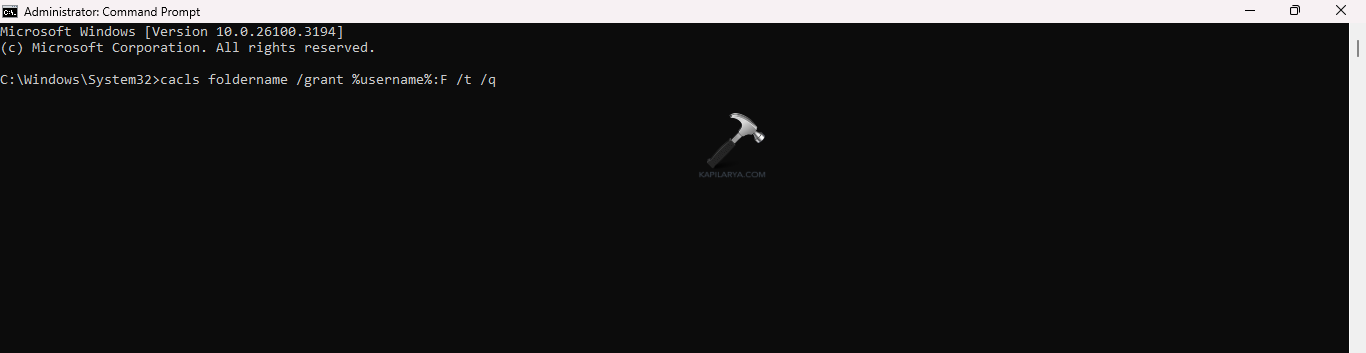
Step 2- Next, run the command given below. Here, change the folder name with the folder wanting to take ownership of.
takeown /f foldername /r /d y

Step 3- For giving ownership to a specific user, run the command-
cacls foldername /grant %username%:F /t /q
Step 4- Lastly, for giving full permission to the Administrator, run the command below-
icacls full_folder_path /grant administrators:F /t

Removing Take Ownership from Context Menu
The Take Ownership option might also posses certain safety concerns. That is why it is not the default option. Therefore, for removing Take ownership from context menu, follow the steps below.
Step 1- At first, open the Registry Editor.
Step 2- Next, go to the path given below-
HKEY_CLASSES_ROOT\*\shell\TakeOwnership
Step 3- Again, right-click the TakeOwnership key and press Delete. Confirm the process of deletion.

Step 4- Lastly, restart Windows Explorer and check if the Take Ownership is removed.
That’s it!