
In Windows 11, users receive an alert from the system, apps or other senders by default. When these notifications arrive, a sound gets played. Now, there is an option to turn on or off these sounds on your Windows PC. In this post, learn how to enable/disable notification sounds in Windows 11 using different methods.
So, let’s begin!
Page Contents
Enable/disable notification sounds in Windows 11
Method 1 – Turn on/off notification sounds for all senders through Settings
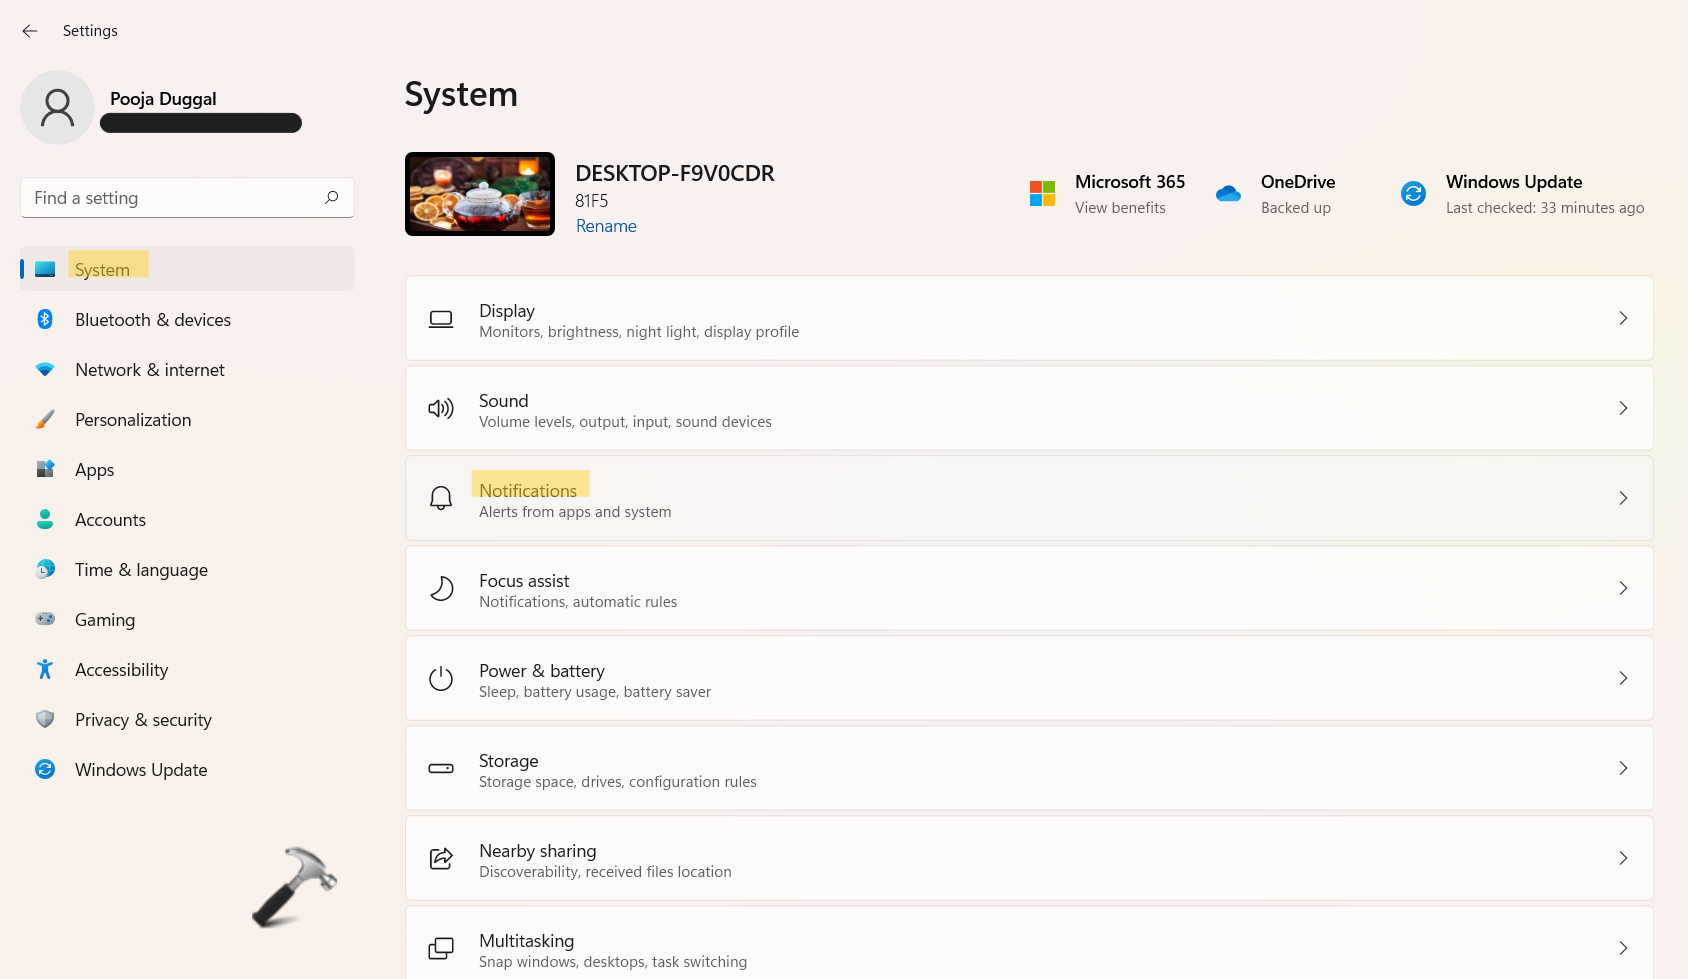
1. Open Settings by pressing the Windows + I tabs together on your keyboard and go to the System tab. After that, click on Notifications present on the right side.
2. Expand the Notifications tab. From there, you can enable or disable the settings by toggling the switch. Check the box present next to Allow notifications to play sounds to enable notification sounds.
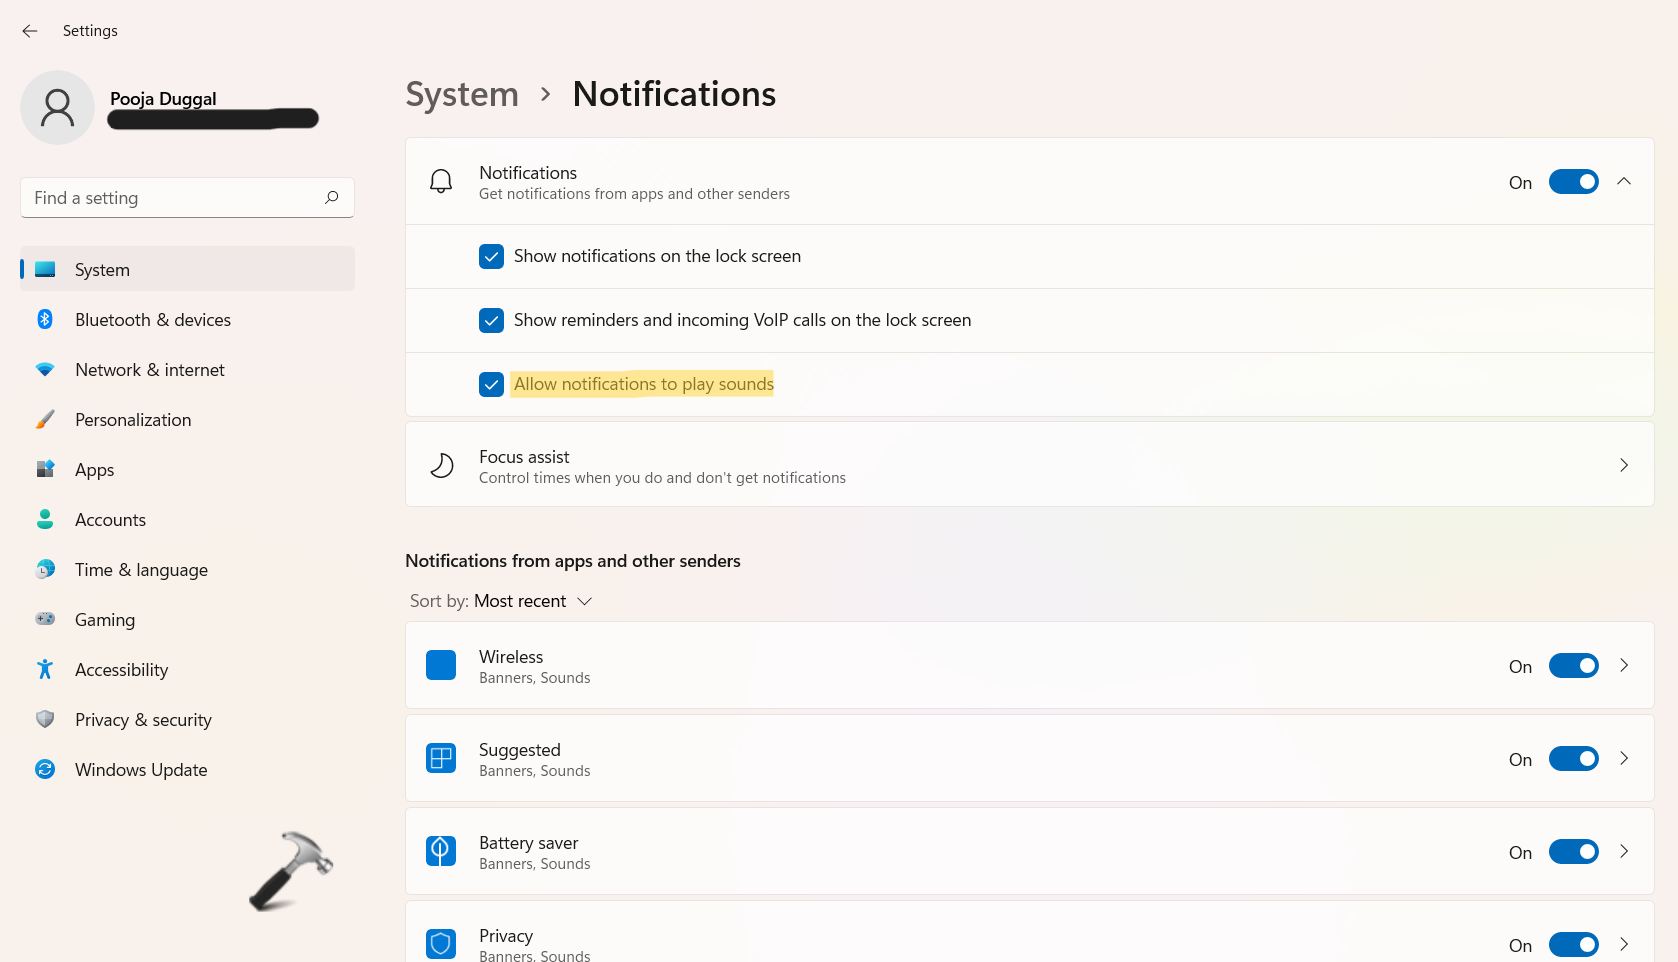
Or else, disable it by unchecking the box.

3. Close settings now.
Method 2 – Turn on/off notification sounds for specific senders through Settings
1. Open Settings by pressing the Windows + I tabs together on your keyboard and go to the System tab. After that, click on Notifications present on the right side.
2. Now, click on the application or sender present under Notifications from apps and other senders. Once done, you will come across the notification settings.
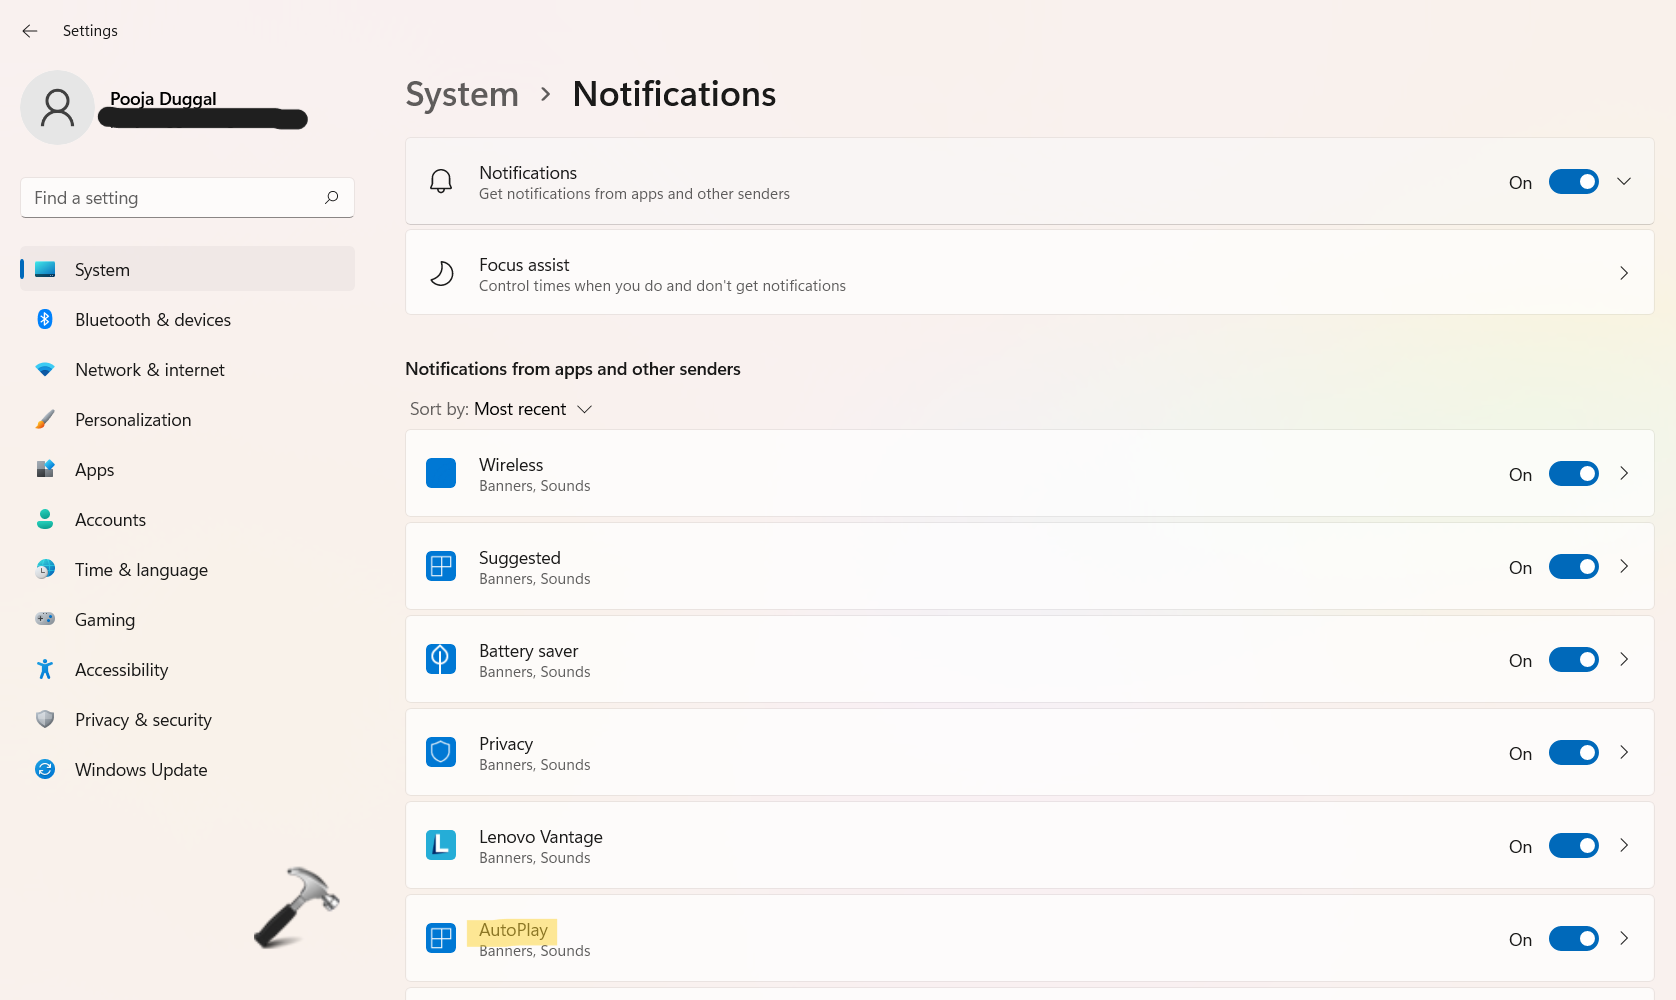
3. Next, enable or disable notification sounds by turning on or off Play a sound when a notification arrives.
4. Close settings now.
Method 3 – Turn on/off notification sounds for all senders through Registry Editor
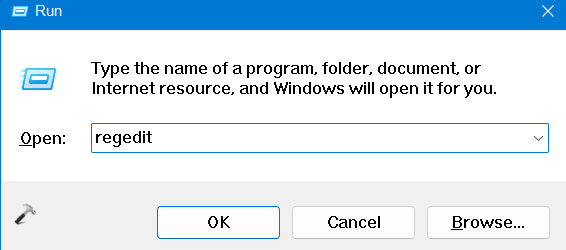
1. In the first place, you need to open the Run dialog box. For this, press the Windows + R keys simultaneously on your keyboard. Once opened, type regedit in the Run dialog box. Press Enter to open Registry Editor.
2. After that, navigate to the following location:
HKEY_CURRENT_USER\Software\Microsoft\Windows\CurrentVersion\Notifications\Settings
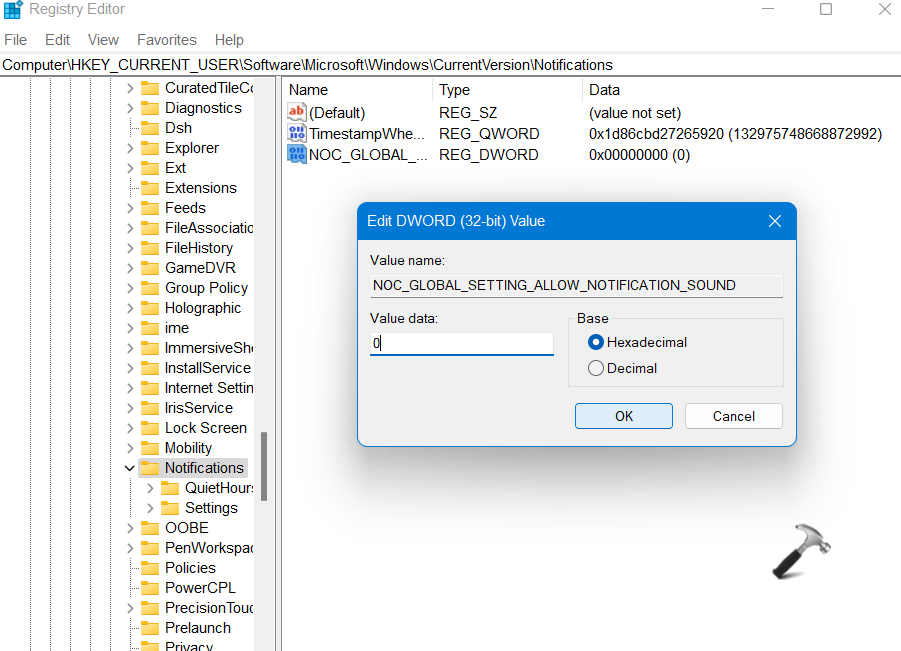
3. Once there, double-click on the NOC_GLOBAL_SETTING_ALLOW_NOTIFICATION_SOUND REG_DWORD and change its value data to 0. This will disable notification sounds in Windows 11.
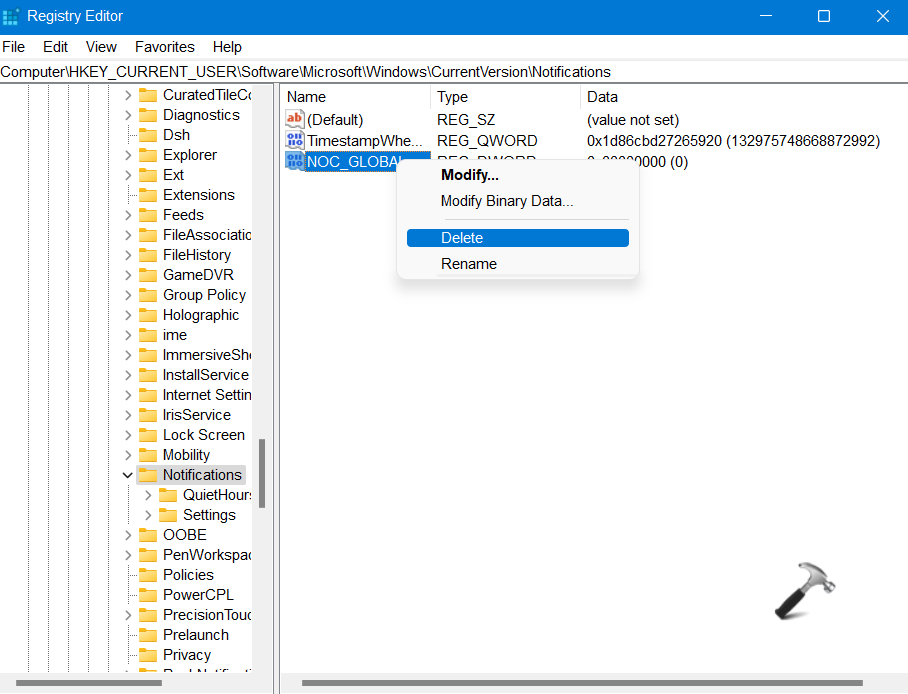
Or else, delete the NOC_GLOBAL_SETTING_ALLOW_NOTIFICATION_SOUND REG_DWORD by right-clicking on it. This will enable notification sounds for all senders.
4. Lastly, close Registry Editor.
Method 4 – Turn on/off notification sounds for specific senders through Registry Editor
1. Open the Run dialog box. For this, press the Windows + R keys simultaneously on your keyboard. Once opened, type regedit in the Run dialog box. Press Enter to open Registry Editor.
2. After that, navigate to the following location:
HKEY_CURRENT_USER\Software\Microsoft\Windows\CurrentVersion\Notifications\Settings
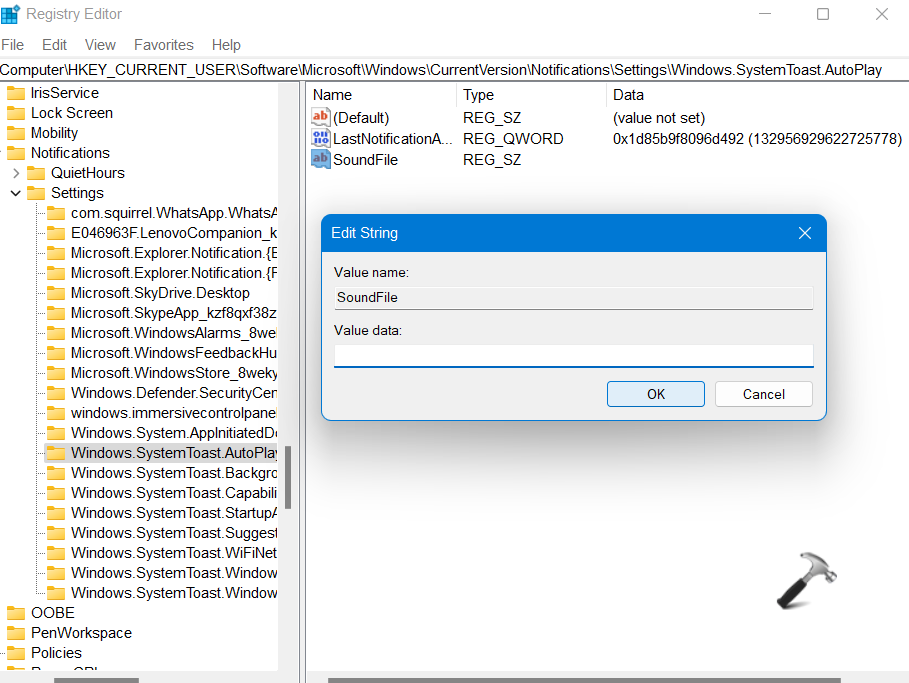
3. Once there, click on the Settings key and select the app or sender you like to enable or disable notification sounds for.
4. Now, double-click on the SoundFile REG_SZ and leave its value data blank. Once done, press OK. This will disable notification sounds in Windows 11.
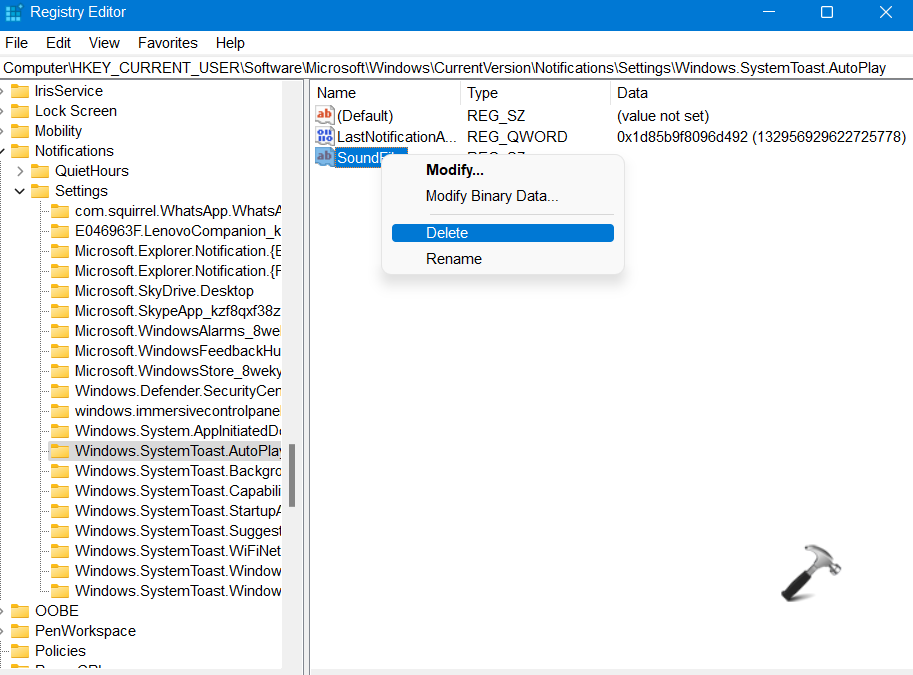
Or else, delete the SoundFile REG_SZ by right-clicking on it. This will enable notification sounds for that specific sender.
5. Lastly, close Registry Editor.
So, this is how you can enable/disable notification sounds in Windows 11.
Related: Hide content when notifications are on Windows 11 lock screen.


