
In Windows operating systems, there are many type of hosts and processes. They are running in background without your consent and can be identified or located via Task Manager.
Page Contents
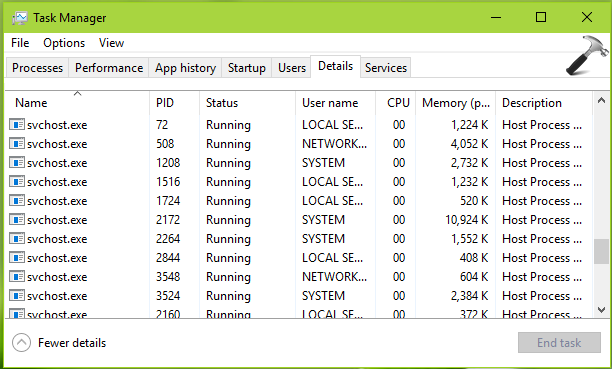
FAQ: What Is Service Host (svchost.exe) In Windows 10?
On Windows 10, Service Host or svchost.exe is the host under which multiple services (with their PID) can run. If there are multiple services which require use of same resources, they’re usually coupled to share same host, in order to reduce overload on machine.
According to Microsoft, ‘Service Host is a shared-service process that serves as a shell for loading services from DLL files‘. This host file can be located at %systemroot%\System32\Svchost.exe.
With Windows 10 V1703, Microsoft restructured Service Host to host only one process rather than grouping of processes. So if your system RAM is more than 3.5 GB (3486 MB or more), Service Host will not group some of the services. On systems with RAM lesser than 3.5 GB, Service Host will continue grouping services.
The consequence of this can be observed as high disk/CPU/memory usage on some of the machines. So if you’re facing the high resource usage with Service Host, you can try below mentioned fixes.
FIX: High Disk Usage By Service Host (svchost.exe) In Windows 10
FIX 1 – General Suggestions
1. Run the System File Checker scan or run DISM commands to repair inbox corruption.
2. Run System Performance troubleshooter.
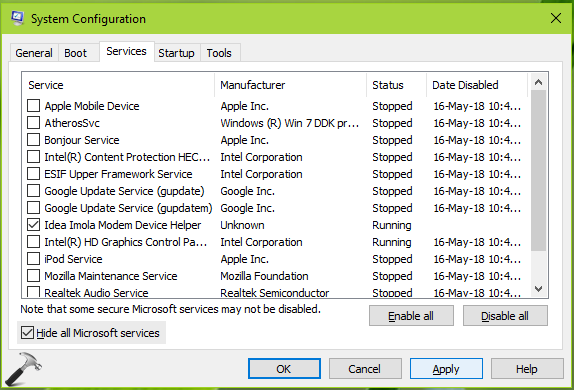
3. Try clean boot. Just run msconfig command, go to Services tab and check Hide all Microsoft services and then hit Disable all button. Reboot and check the status of issue. Do this step-wise, for each programs, one-by-one disable the corresponding services and keep checking, see if the issue resolves.
FIX 2 – Via Registry
1. Press  + X or right click on Start Button and select System.
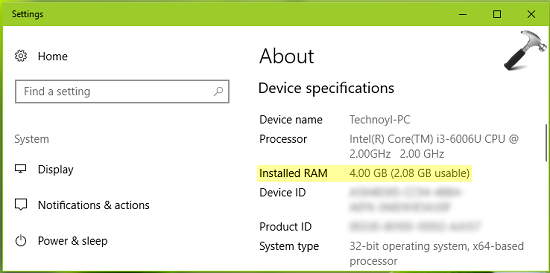
2. This should display your device specifications. Note down the amount of Installed RAM.
Registry Disclaimer: The further steps will involve registry manipulation. Making mistakes while manipulating registry could affect your system adversely. So be careful while editing registry entries and create a System Restore point first.
3. Press + R and put regedit in Run dialog box to open Registry Editor (if you’re not familiar with Registry Editor, then click here). Click OK.

4. In left pane of Registry Editor window, navigate to following registry key:
HKEY_LOCAL_MACHINE\SYSTEM\CurrentControlSet\Control
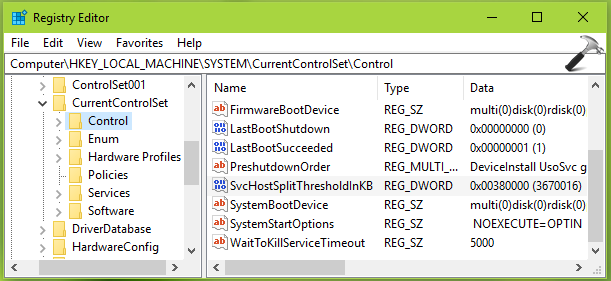
3. In the right pane of Control registry key, look for SvcHostSplitThresholdInKB named registry DWORD (REG_DWORD), whose default value is set to 380000. Double click on the DWORD to modify its Value data:
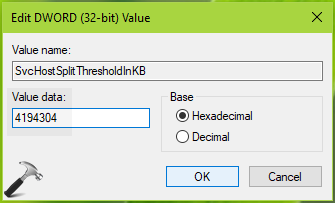
4. Put the Value data equals to installed RAM amount (in KB) on your system. Use the reference of Installed RAM amount we got in step 2. So if installed RAM is 4GB, you’ve to put 4x1024x1024=4194304. Click OK. Close Registry Editor and reboot the machine.
After restarting your system, you’ll find that high disk usage by Service Host is reduced now.
Hope this helps!


![SecurityHealthSystray.exe High CPU / Disk / Memory Usage [Fixes]](https://www.kapilarya.com/assets/Windows-Defender-768x669.png)

its Ram X 1024 X 1024 in decimal value, not hexadecimal