Sometimes, Windows 11 may show the error message of The exception breakpoint has been reached. This may occur while opening various games, browsers, shutting the PC without closing the program, etc. This issue may be a result of various causes such as memory leaks, older version of Windows, corrupted device, etc. Thereafter, this guide consists of all the fixes which will help the users to solve the error of The exception breakpoint has been reached easily.
Page Contents
Fix: The exception breakpoint has been reached error
The main fixes which will help in fixing the aforementioned issue are described below in detail.
Fix 1: Installing Latest Version of Windows
At first, the users, if using older versions of Windows such as 8, 8.1 or 10, you must download and install the latest version of Windows. This should fix ‘The exception breakpoint has been reached error’.
Fix 2: Updating the Troublesome Application
If the error message is occurring with some particular application, then it may be because of the application being outdated or incompatible with the PC. Thus, updating the respective application can also fix the problem.
Fix 3: Running Disk Checker
Damaged disks may too cause the issue. Thus, for checking and repairing the errors of the drive, we need to run the CHKDSK command. Follow the steps given below to do the same-
Step 1- Primarily, run the Command Prompt as an administrator.
Step 2- Now, copy and paste the prompt given below to run the CHKDSK command and press Enter (replace X: with your system root drive).
CHKDSK /f/r X:
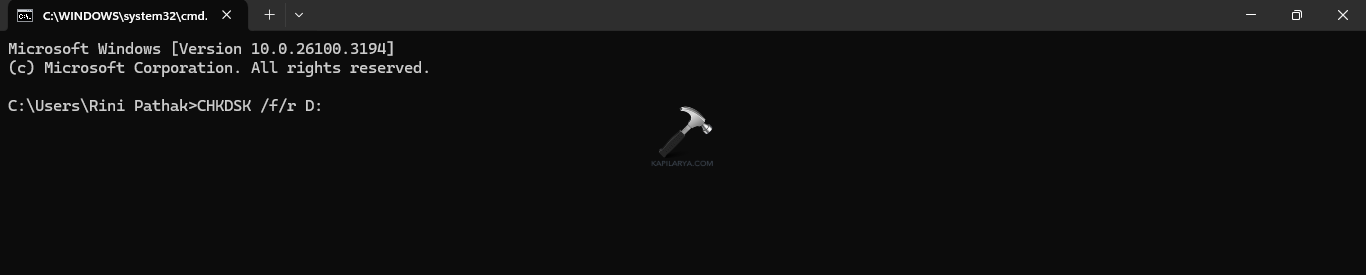
Step 3- Now, the CHKDSK command will scan any error in the system and repair it. Again, if it asks for scheduling a disk check next time, press Y on the keyboard. Thereafter, press Enter and reboot the PC to allow the CHKDSK command to run.
Fix 4: Terminating the program before closing the PC
The users should also consider terminating the application before closing the PC using the steps below.
Step 1- Open Task Manager.
Step 2- Next, choose the app with the problem and select End task.

Step 3- Lastly, restart the PC and see if this solves the breakpoint error.
Fix 5: Setting Page File to Automatic
Allowing Windows to page files automatically can also fix the problem. Follow the steps below for doing the same.
Step 1- Firstly, open Windows Search and write Adjust the appearance and performance of Windows. Open it.
Step 2- Next, in the Performance Options window, go to Advanced tab > Change.

Step 3- Now, select Automatically manage paging file size for all drives and press OK.
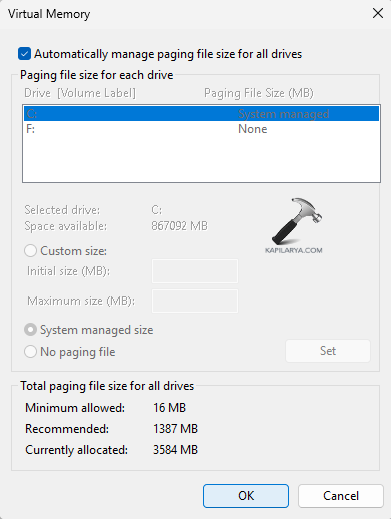
Step 4- Lastly, restart the PC for applying all the changes.
Fix 6: Uninstalling Apps
Uninstalling the problematic application can also solve the problem. Consider following the steps given below for doing that.
Step 1- Go to Windows search and search the respective application.
Step 2- Now select Uninstall.
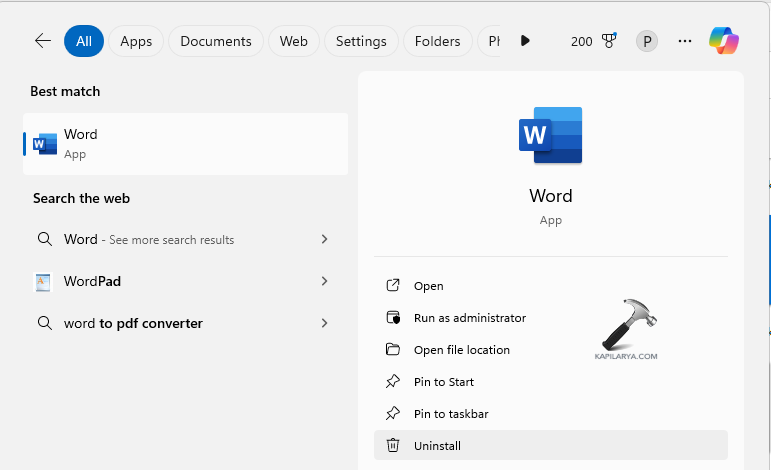
Step 3- Confirm to any further prompts and restart the PC for completing the process.
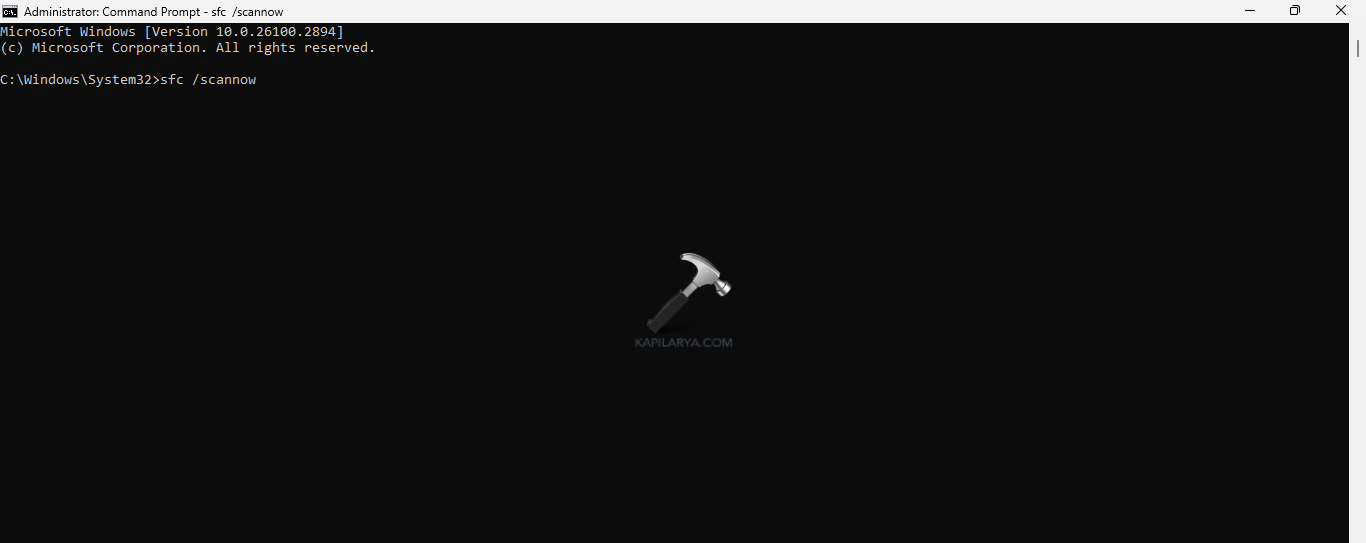
Fix 7: Running SFC and DISM scan
Running a System File Checker scan and a DISM scan can help the users in solving the aforementioned issue easily. Therefore, follow the steps given below to run the SFC and DISM Scan and solve the issue.
Step 1- At first, open Command Prompt and run it as an administrator.
Step 2- Next, copy and paste the prompt given below for running a SFC scan and select Enter.
sfc /scannow
Step 3- Again, to run the DISM tool scan, run PowerShell as an administrator. Then, type the commands given below one by one and press Enter after each command.
Dism /Online /Cleanup-Image /ScanHealth
Dism /Online /Cleanup-Image /CheckHealth
Dism /Online /Cleanup-Image /RestoreHealth
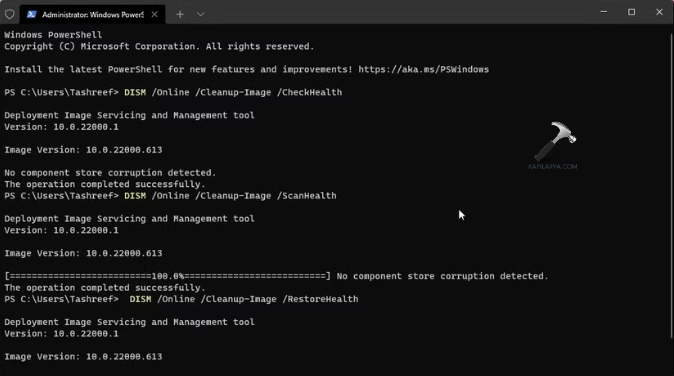
Step 4- Lastly, after the completion of the scan, exit PowerShell and reboot the PC. This should solve the issue.
Fix 8: Disabling Automatic Apps from Startup Items
Startup applications if enabled can be a major reason for the appearance of the issue. Now, disable the apps with the instructions below.
Step 1- Open Task Manager. Next go to Startup.
Step 2- Now, select the applications for starting with the system and click Disable. This will remove the apps from the Startup Items.
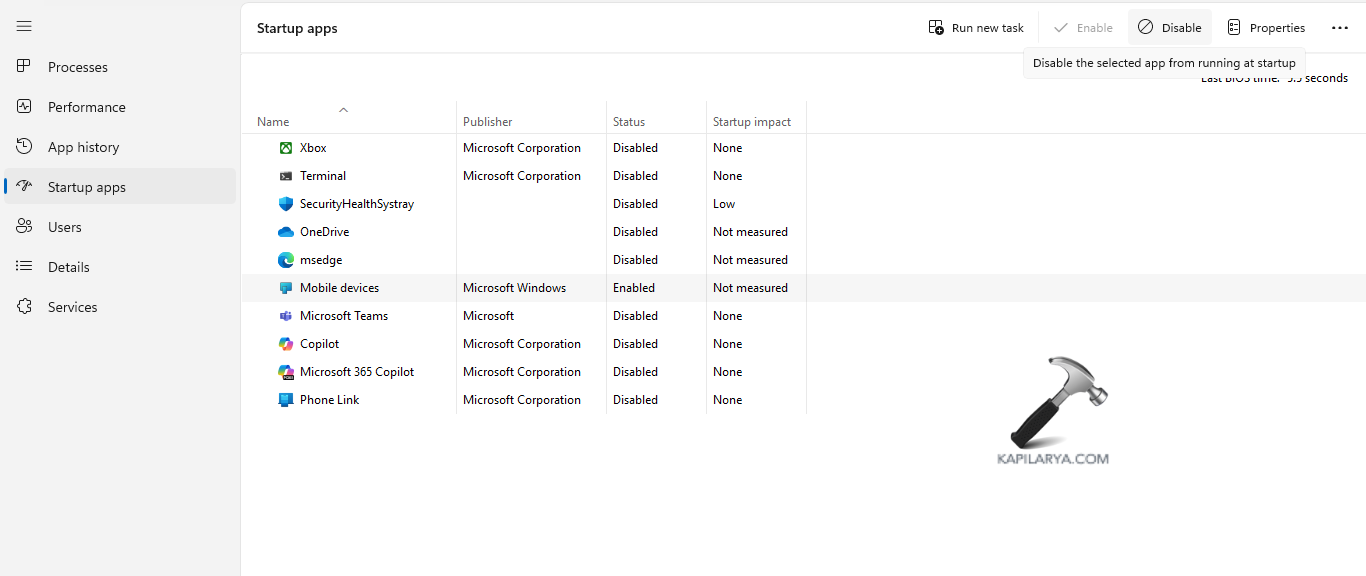
Step 3- Lastly, reboot the PC and see if the error is fixed.
Fix 9: Checking Memory Leaks
Presence of memory leaks in the system might too cause the issue. Check out the steps below for fixing it.
Step 1- Search Windows Memory Diagnostic tool.
Step 2- Open it and select Restart now and check for problems (recommended).

Step 3- After the PC reboots, the tool will scan the PC’s memory. Now, check for Advanced options, like Test mix or Pass count. Click F10 for starting the test.

Step 4- Finally, restart the PC and see if this solves the error.
Fix 10: Creating a new User Profile
Problems with the user account can act as a reason for the issue. Thus, creating a new user profile can help the users in solving the above issue. Follow the steps below for creating a new user profile.
Step 1- At first, login with an admin account or another account.
Step 2- Next, go to Settings > Accounts > Family.

Step 3- Now, in the section of Other users, click Add account / Add someone else to this PC.
Step 4- Further, follow the prompts for setting up a new user account. However, in absence of Microsoft account details, select I don’t have this person’s sign-in information > Add a user without a Microsoft account.
Step 5- Now, select a username and password for the new account and finish the process.

Hoping that this helps!