The Snipping Tool is a powerful yet user-friendly screen capture and screen recording tool that comes preinstalled in Windows 11. However, it isn’t perfect. It may occasionally crash, fail to launch, or cause other screen capture issues. If your Snipping Tool is not working as it should be on your Windows 11/10 computer, follow this guide to fix it.
Page Contents
Fix: Snipping Tool Not Working on Windows 11/10
Method 1: Update Windows
When the Snipping Tool doesn’t work, the first thing Microsoft recommends you do is to update your Windows. If automatic updates are not available, download and install the update number KB5008295 from the Microsoft Update Catalog (https://www.catalog.update.microsoft.com/Home.aspx).
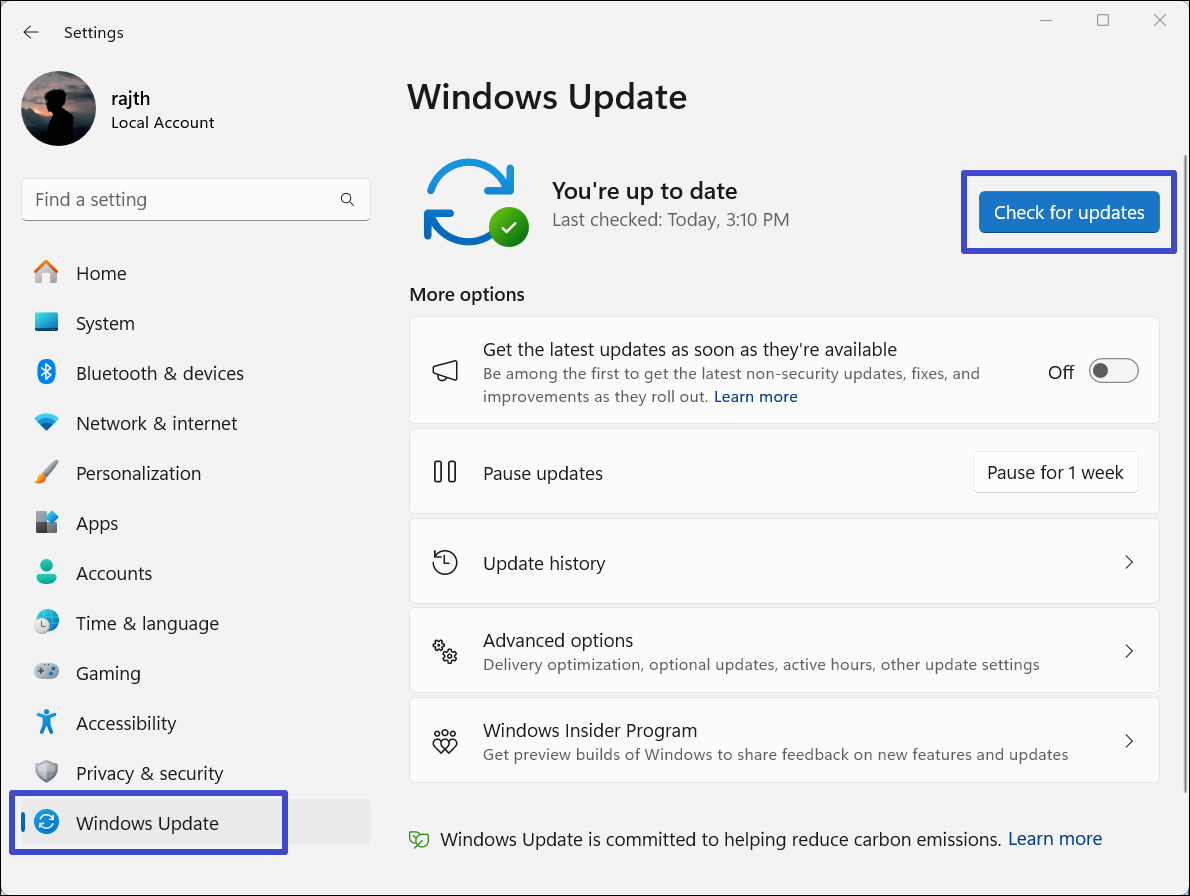
1. Open Windows Settings and go to “Windows Update“.
2. Then, click “Check for updates” to download and install any pending updates.
Method 2: Disable Focus Assistant
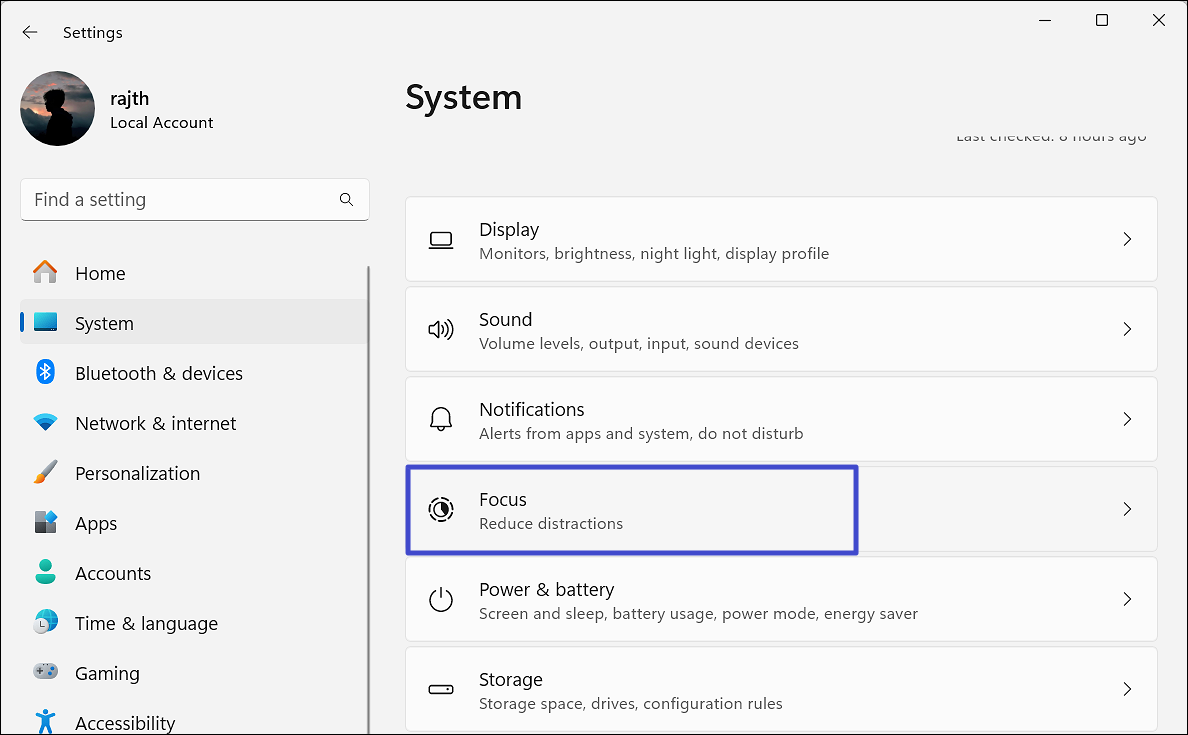
1. Click the Start button and choose “Settings“.
2. In the Settings app, go to “System” and then click on “Focus”.
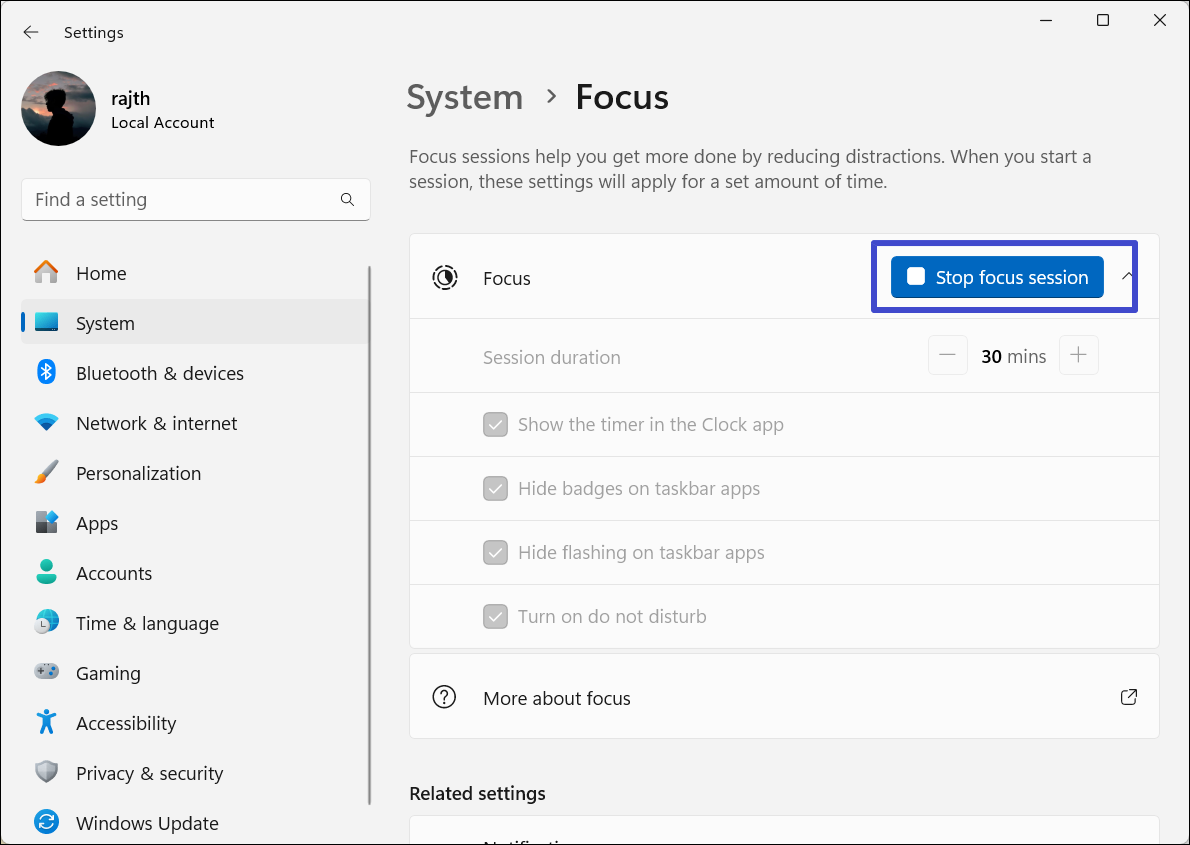
3. If you’re currently in a focus session, click “Stop focus session” to end it.
Method 3: Disable Auto Copy to Clipboard Feature
1. Open the Snipping tool from the Windows Search.
2. In the Snipping Tool window, click the three dots button in the top left corner and select “Settings“.

3. Then, find and toggle off the “Automatically copy changes” option.

Method 4: Open the Snipping Tool from Windows.old folder
When you update or upgrade your Windows, your old Windows files are moved to the Windows.old folder. So, if the newer version of Snipping Tool is not working or crashing, you can try launching the older version of the app from Windows.old folder. Navigate to the C:\Windows.old folder and search for the Snipping Tool. If you find it, pin the tool to your Start menu or desktop and launch it from there whenever you need it.
Method 5: Check ScreenShot Save Destination
The Snipping Tool saves screenshots automatically, but it might not always be obvious where they’re saved. If you think it’s not working properly, then, check the default save location of the Snipping Tool: “C:\Users\Username\OneDrive\Pictures\Screenshots“. Replace the Username with your actual username.
If the screenshots are not saved in the default location, you can check its save location with these steps:
1. Open the Snipping Tool and take a screenshot.
2. Then, click the three dots button and select “Open Screenshot folder“.

Method 6: Enable the Print Screen Key
1. Launch the Snipping Tool.
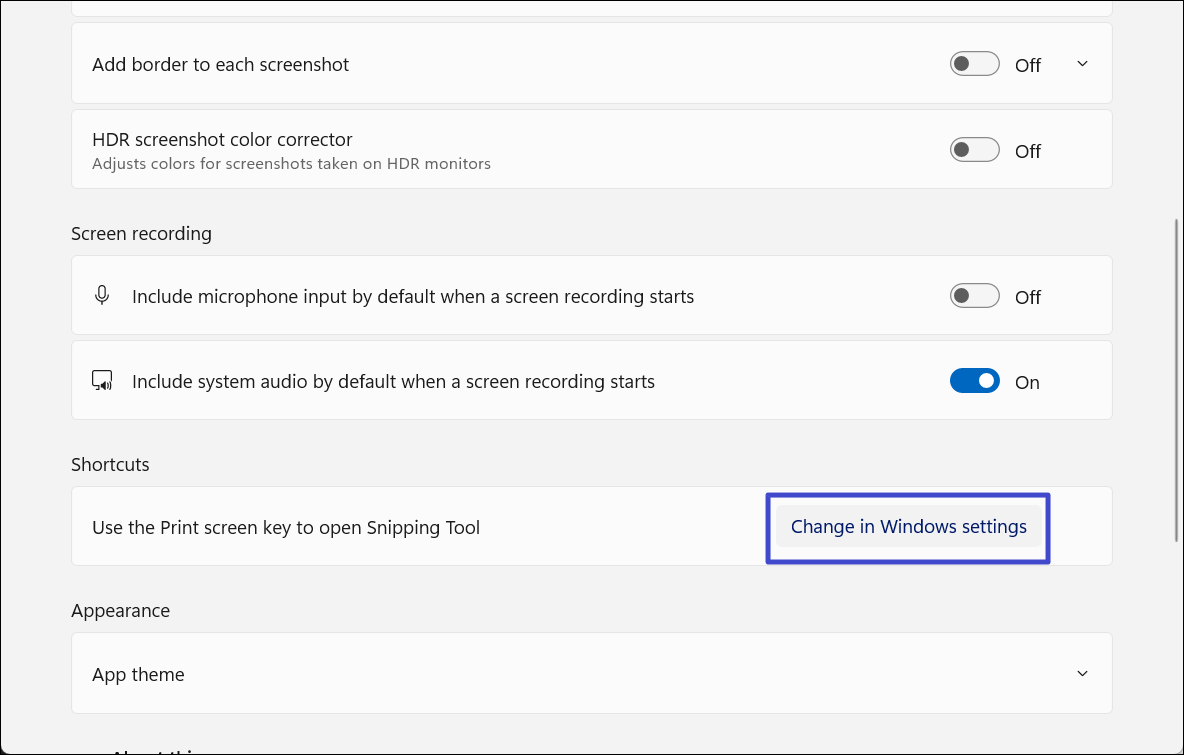
2. Click the three dots button at the top left corner and select “Settings“.

3. In the Settings page, click “Change in Windows settings” next to Use the Print Screen key to open the Snipping Tool.
4. Windows settings will open. Here, find and turn on the “Use the Print Screen key to open screen capture” option.
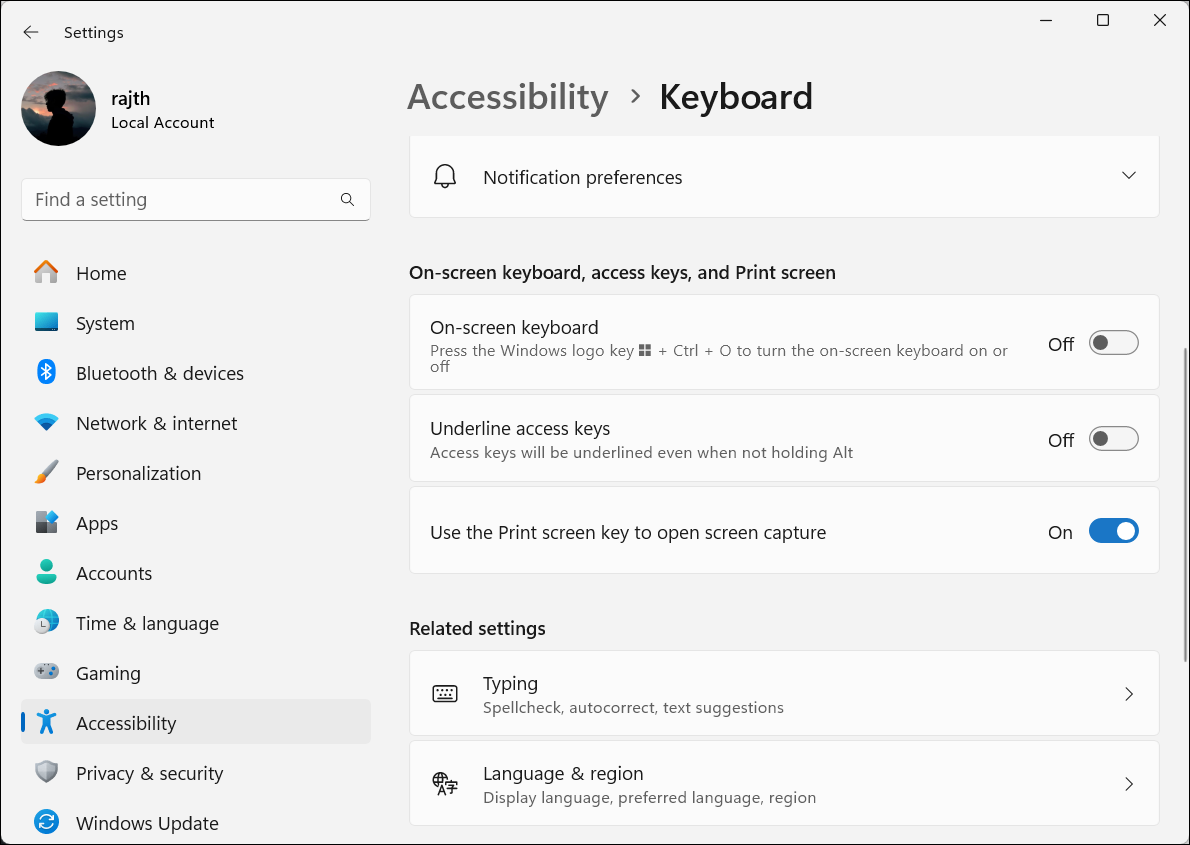
5. Now, whenever you press the PrintScreen key, it will automatically launch the Snipping Tool app.
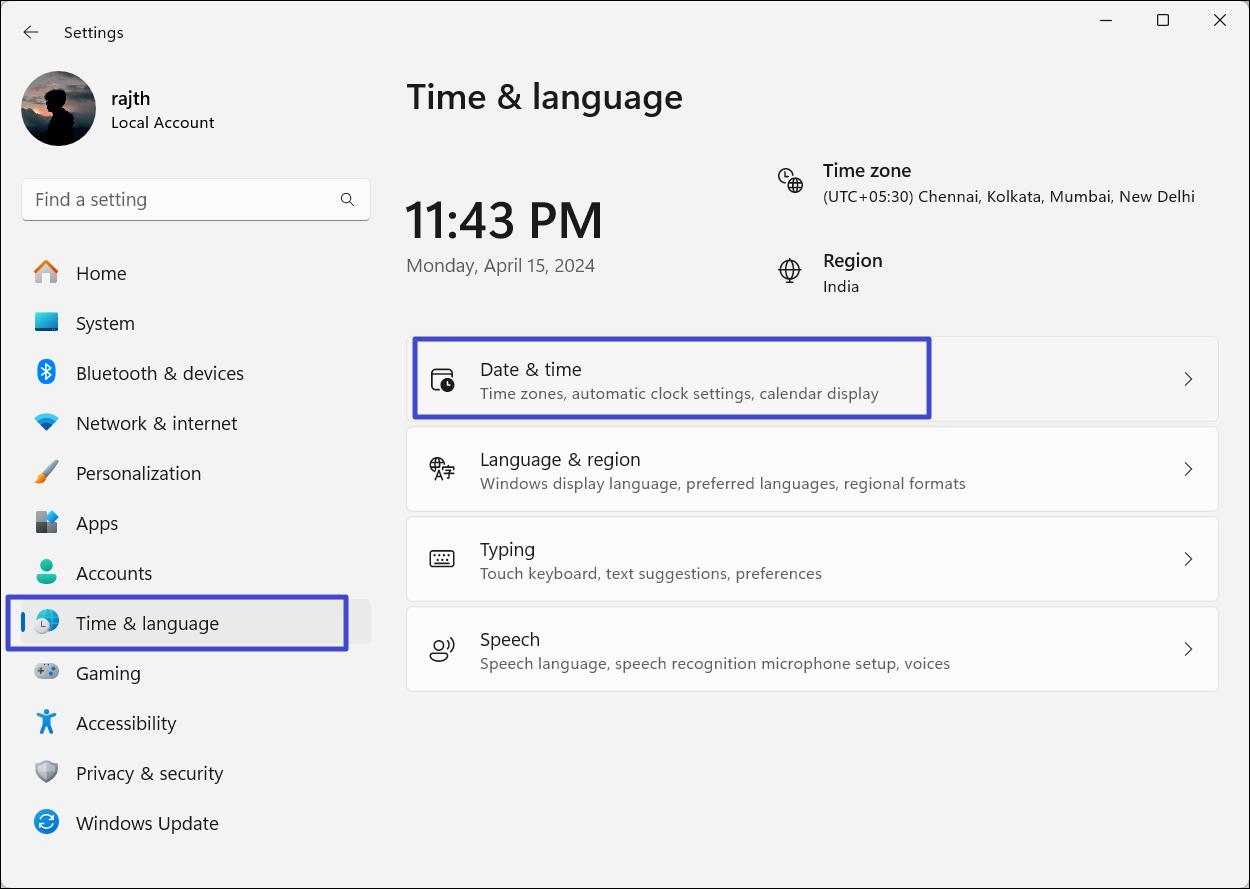
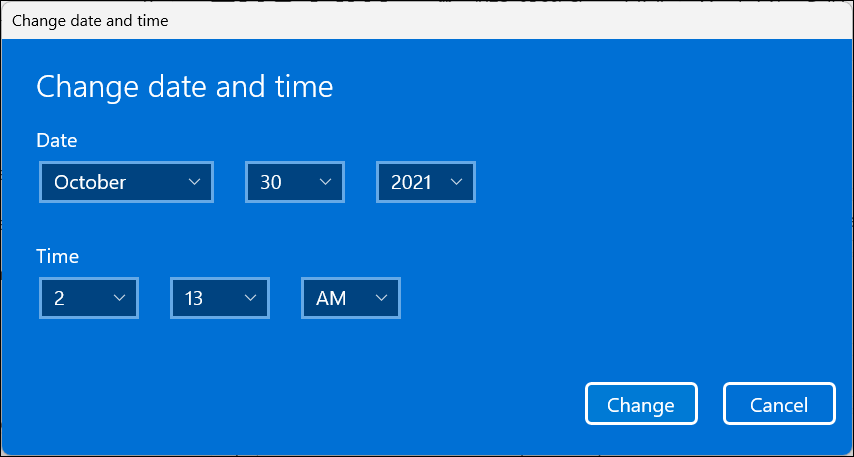
Method 7: Disable Automatic Time Temporarily
1. Open the Windows Settings app and go to Time & language > Date & Time.
2. Under the Date & time, turn off the “Set time automatically“.
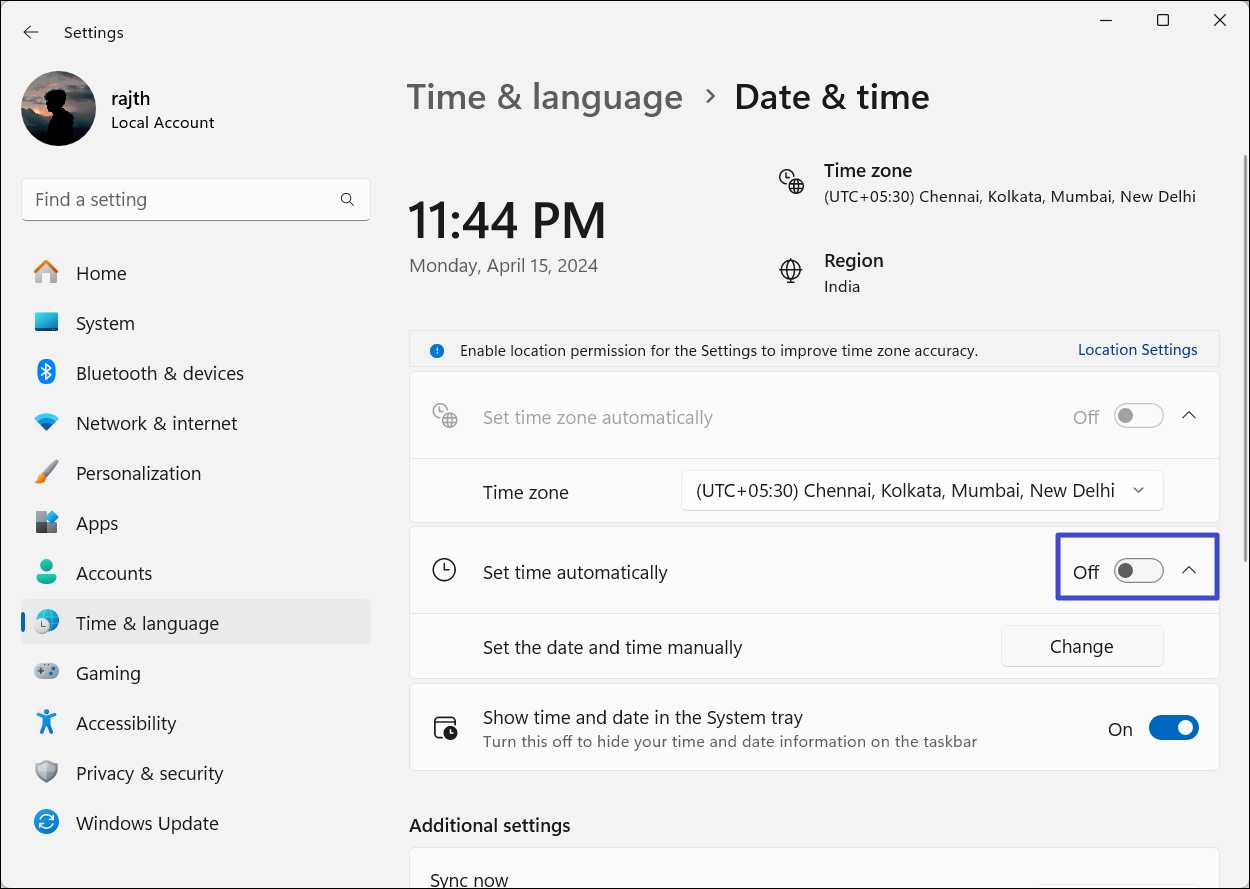
3. Then, click the “Change” button.
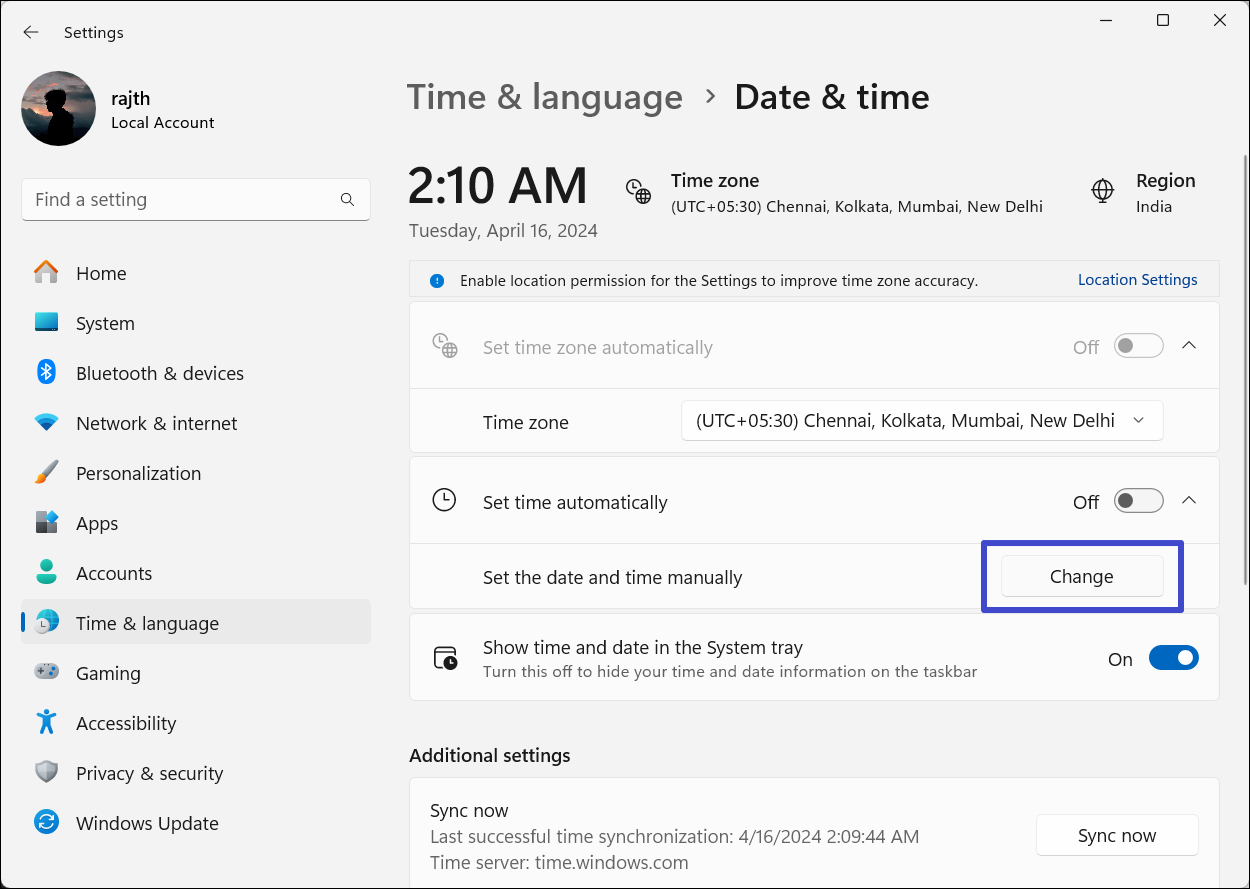
4. In the Change date and time pop-up window, set the date to October 30, 2021 (or earlier), and leave the time as it is. Then, click “Change“.
Method 8: Delete and Reset the App Shortcut
If the Snipping Tool shortcut on your desktop or toolbar doesn’t work, deleting and resetting your app shortcut will probably fix the issue.
1. Click the Start menu and search for “Snipping Tool“.
2. Right-click the app from the result, and select “Pin to taskbar” or “Pin to Start” to create a new shortcut.

Method 9: Perform a Clean Boot
The Snipping tool may crash due to conflicts with third-party programs or drivers. To find the problematic program, you can perform a clean boot in Windows. This temporarily disables non-essential startup programs and services, allowing you to find any program or driver causing the display issue.
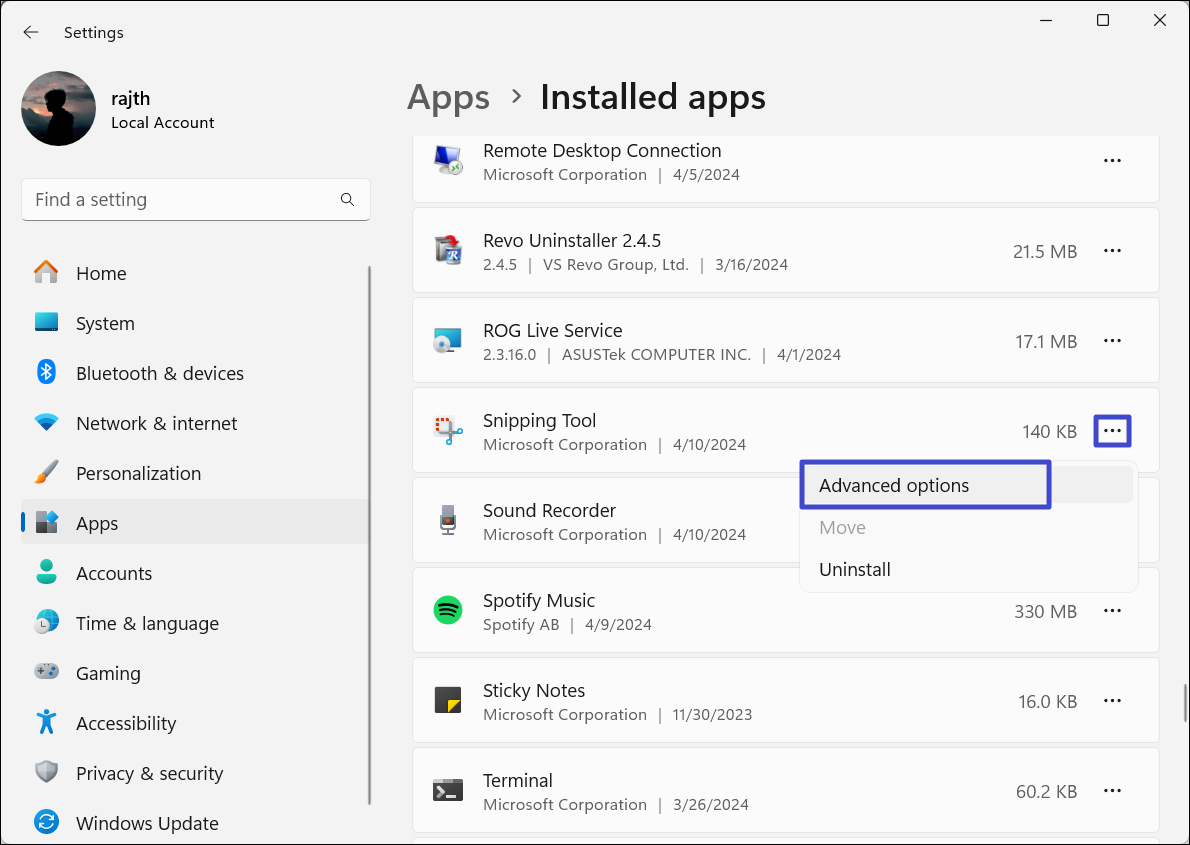
Method 10: Reset the Snipping Tool App
1. Launch Windows Settings app.
2. Go to “Apps” > “Installed Apps“.

3. Scroll down the list of apps, click the three dots next to the “Snipping Tool” and select “Advanced options“.
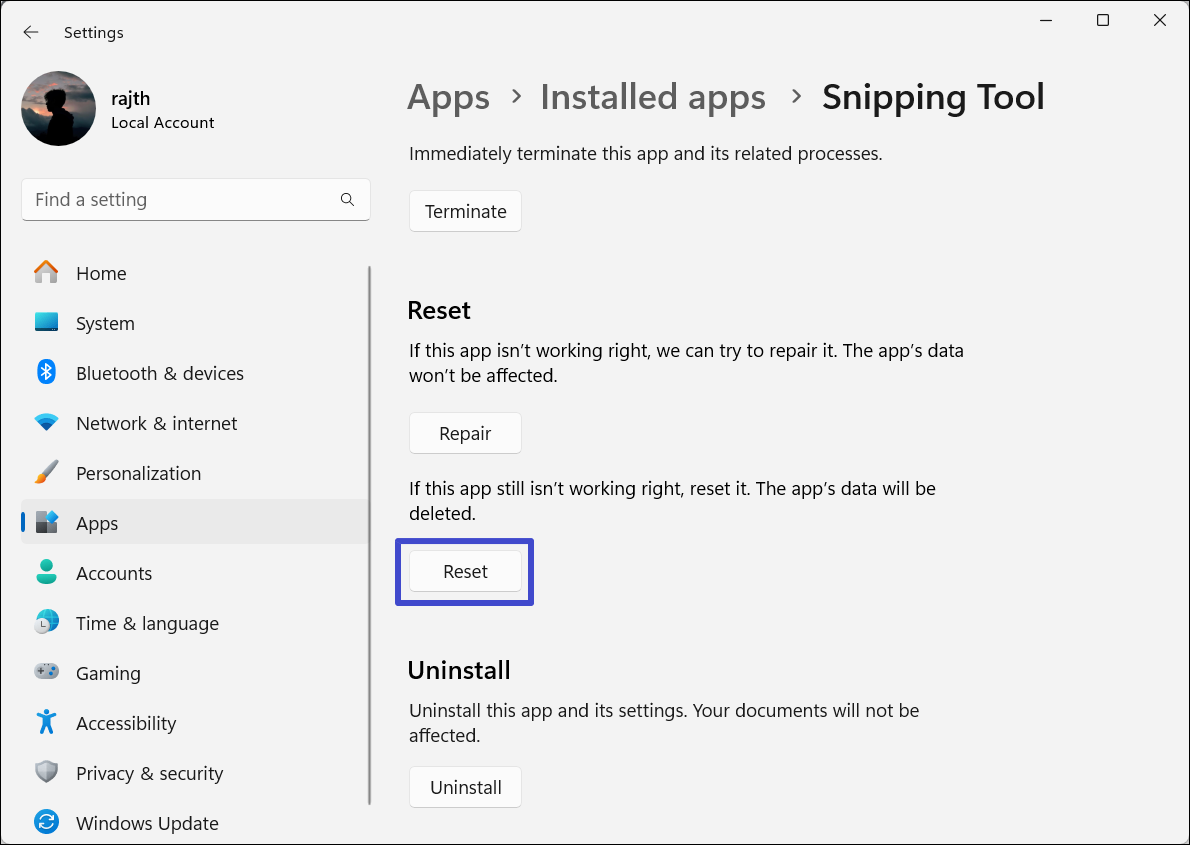
4. In the app settings, click “Reset“.
Method 11: Reinstall the Snipping Tool
1. In the Start menu, search and select the “Add or Remove programs” settings.

2. Click the three dots next to the “Snipping Tool” and select “Uninstall“.

3. Once you uninstall the app, restart your PC.
4. Then, open the Microsoft Store, and reinstall the Snipping Tool app.
Method 12: Use a Snipping Tool Alternative
If you are unable to fix the app after all these methods, you can try using an alternative screen capture tool. Instead of going through the trouble of fixing the Snipping Tool, consider using a more versatile screenshot tool like PicPick, ShareX, etc. These tools offer screenshot and screen recording functionalities with potentially more features.
That’s it.