We all know that Windows previous editions only uses Master Boot Record (MBR) partition style for disks. In Windows 8 or later, you may use GUID Partition Table (GPT) partition style on disk. Though you can still use Master Boot Record (MBR) partition style for disks in Windows 10, but it comes with some limitations.
On Master Boot Record (MBR) partition style disks, you can have maximum of four partitions. When you already have three primary partitions on this type of disk, and if you create fourth partition, it will be automatically created as extended partition. The partition can then used by creating multiple logical drives just like you create partitions on primary disk. If you further try to create partition on MBR disk, you won’t be able to so, because of this error:
Okay, so in the above mentioned case, fourth partition is automatically the extended partition. But, we’re here interested to create extended partition manually. Here’s how you can do that.
How To Create Extended Partition In Windows 10
1. Right click Start Button or press  + X keys and select Disk Management.
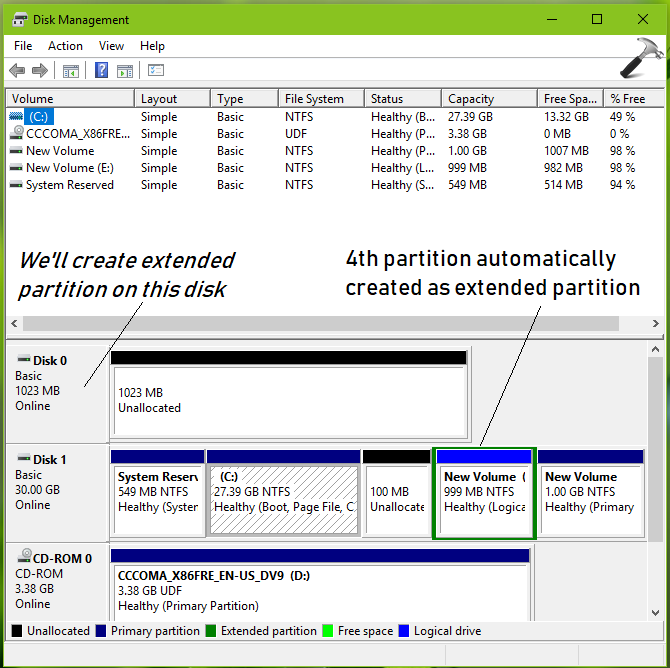
2. In this example, as you can see the Disk Management have two disks i.e. Disk 0 and Disk 1. On the Disk 1, allowed four partitions are already created, where an extended partition automatically created as fourth partition. Now we’ll see how to create extended partition on Disk 0. So open administrative Command Prompt.
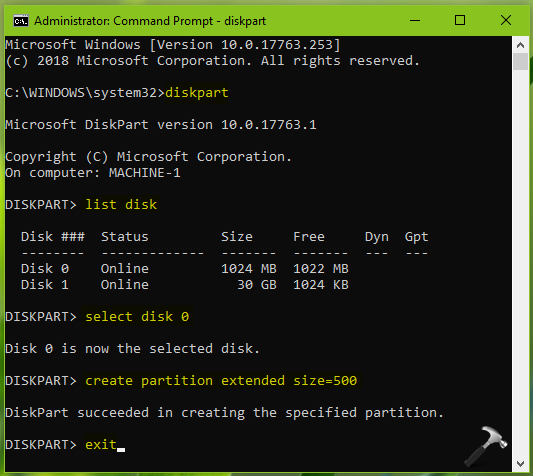
3. In Command Prompt window, type these commands (mentioned in bold) and press Enter key after each:
diskpart
list disk
select disk # Replace # with exact disk number in your case.
create partition extended size=### Replace ### with size of extended partition you want.
* If you remove size parameter in above command, Windows will automatically use all unallocated space in creating extended partition.
exit
4. Close Command Prompt window.
5. Back in Disk Management, you’ll see the extended partition, we just created using Command Prompt.
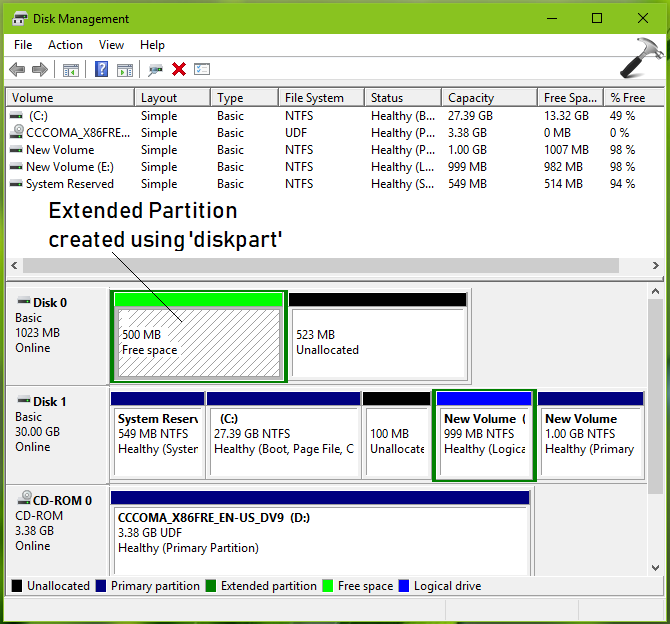
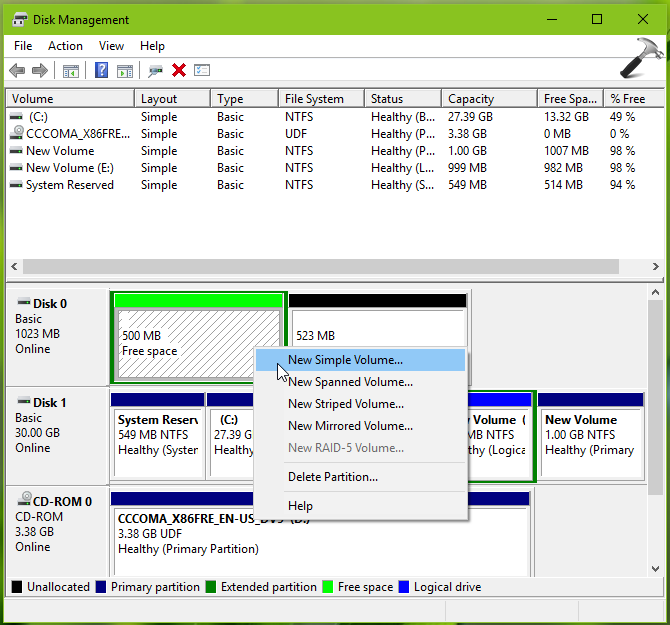
6. Next, to create logical drive on this extended partition, right click on it and select New Simple Volume and follow steps 2-7 of this guide.
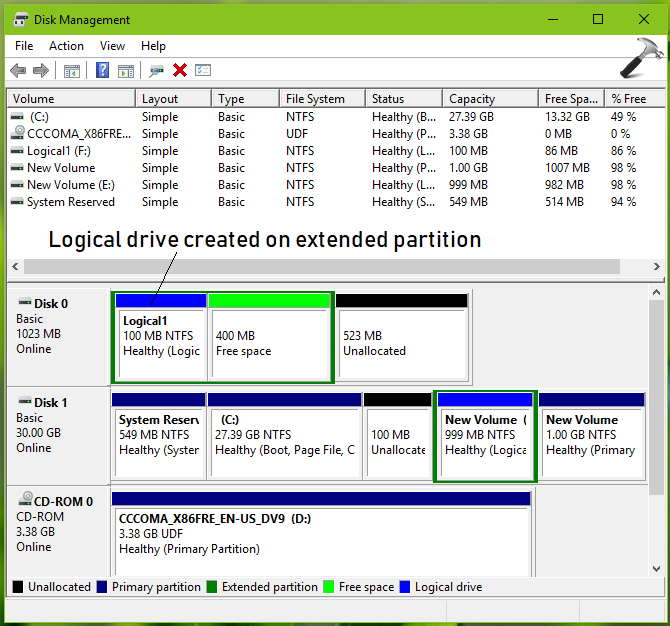
7. Finally, we’ve the logical drive created. The logical partition can be used to install Windows, like the primary partition but you can’t mark the logical partition as active. You can create multiple logical partitions on an extended partition and manage them as separate drives.
So in this way, you create extended partition in Windows.
Hope you find the guide useful!
![Add the Recovery Partition in Windows 11 [2026 Guide]](https://www.kapilarya.com/assets/Disk-768x494.jpg)