If you are looking forward to test any apps on your system without affecting the settings on host machine, Windows Sandbox is perfect feature for you. It will provide you a lightweight desktop environment so that you can safely run applications in complete isolation. Whenever you install any app inside Windows Sandbox, it will always work isolated from the machine and will remain sandboxed for sure. The applications you are using on the host machine will not be available under Windows Sandbox. In this article, you will read how to enable Windows Sandbox in Windows 11/10.
Whatever you do inside a Windows Sandbox session, all the software and files will be lost when you terminate the session. This means whenever you start Windows Sandbox session, it is always a brand new instance. However with Windows 11 build 22509 or later, your data can persist through a restart initiated from inside the virtualized environment. This will be useful for testing applications that require the Windows to reboot so that they can work.
As per Microsoft, following are the requirements for Windows Sandbox feature:
- Windows 10 Pro, Enterprise or Education build 18305 or Windows 11 (Windows Sandbox not supported on Windows Home edition).
- AMD64 or (as of Windows 11 Build 22483) ARM64 architecture.
- Virtualization capabilities enabled in BIOS.
- At least 4 GB of RAM (8 GB recommended).
- At least 1 GB of free disk space (SSD recommended).
- At least two CPU cores (four cores with hyperthreading recommended).
Here’s how to enable Windows Sandbox in Windows 11.
Page Contents
How to enable Windows Sandbox in Windows 11
Method 1: Using Turn Windows features on or off
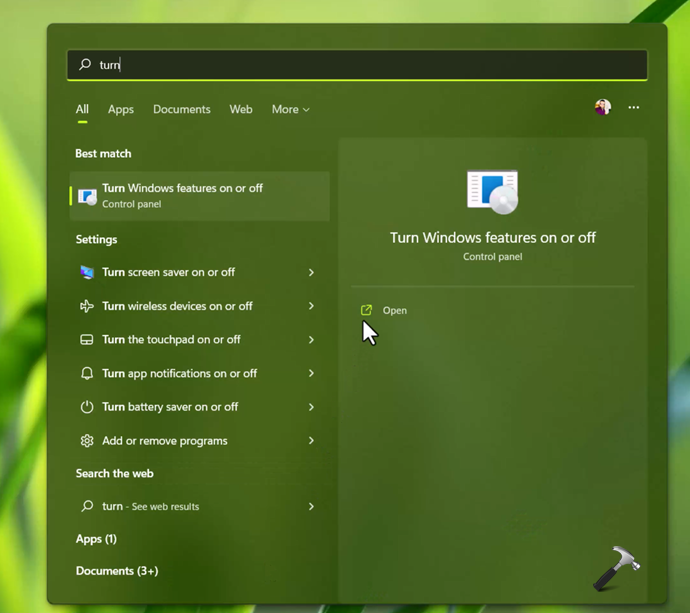
1. Search for Turn Windows features on or off and open it.
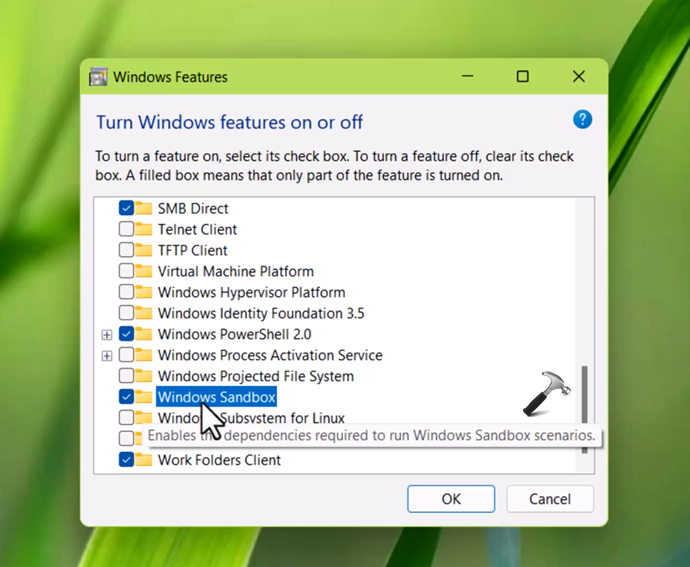
2. Scroll down, locate Windows Sandbox, select that option and click OK.
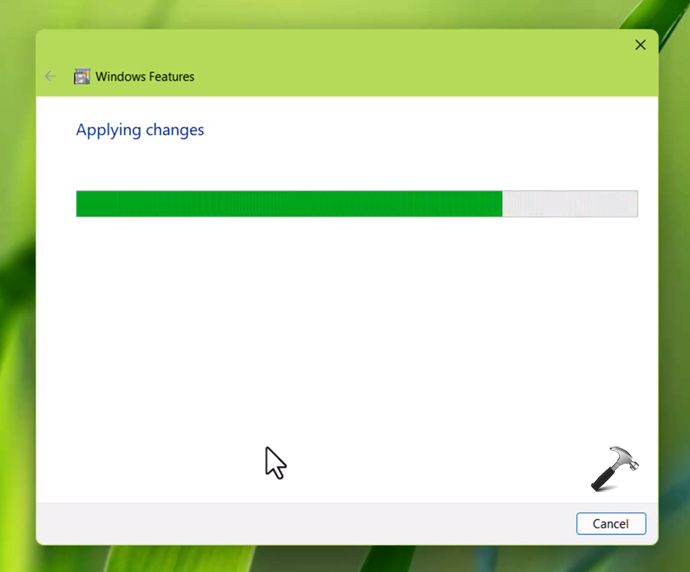
3. Now Windows will start applying changes and it may take a few moments to complete.
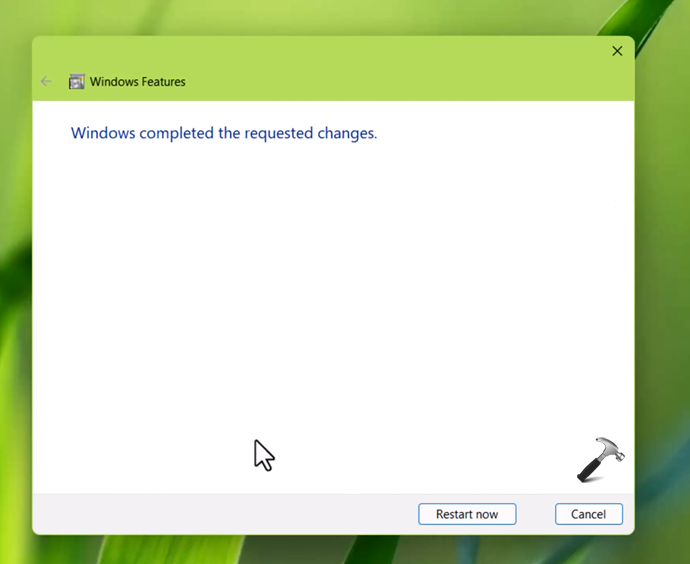
4. Once done, you will be asked to reboot the system. Select Restart now.
When’s your system restarts, you can go to the Start Menu then all apps and locate Windows Sandbox there to launch.
Method 2: Using PowerShell
1. Press  + X keys and select Windows Terminal (Admin).
2. Type following command and press Enter:
Enable-WindowsOptionalFeature –FeatureName "Containers-DisposableClientVM" -All -Online
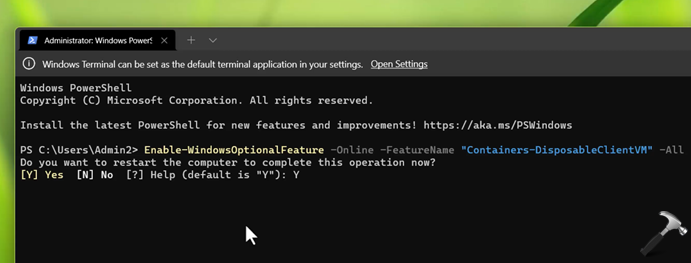
3. Once prompted to restart, press Y key. Windows Sandbox will be enabled after reboot.
Method 3: Using Command Prompt
1. Press + X keys and select Windows Terminal (Admin).
2. Click on dropdown next to + and select Command Prompt. Execute this command:
Dism /online /Enable-Feature /FeatureName:"Containers-DisposableClientVM" -All
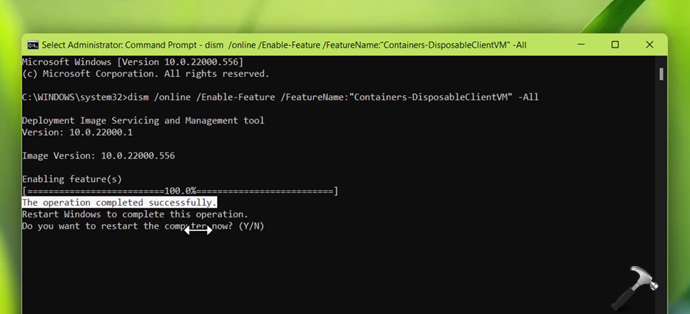
3. Once prompted to restart, press Y key. Your system will restart and Windows Sandbox will be enabled at next boot.
Video fix
You can checkout following video to understand above methods and see how to use Windows Sandbox:
That’s it!