Power Throttling is something new to Windows 10. This is especially for the background apps which keeps eating the system power. With Power Throttling, Windows is supposed to spent least amount of power on these background apps and getting the work done in efficient manner. We all know most of computing devices today uses semiconductors, in which silicon is main component. If silicon capabilities are absorbed efficiently, this helps us to achieve Power Throttling.
Microsoft introduced Power Throttling to Windows Insiders in build 16176 and end users in Windows 10 Fall Creators Update (V1709). With Power Throttling enabled, Microsoft expects around 11% of power saving in Windows 10 running devices. However, Power Throttling is supposed to give best results on Intel‘s 6th generation or later processors which are equipped with Intel’s Speed Shift technology. Microsoft is committed to extend support for Power Throttling to other processors as well.
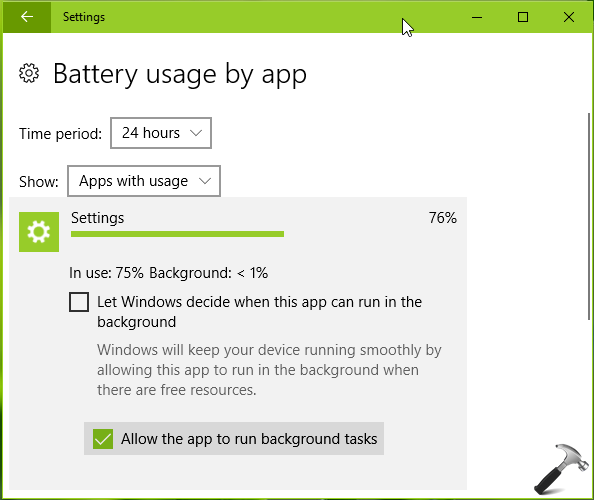
If you’re using Windows 10 Fall Creators Update (V1709), you can allow Power Throttling for individual apps. Just go to Settings > Battery > Battery usage by app. Select an app and uncheck Let Windows decide when this app can run in the background and then check Allow the app to run background tasks option.
To enable Power Throttling system wide, follow below mentioned steps.
Page Contents
How To Manage Power Throttling In Windows 10
Enable Or Disable Power Throttling In Windows 10
Registry Disclaimer: The further steps will involve registry manipulation. Making mistakes while manipulating registry could affect your system adversely. So be careful while editing registry entries and create a System Restore point first.
1. Press  + R and put regedit in Run dialog box to open Registry Editor (if you’re not familiar with Registry Editor, then click here). Click OK.

2. In left pane of Registry Editor window, navigate to following registry key:
HKEY_LOCAL_MACHINE\SYSTEM\CurrentControlSet\Control\Power
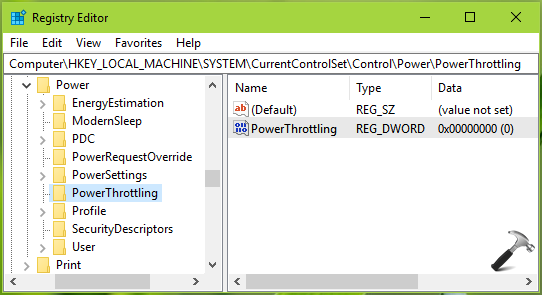
3. In the left pane of the above shown window, right click Power registry key and select New > Key. Name the newly created registry key as PowerThrottling. In the right pane of PowerThrottling registry key (HKEY_LOCAL_MACHINE\SYSTEM\CurrentControlSet\Control\Power\PowerThrottling), right click and select New > DWORD Value. Name the newly created registry DWORD (REG_DWORD) as PowerThrottling. Double click on this DWORD to modify its Value data.
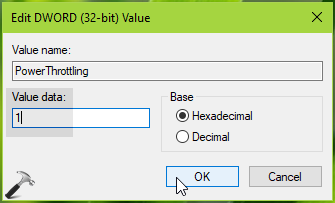
4. Use 0 as the Value data to enable Power Throttling, whereas using 1 as Value data will disable Power Throttling. Click OK. Close Registry Editor.
5. Open Task Manager by pressing Ctrl+Shift+Esc keys. Switch to Details section, right click and pick Select columns option.
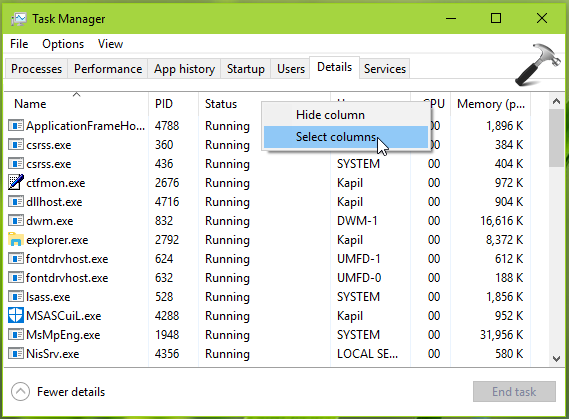
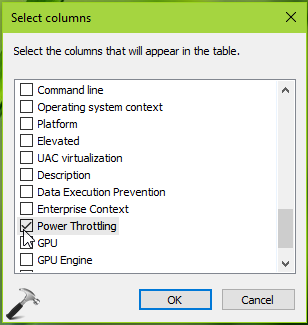
6. In the Select columns, check Power Throttling. Click OK.
7. You should now be able to view Power Throttling section for different processes in the Task Manager.
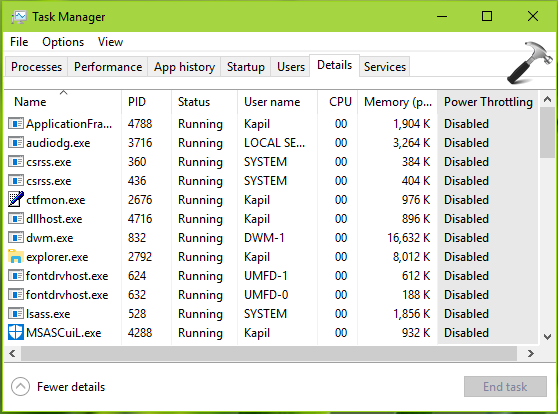
This is how you can manage Power Throttling in Windows 10.
That’s it!