
Do you want to know how to share a folder or drive in Windows 11?
Windows 11 has also contributed a lot towards making the process of sharing files, folders, and drives with networks easier. The new system of file sharing is more secure and faster than the older versions of Windows. Besides, it is easy to set up, although you may not be that technologically savvy. Following these steps, you will be able to transform your PC into a personal file server, plan shared workspaces, and connect various devices without problems.
Page Contents
Why Sharing Folders or Drives in Windows 11 Is Useful
Being one of the most efficient data management features in Windows 11, this tool is enabled to share a folder/drive over a local network. The externally connected SATA SSDs have become popular with many users who store their important files, backups or their work pieces in these devices due to the speed, the portability as well as the reliability. When working with a SATA SSD connected by USB or a docking station, the former will be simple to convert to a shared network storage device or drive accessible among computers running Windows.
- Every access will be verified with your local Windows account and password, which provides the assurance that your data is private and secure.
- Windows also allows you to access an SSD between devices without relocating the device, allowing it to be connected as though they are actually connected.
- This enhances productivity, time-saving, and the wear and tear of devices.
How to share a folder/drive in Windows 11
This article will also show how to share the full file system, such that other Windows 11 workstations may access them in a seamless manner. We are going to take you through it by showing how to enable network discovery, share folders, drives, NTFS permissions and mapping of the shared storage through another computer.
Setting Up the File Server
File sharing or drive sharing starts with the preparation of the system on which the files are physically stored and which will serve as a file server.
1. Firstly, connect to your Windows 11 PC the hard drive, SSD, or external USB. Ensure the drive is visible on your user account in File Explorer. This makes Windows identify the drive and is able to share the drive suitably.
2. Secondly, open Windows File Explorer. Hold down the Shift key.
3. Select a drive or a folder that needs to be shared. Hover over “Give access to”. Or go to “Properties” > “Sharing” tab.

4. Click “Advanced sharing”. This will bring you to the primary sharing control window, where permissions will be configured. The windows will require the permissions of the administrators. Then, confirm with “Yes”.
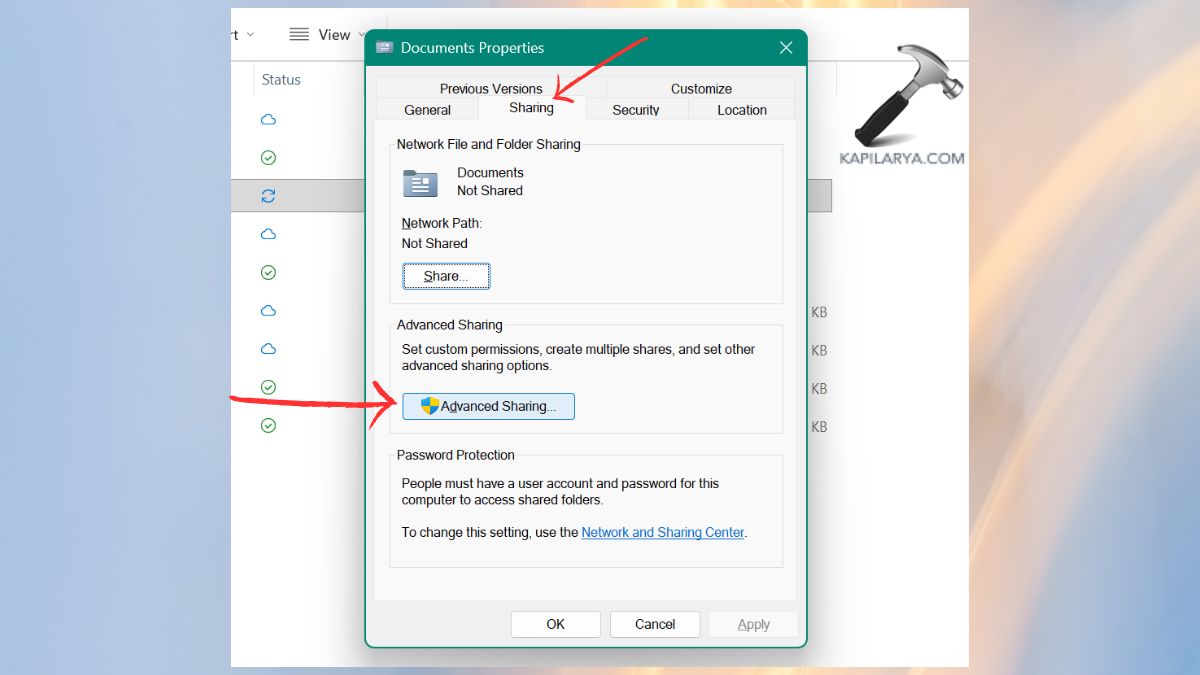
5. Check the box “Share this folder” and click on Permissions.
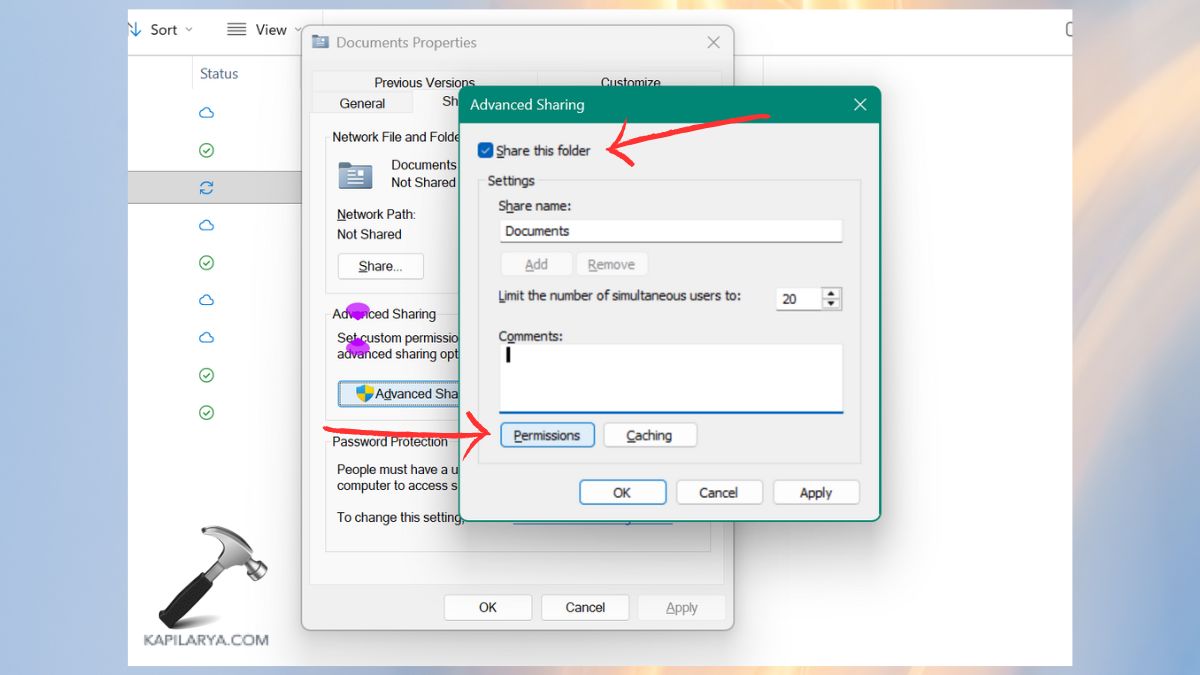
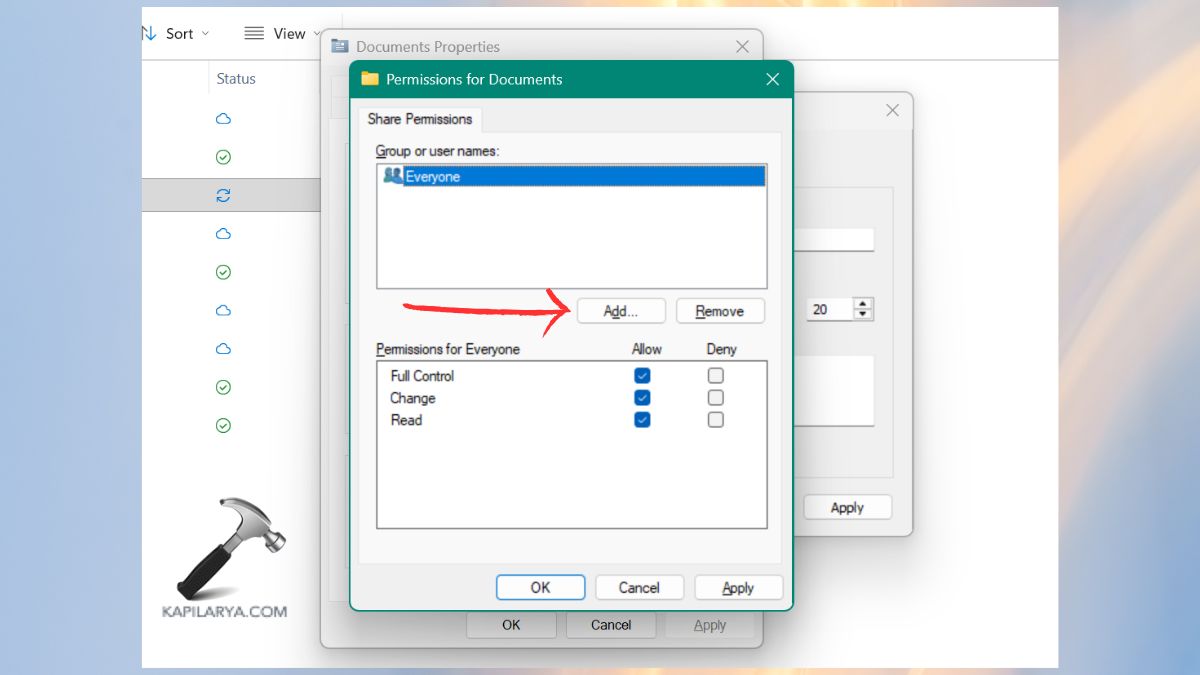
6. A window with the “Share Permissions” for share name will come about. In this case, you are in charge of who is allowed to access the folder and what they are allowed to do. Use Group or user names and click on “Add”.
7. In the box, enter the object names to select, and enter your Windows user account name. Click Check Names. On the name, Windows will automatically fill in the username. Example: “DESKTOP-PCNAME\UserName”.
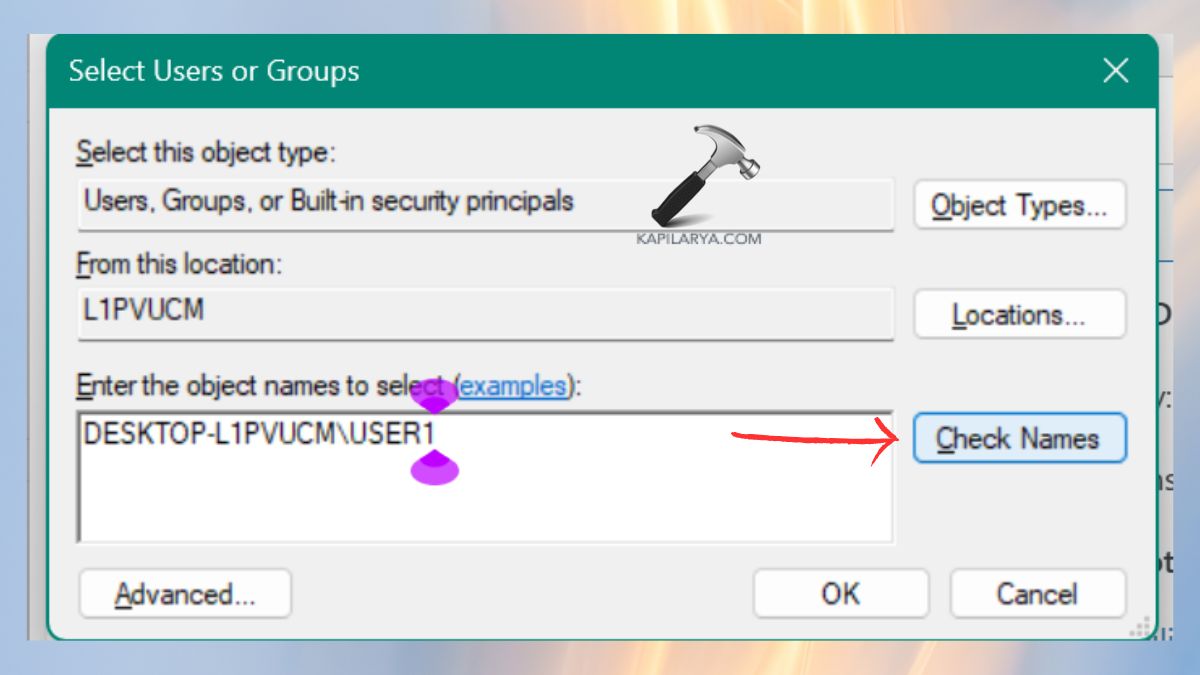
Record the name of the PC before the backslash because it is required during the connection. Click OK. This will ensure that only your intended user has access to the shared folder over the network.
8. Now, select the username. There are these under Permissions:-
- Read (to view files)
- Change (to edit or add files)
- Or Full Control (full access)
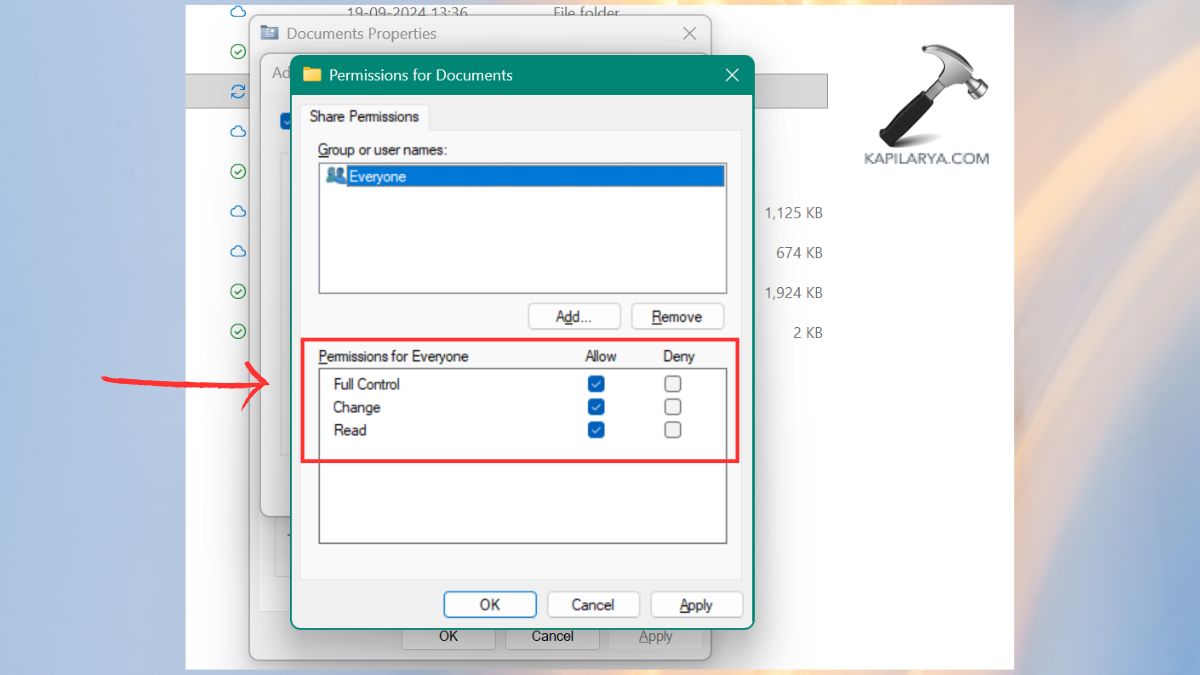
Click OK. Your folder/drive is officially shared.
Connecting to the Shared Folder/Drive
Once the folder or drive has been shared on the server PC, it can be connected to it using a different device. So, make sure that the client computer gets attached to the same Wi-Fi or router with which the file server is attached.
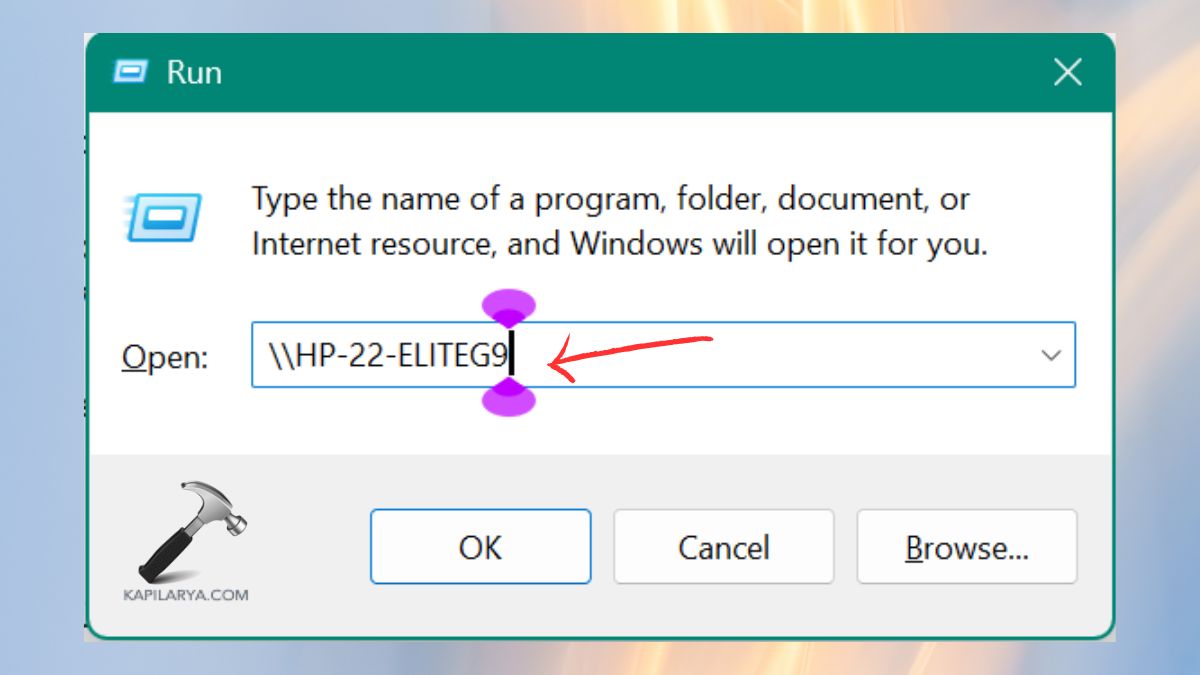
1. Access the Run Box, Windows Key + R. Enter the shared path. For example: “\\HP-22-ELITEG9”.
\\Server-PC-Name
If you do not know the path, go to Windows Settings > System > About.

2. These details will be requested of you: Username and Password of the Server PC.
Note: These are not the login information of the client computer.
After that, Windows Explorer will appear, and all shared drives and folders will be displayed. You are now able to Open files, Copy/paste and Drag and drop, and Edit documents. This provides access to the whole content shared.
However, to be able to save files directly to the shared point, in applications such as Word, Excel or Photoshop, then you will require a mapped drive.
Assigning a Drive Letter
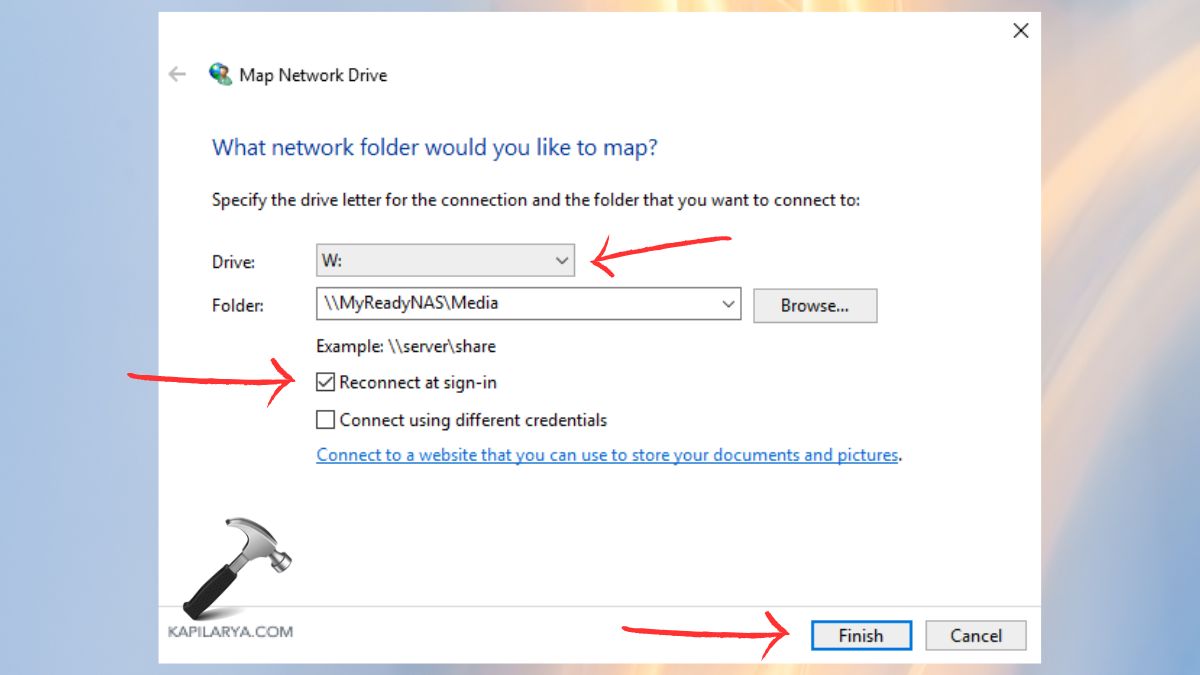
Mapping to a network drive also assigns a drive letter to your shared folder, such as Z:. This gives it the appearance of a local disk within the client computer.
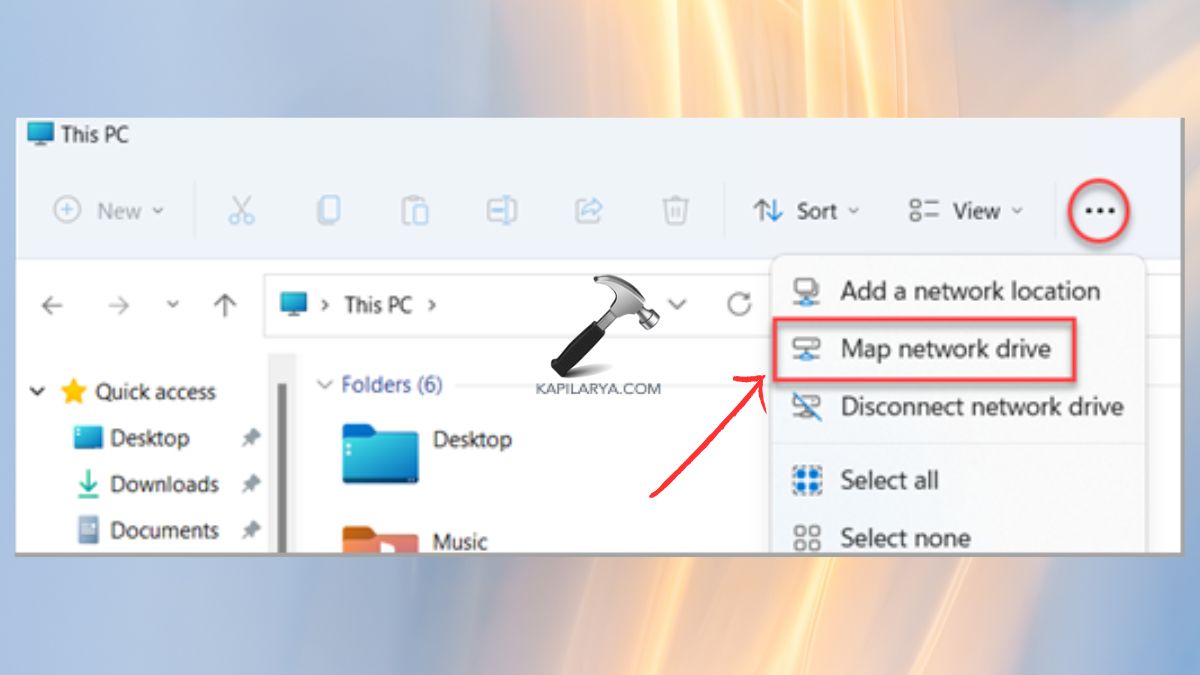
1. Once you have been connected to a shared folder, right-click the name of the shared folder in the file explorer. Now, select the option “Map Network Drive”.
2. Assign a Drive Letter. Select a letter (the default is normally Z:). Also, click on Reconnect to sign in automatically and reconnect the folder. Click “Finish”.
Finally, that is all you need to do with your network folder to share it.
Frequently Asked Questions (FAQs)
Why can’t I see the shared folder on another PC?
Make sure that both devices are using the same network and both Network Discovery and File Sharing are turned on using the Windows settings.
Do I need NTFS to share drives in Windows 11?
Yes, NTFS should be adopted since it is compatible with advanced permissions and enhanced security when sharing the network.
Can I share an entire drive instead of a folder?
Yes, you are able to share any drive (C:, D:, external drives) in the same way as you do with the Advanced Sharing.
Is it safe to share folders on Wi-Fi?
Yes, in case of password-protected sharing and avoidance of Public networks. Provide minimum authorizations.
That’s it!


![The mapped network drive could not be created [Detailed fix]](https://www.kapilarya.com/assets/Network-Drive-768x511.jpg)

![Stop sharing a folder in Windows 11 [Guide]](https://www.kapilarya.com/assets/Network-768x522.png)