
If you are looking forward to upgrade Windows 11 Home to Pro, you are already reading the best guide. The mostly used editions for Windows 11 are Home and Pro editions. All Windows 11 editions are same in performance and they can be only differentiated on the basic of features they provide. Usually, most of OEMs sells Home edition pre-installed with a new device. So if you are going to buy a new Windows 11 pre-installed system, you may have the Home edition installed there by default. But with Home editions, advanced features are not available and if you need those features, you’ve to upgrade to Pro edition.
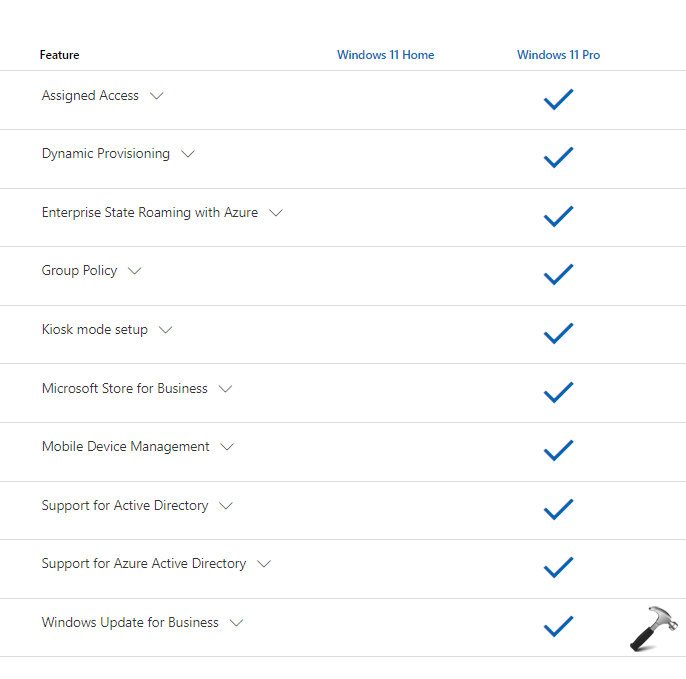
Here is a quick comparison between Windows 11 Home and Pro editions when compared for business management and deployment. This comparison is provided by Microsoft. You can clearly see that Windows 11 Home lacks a lot of advanced features.
To upgrade to Windows 11 Pro, you can either have Pro upgrade license or full Pro edition license key. To buy the Pro upgrade license you have to get that license from the Microsoft Store app. Go to Settings > Activation > Upgrade your edition of Windows > Open Store. In case if you already have Windows 11 Pro product key with you, use below steps to upgrade.
Page Contents
How to upgrade Windows 11 Home to Pro
Manual steps
1. Press Windows + I keys to open Settings app.
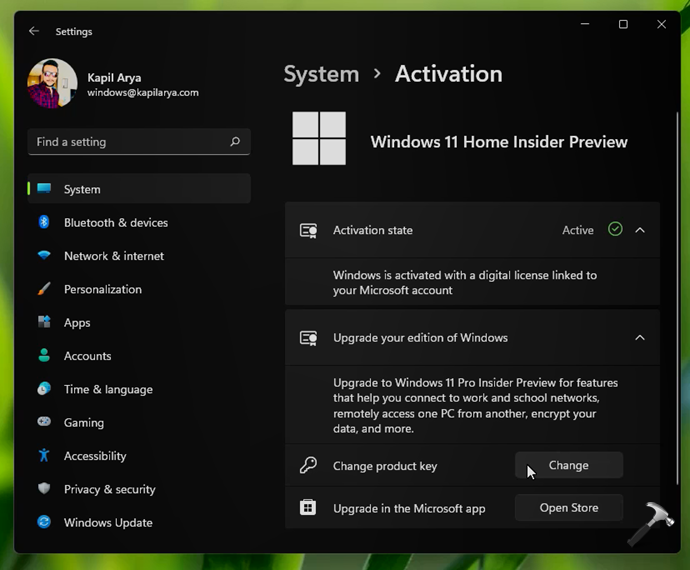
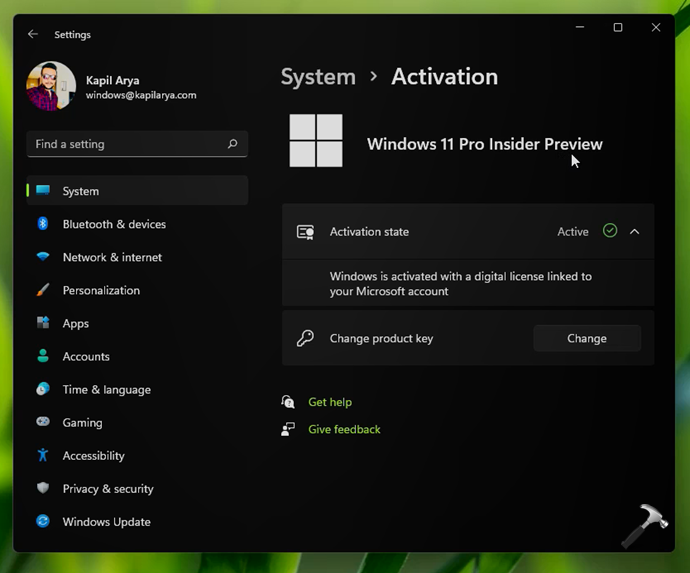
2. Go to System > Activation.
3. Under Upgrade your edition of Windows, click on Change for Change product key.
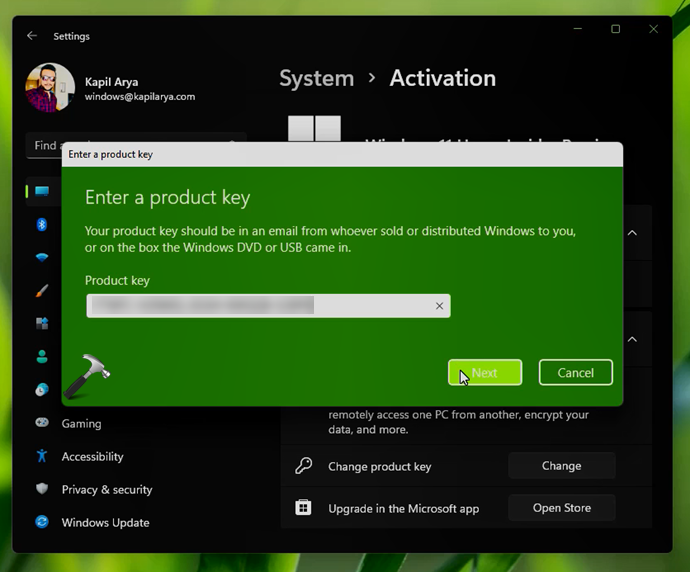
4. After this, there will be a pop-up to Enter a product key. Type in your Windows 11 Pro genuine product key and click Next.
5. Under Upgrade your edition of Windows, click on the Start button.

6. Next, let the Preparing for upgrade screen completed to 100%.

7. Once the Preparing for upgrade screen is completed to 100%, your system is expected to restart. However if that doesn’t happens, you have to manually restart after the Unable to upgrade your edition error.

8. So close the error and Settings app and restart your system.

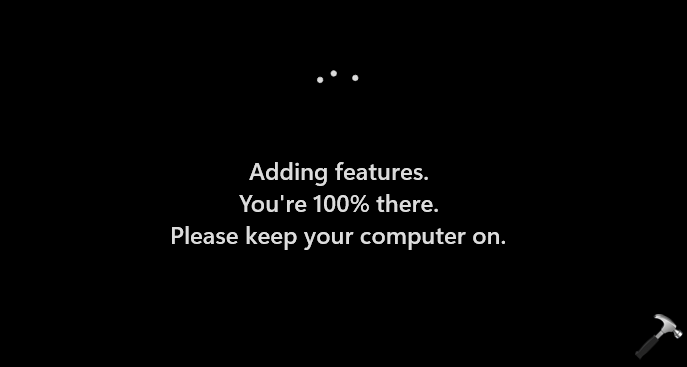
9. During restart, you will be seeing some screens where features are being added. Your system will now restart for the first time.

10. After restart, you will be seeing Adding features screen, which should be completed to 100%. Your system will now restart for the second time.
11. After the second restart, your system should be finally upgraded to Windows 11 Pro. You can confirm this from Settings app > System > Activation.
So in this way, your system is now upgraded to Windows 11 Pro and is activated with the genuine product key you’ve provided in step 4.
Video guide
You can check out following video guide go see the live demonstration of above method:
That’s it!
Related: How To Upgrade Windows 10 Home To Pro Edition.
Also available: Downgrade Windows 11 Pro to Home.


Im not upgrading from home to pro. I purchased a Windows 11 Pro full edition from windows store. I have a purchase order # xxxxxxxx. I do not want to install it on this machine, I want to get the key/install download link. Then I can create a USB with media creation tool. This is a new pc build. Has never had OS installed. I need to do a cean install because I do not want to be in the Windows insider program in the Dev channel. Im retiryed now and just want to use the machine. If you could advise me with this issue, I buy you a pot of coffie and a new cup. I also did not receive an email with the purchase details, It said I would, but that was June 27.
Thank you for your time and support….