
When you want to change your Windows 11 edition, there are certain downgrade paths you need to follow. They are defined by Microsoft. And if there exist no downgrade or upgrade paths between any edition, you can’t usually convert your edition. The same happens with Windows 11 Pro and Home edition. There is an upgrade from Windows 11 Home to Pro but there exists no downgrade path. Due to absence of downgrade path, if you want to go back to Windows 11 Home, you need to make clean install. When you make clean install, usually you’ve to wipe your data. Hence it’s not possible to downgrade to Windows 11 Home without affecting your data. But in this article, we will see how you can downgrade Windows 11 Pro to Home without losing your data.

In this guide, we will be sharing you a work around that exist and help you to go back to Windows 11 Home. Following that work around, you just need to modify the registry on your system and then perform a repair upgrade process. The repair upgrade process can be carried out without affecting data. Hence, you will be finally on Windows 11 Home.
Page Contents
Downgrade Windows 11 Pro to Home
Manual registry steps
 Registry Disclaimer: It is recommended to create a System Restore point first, if you’re not familiar with registry editing.
1. Run regedit command to open Registry Editor.
2. In left pane of Registry Editor window, navigate to:
HKEY_LOCAL_MACHINE\SOFTWARE\Microsoft\Windows NT\CurrentVersion
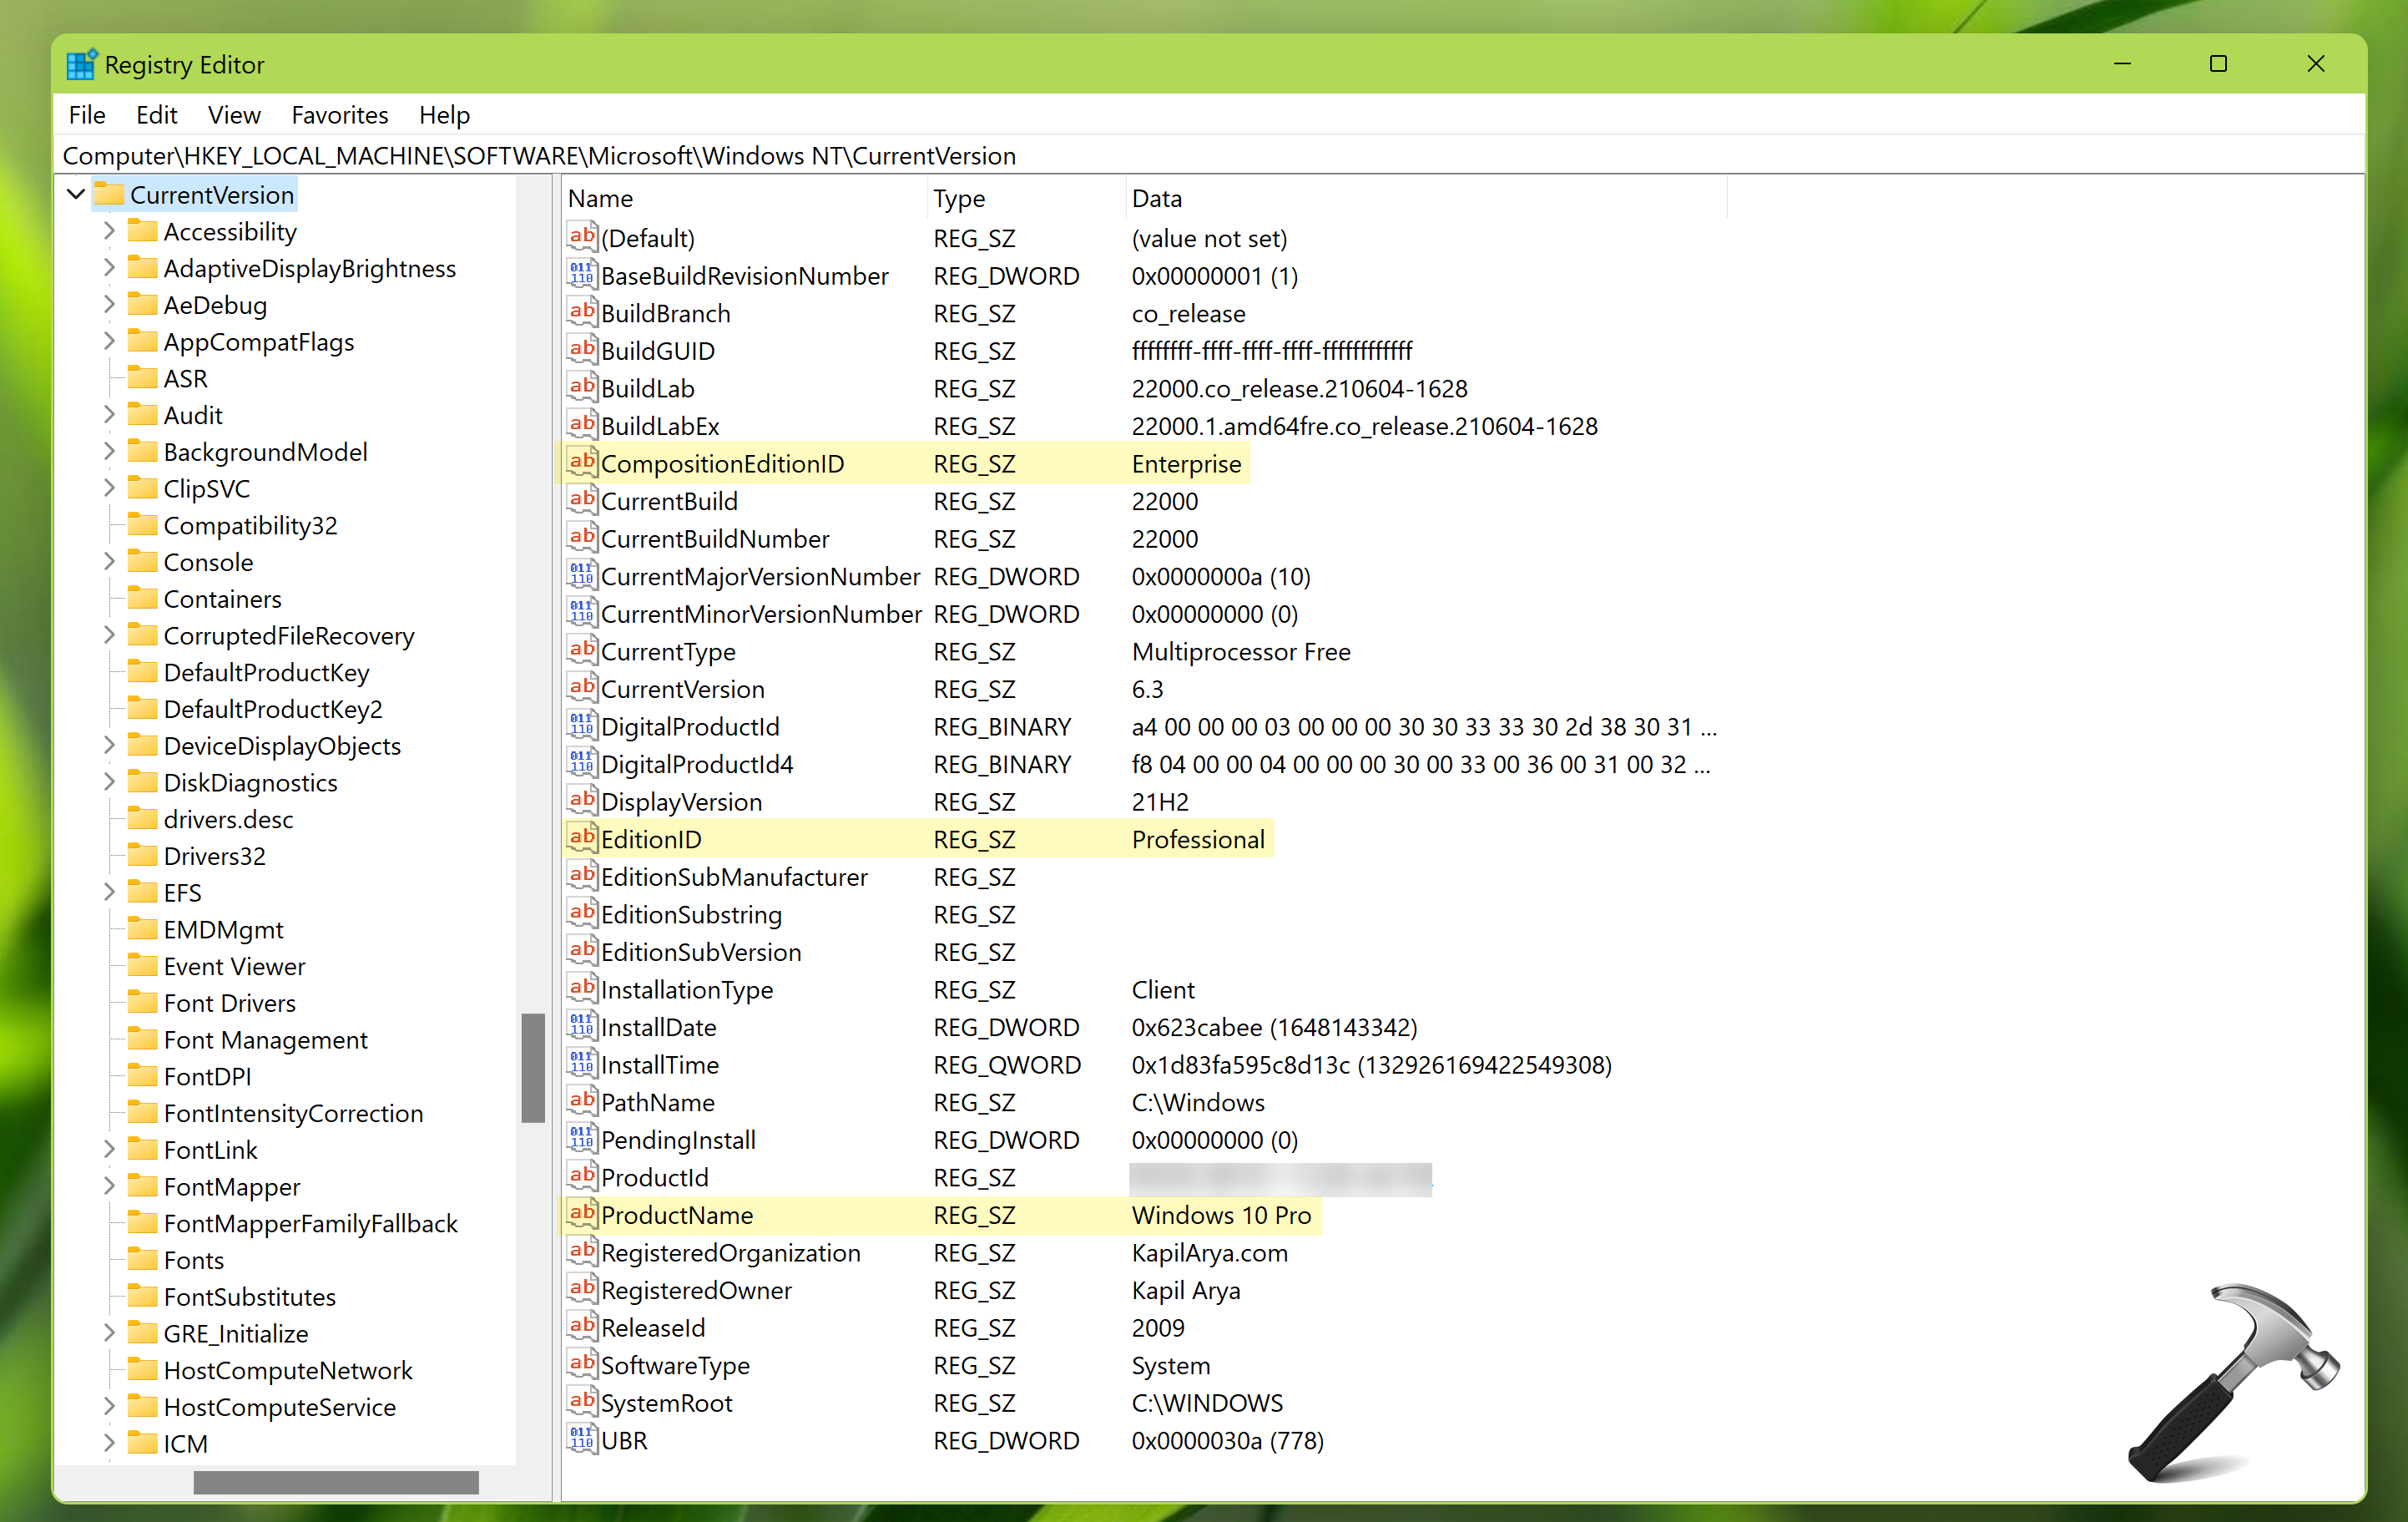
3. At this registry location, you need to change following entries to corresponding values:
- CompositionEditionID set to Core
- EditionID set to Core
- ProductName set to Windows 10 Home
4. Then go to following registry location:
HKEY_LOCAL_MACHINE\SOFTWARE\Wow6432Node\Microsoft\Windows NT\CurrentVersion
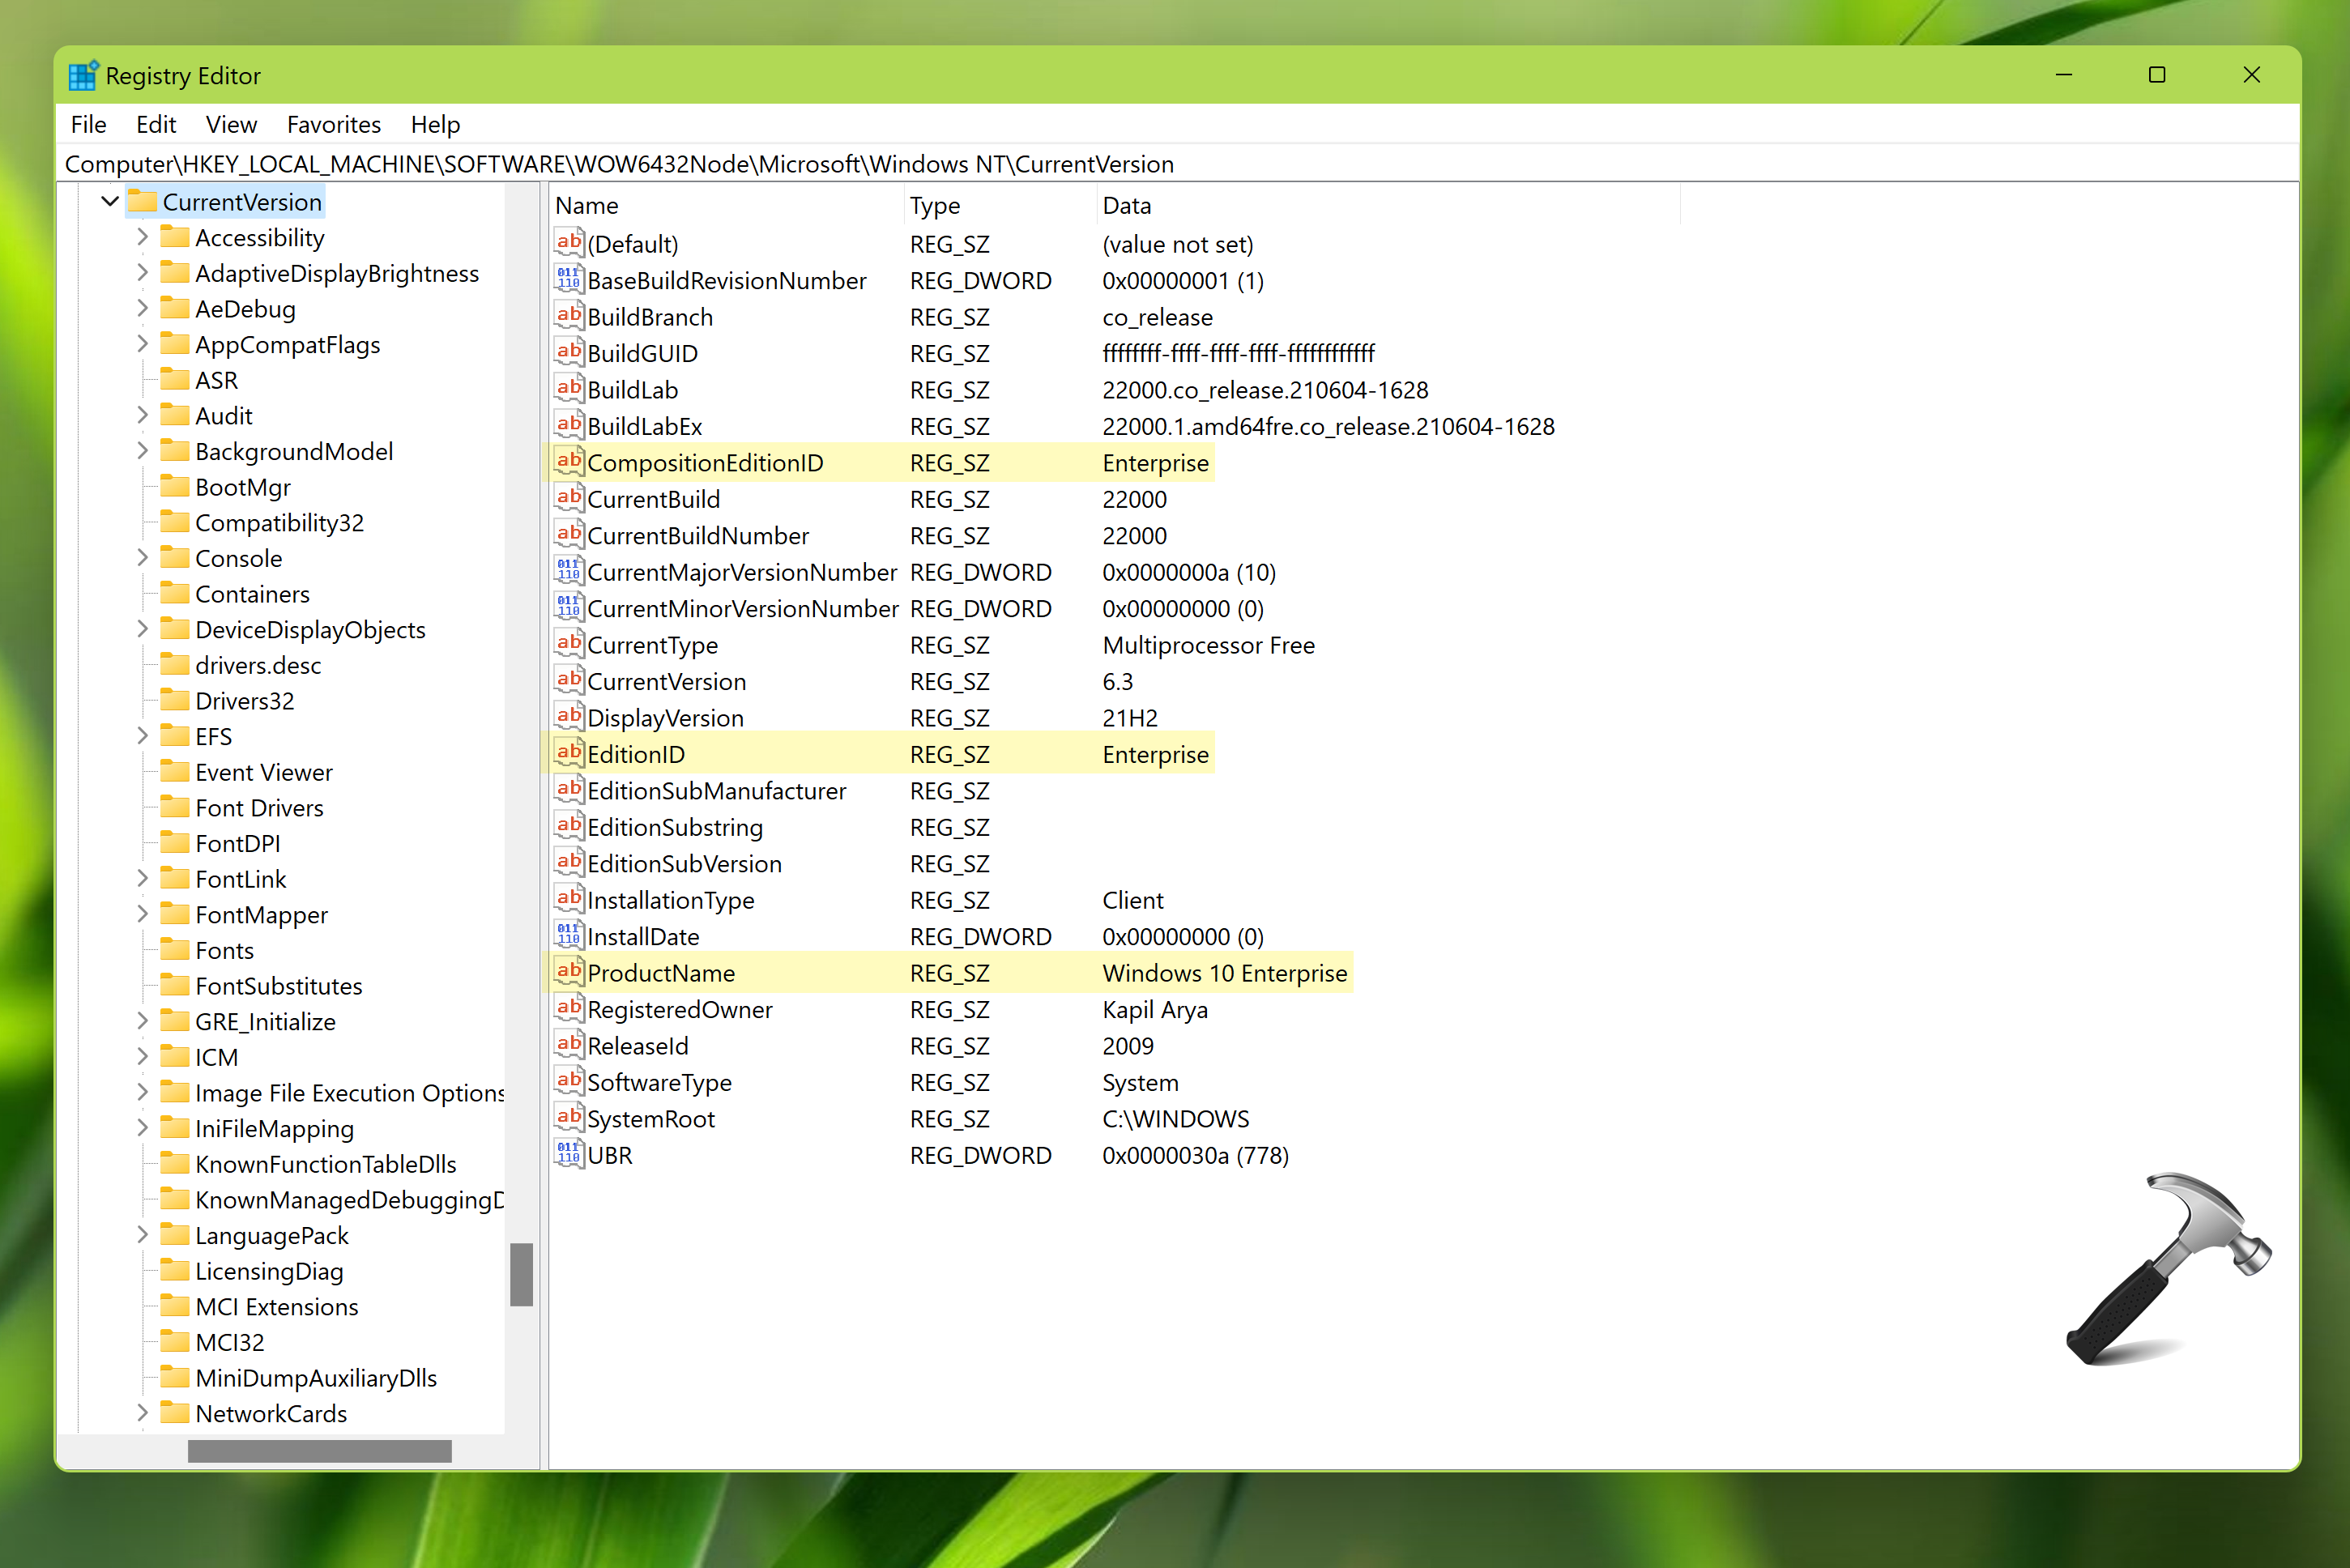
5. Same as step 3, change those same entries and use same value data used.
6. Close Registry Editor and reboot to make changes effective.
7. Perform the repair upgrade using this step-by-step guide. Make sure to Keep personal files and apps at step 8 of the guide.
8. Once repair upgrade has been completed, you will be finally downgraded to Windows 11 Home edition without losing your data.
Video guide
You can check out following video guide to learn more about this:
That’s it!


is there is any application error downgraded from Pro to Home if don’t follow you step to edit Registry file? please help