IP Address Management (IPAM) provides a central framework for managing your IP address space and corresponding infrastructure servers such as DHCP and DNS. According to Microsoft, IPAM provides a dynamic view of your IP infrastructure and this view is continually refreshed by periodic tasks that run on the IPAM server. However, IPAM is not enabled by default on your Windows Server. In this article, we’ll see step-by-step process to install IP Address Management (IPAM) in Windows Server.
You can install IPAM as Windows Server feature. Once you install IPAM, you have the tools for end-to-end planning, deploying, managing and monitoring of your IP address infrastructure. You can read more about IPAM in this official documentation.
Now let us see how you can install and access IPAM in your Windows Server.
Page Contents
Install IP Address Management (IPAM) in Windows Server
Method 1 – Using Add Server Roles and Features Wizard
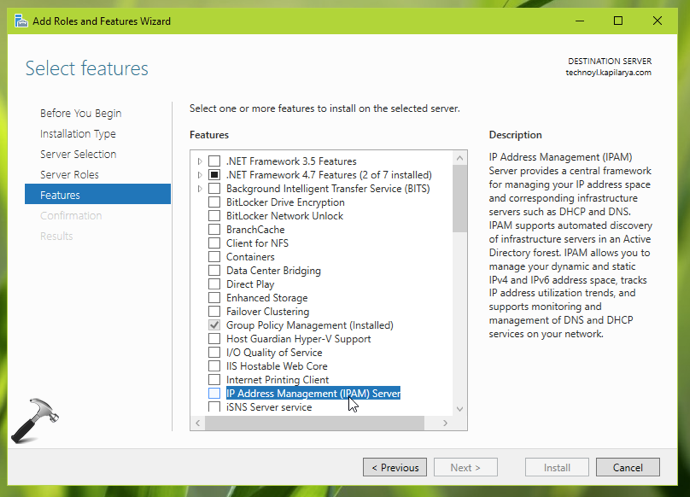
1. Open Add Roles and Features Wizard using Server Manager. In the Features section, select IP Address Management (IPAM) Server.
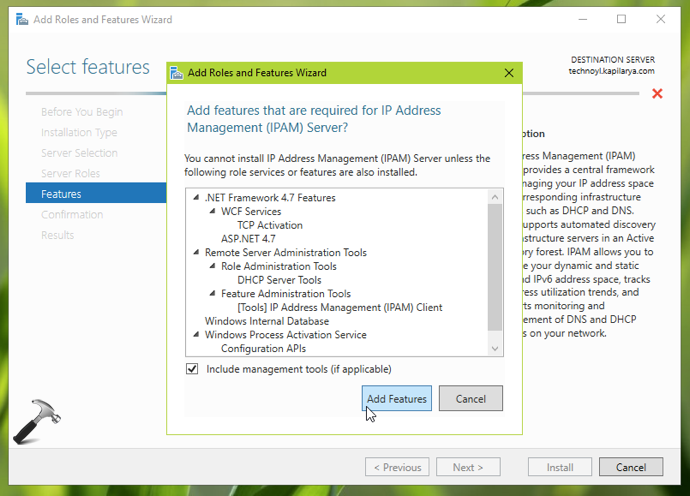
2. When you check that feature, you will be asked to install some of the roles or features required for IPAM. Hit Add Features in that pop-up window and then click Next.
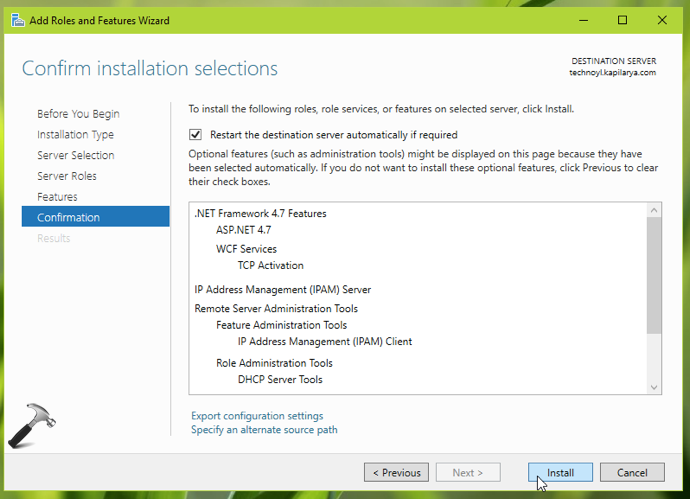
3. Moving on, confirm the install selections and finally click on Install button.
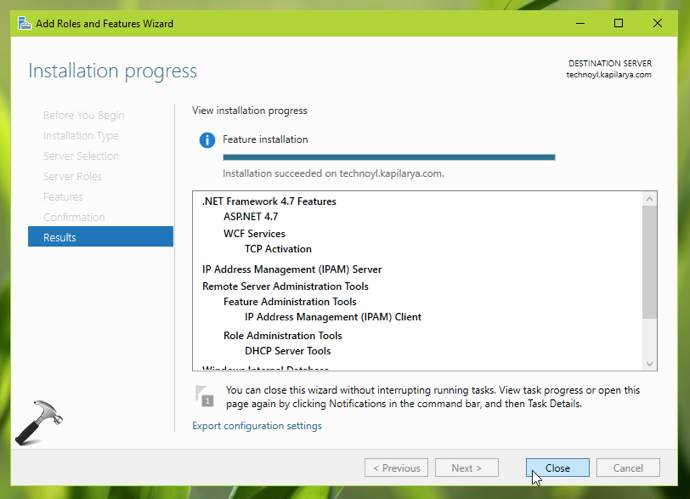
4. You will see that in few moments, installation will be completed. You can then hit Close button to exit the wizard.
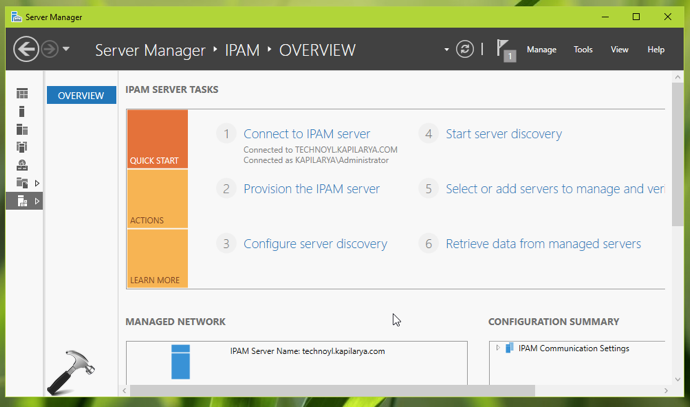
You can now go to Server Manager and you should be able to locate IPAM there. Now you can easily configure the IPAM server.
Method 2 – Using Windows PowerShell
1. Right click Start Button or press  + X keys and select Windows PowerShell (Admin).
2. In administrative Windows PowerShell window, paste following and press Enter key:
Install-WindowsFeature IPAM -IncludeManagementTools

Once the installation is completed, the IPAM should be available in the Server Manager, as mentioned earlier in this article.
That’s it!
Related: Configure VPN On Windows Server 2019.