The state of Memory Integrity turns on or off after a restart is one of the frequent problems in Windows 11 that makes users confused and even frustrated. You enable it to enhance protection or disable it to resolve driver compatibility issues, but upon reboot, this is reversed. Why is this so? The reason is in the background processes, Group Policy, updates, and conflicts on the system level.
In this article, you shall find 6 accurate and practical ways of preventing the automatic actions of Memory Integrity turns on or off after a restart. To always have it on or to avoid it, these fixes will give you complete control of your security settings on your system.
Page Contents
Why Does Memory Integrity Turn On or Off After Restart?
The most common reasons behind this issue are-
- Conflict of Group Policy or registry
- Windows Updates are rolling back the security settings
- Software conflicts or startup conflicts
- BIOS/Firmware level virtualization options
To improve the situation, you need to determine the cause in your system and use the corresponding technique described above.
Fix Memory Integrity turns on or off after restart
Fix 1: Stop Windows Update from Resetting Memory Integrity
In some cases, even after manually changing the setting, Windows Update will revert security features such as Memory Integrity. This is how it can be prevented from doing so-
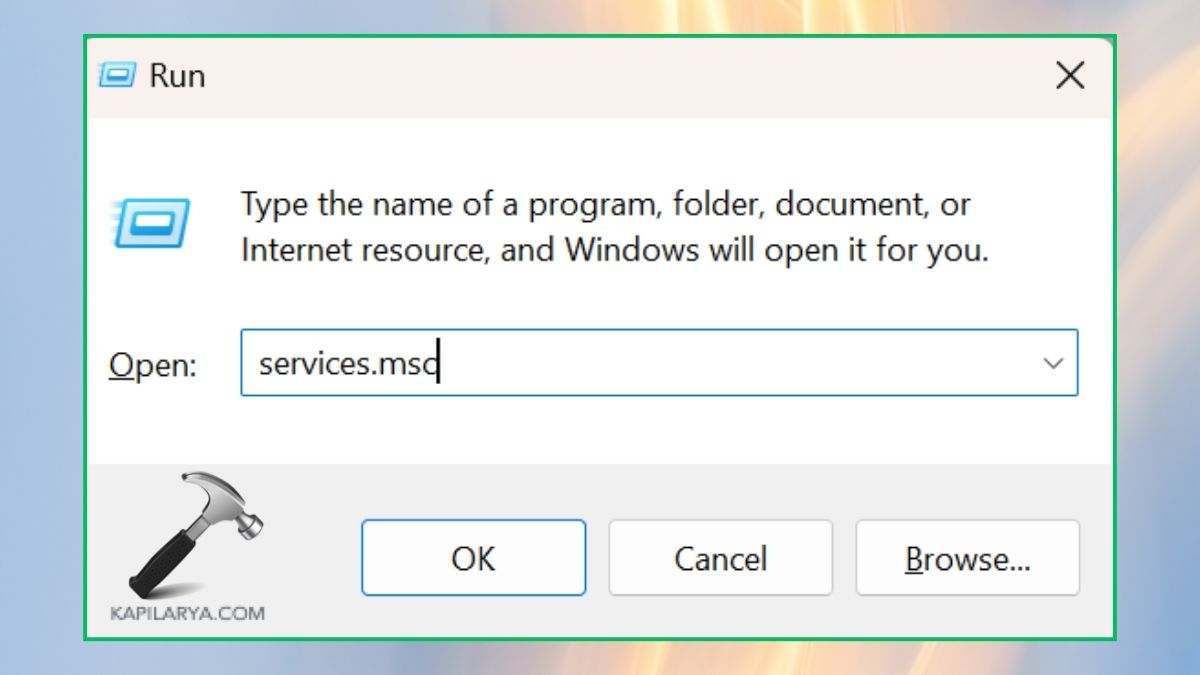
1. Type this command and press Enter by pressing Windows + R.
services.msc
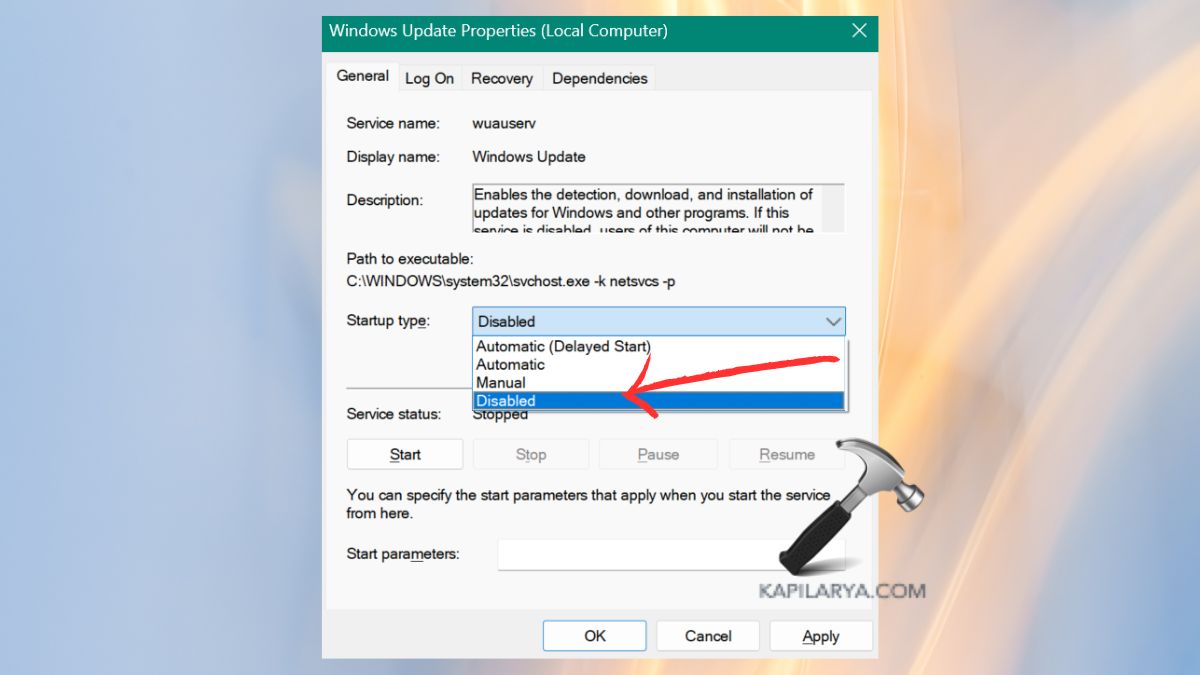
2. Move downwards and find Windows Update. Right-click and select properties.

3. In the drop-down of startup type, select “Disabled”. On the page of Service status, select Stop. Press the Apply button and OK.
4. Restart the PC change the Memory Integrity settings from the path –
Settings > Privacy & Security > Windows Security > Device Security > Core Isolation

5. After this, you may re-enable Windows Update by changing its setting to Automatic once again.
Fix 2: Check the Group Policy Settings (GPO)
Windows Security settings and changes, such as Memory Integrity, can be enforced through the Group Policy Editor. Manual changes made will not persist across reboots if it is turned on or off through Group Policy.
1. Simply hit the combination called Windows + R, then enter this command and press Enter.
gpedit.msc

2. Navigate to – Computer Configuration > Administrative Templates > System > Device Guard. Click twice on Turn On Virtualization Based Security. Put it to Disabled or Not Configured.

3. Apply and OK, and restart the computer.
Note: Group Policy Editor itself is not present on other versions of Windows, such as Home, but is present on Pro, Enterprise, and Education.
Fix 3: Troubleshoot in Clean Boot Mode
These settings can be overridden by conflicting third-party software every time the computer is restarted. The clean boot will assist you in isolating and disabling such interference.
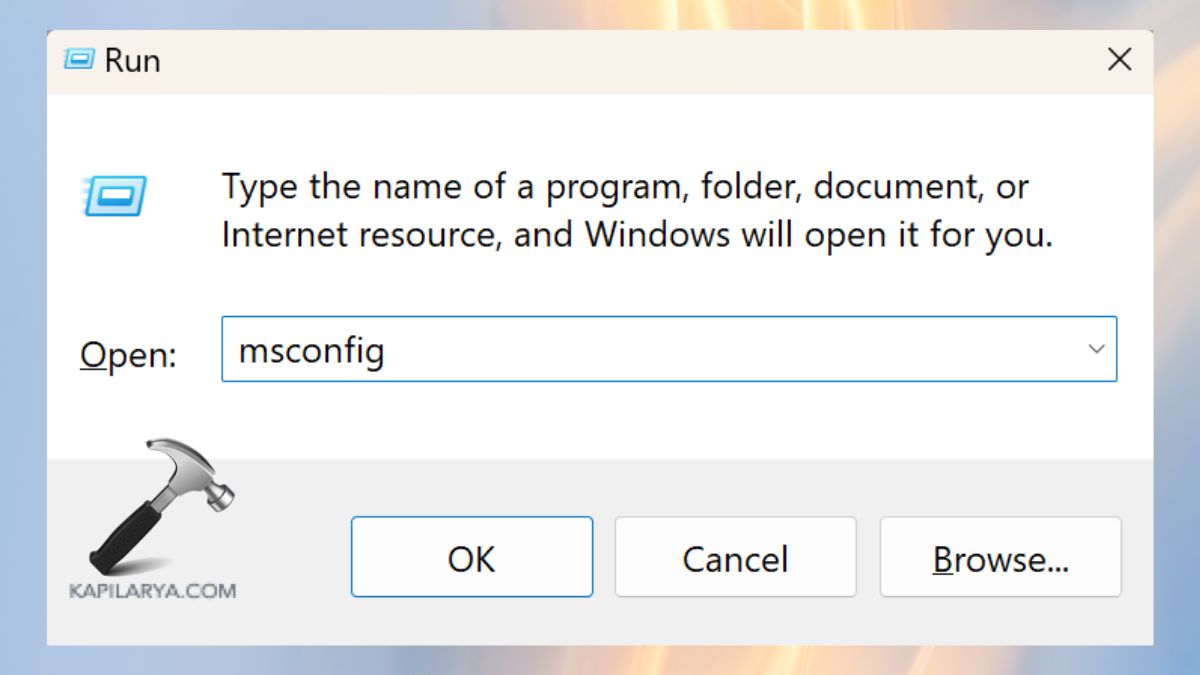
1. In Windows, press the combination of Windows and R, enter the command below, and press Enter.
msconfig
2. In the System Configuration window, click on the Services tab. Check “Hide All Microsoft services” and then Disable All.

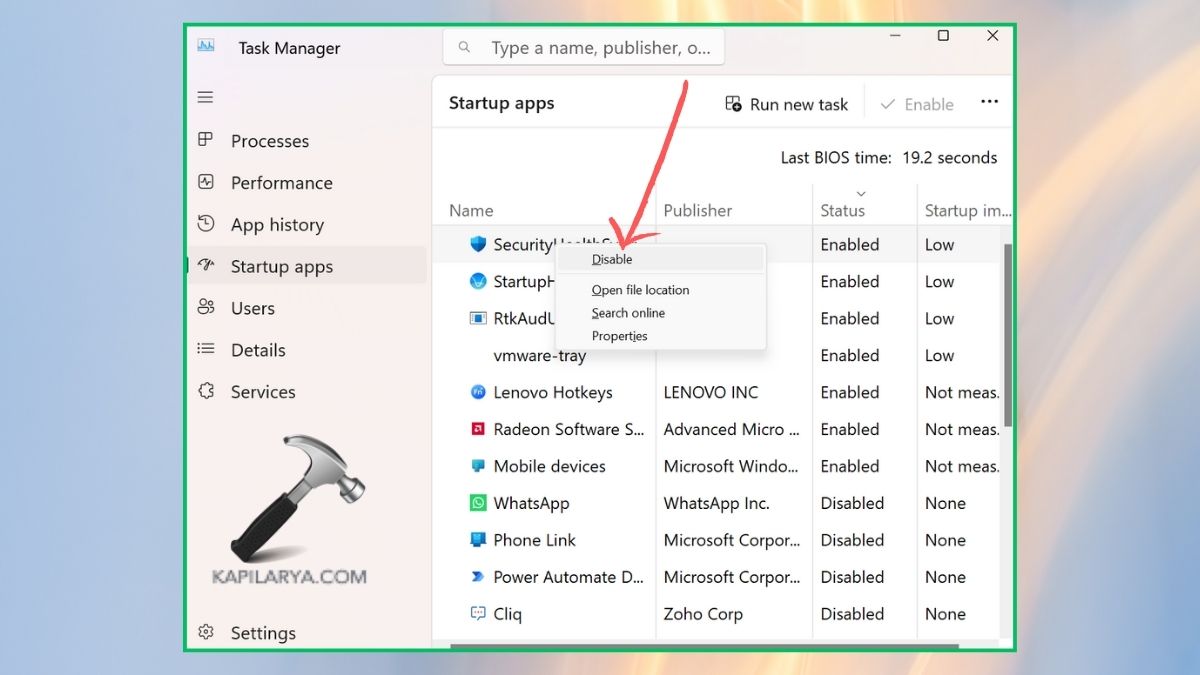
3. To start the Task Manager, right-click on the Startup tab > click Open Task Manager.

4. Uncheck all the startup entries. Close Task Manager, Save and Close > click on Apply and OK.
5. Reboot your PC. Now, go and turn Memory Integrity “ON” and see whether it stays when you restart.
Fix 4: Re-enable Core Isolation using PowerShell (Advanced Users)
PowerShell has commands to forcefully disable or enable the Memory Integrity toggle, in case it resets upon restart.
1. Right-click Start and go to Windows Terminal (admin) or PowerShell (admin).

2. Type in the command-
Set-ItemProperty -Path "HKLM:\SYSTEM\CurrentControlSet\Control\DeviceGuard\Scenarios\HypervisorEnforcedCodeIntegrity" -Name Enabled -Value 0

3. Reboot your computer and see the status of Memory Integrity. In order to enable the option, copy the following command.
Set-ItemProperty -Path "HKLM:\SYSTEM\CurrentControlSet\Control\DeviceGuard\Scenarios\HypervisorEnforcedCodeIntegrity" -Name Enabled -Value 1

Fix 5: Check the Registry Editor for Memory Integrity Flags
Memory Integrity, in particular, is a persistent system configuration stored in the Registry Editor. After rebooting, incorrect or left behind entries may induce some unexpected behavior.
1. Search for and open Registry Editor, which is in Windows.

2. Navigate to this path-
HKEY_LOCAL_MACHINE\SYSTEM\CurrentControlSet\Control\DeviceGuard\Scenarios\HypervisorEnforcedCodeIntegrity
a. To turn off Memory Integrity, set it to 0.
b. Leave it set at 1 to turn it on.
c. In case the key does not exist, you will have right-click > New > DWORD (32-bit) Value and name it Enabled.

3. Restart your PC after you have edited.
Fix 6: Disable Virtualization in BIOS/UEFI
The security relies on Memory Integrity, which is based on virtualization. In case BIOS/UEFI settings interfere with this, then your manual changes will be stepped over each time you restart.
1. Turn on your PC again and go to BIOS/UEFI options (normally by pressing Del, F2, or Esc when the system boots).
2. In the PCI List, find Advanced > CPU Configuration, Intel VT-x, AMD-V, or Virtualization Technology. Choose “Disabled” for the virtualization option.
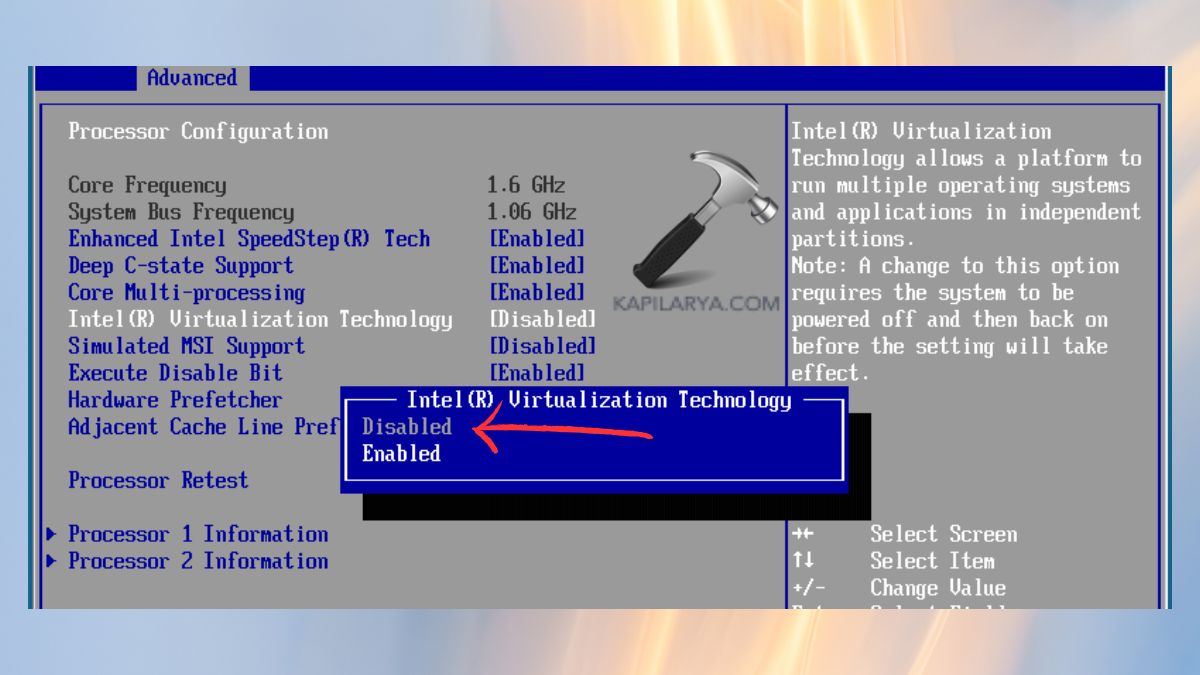
3. Press exit and save in BIOS/UEFI. When you get into Windows, you can alter the Memory Integrity setting accordingly and reboot to determine whether it sticks.
Frequently Asked Questions (FAQs)
#1 Is Memory Integrity necessary in Windows 11?
It is advisable to promote greater security against malware and kernel threats. Nevertheless, it can clash against some apps or drivers.
#2 Why can’t I toggle Memory Integrity in settings?
When the setting is greyed out or simply keeps getting reset, it may be because of Group Policy enforcement, registry settings, or incompatibility with missing drivers.
#3 Does disabling Memory Integrity reduce system security?
It does, yes, lower immunity to some attacks. Disabling should be done only when it is required (e.g., when the app is not compatible).
#4 Can outdated drivers cause Memory Integrity issues?
Absolutely. It may fail to remain enabled due to incompatible drivers or unsigned drivers.
That’s it!