When you see the message Automatic repair couldn’t repair your PC on startup, it means that the built-in repair system was unable to fix whatever’s preventing Windows 11 from booting properly. Common causes include corrupted boot configuration, faulty drivers, or damaged system files.

Page Contents
Fix Automatic repair couldn’t repair your PC in Windows 11
Below are seven tested fixes. Use them one by one and restart your PC after each to check whether the issue is resolved.
Fix 1: Disconnect external devices and reboot
Sometimes, peripherals or external hardware interfere with startup repair.
1. Shut down your computer completely.
2. Unplug all USB drives, external hard disks, printers, cameras, and other accessories.
3. Wait about 30 seconds.
4. Plug everything back in except the non-essential devices.
5. Turn on the PC and let Windows attempt automatic repair again.

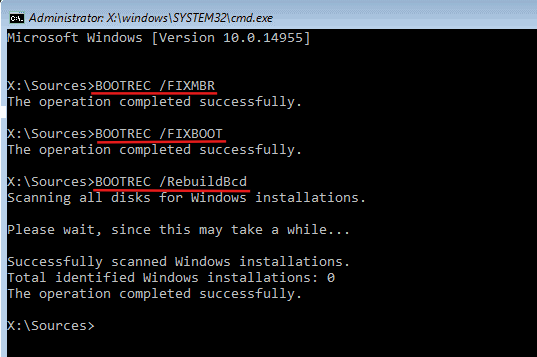
Fix 2: Reset Boot Configuration Data (BCD)
A corrupted BCD often prevents Windows from being repaired.
1. In the Automatic Repair screen, choose Advanced options and go to Troubleshoot and then Command Prompt.

2. Run these commands one by one:
bootrec /fixmbr
bootrec /fixboot
bootrec /rebuildbcd
3. Close the Command Prompt and reboot.
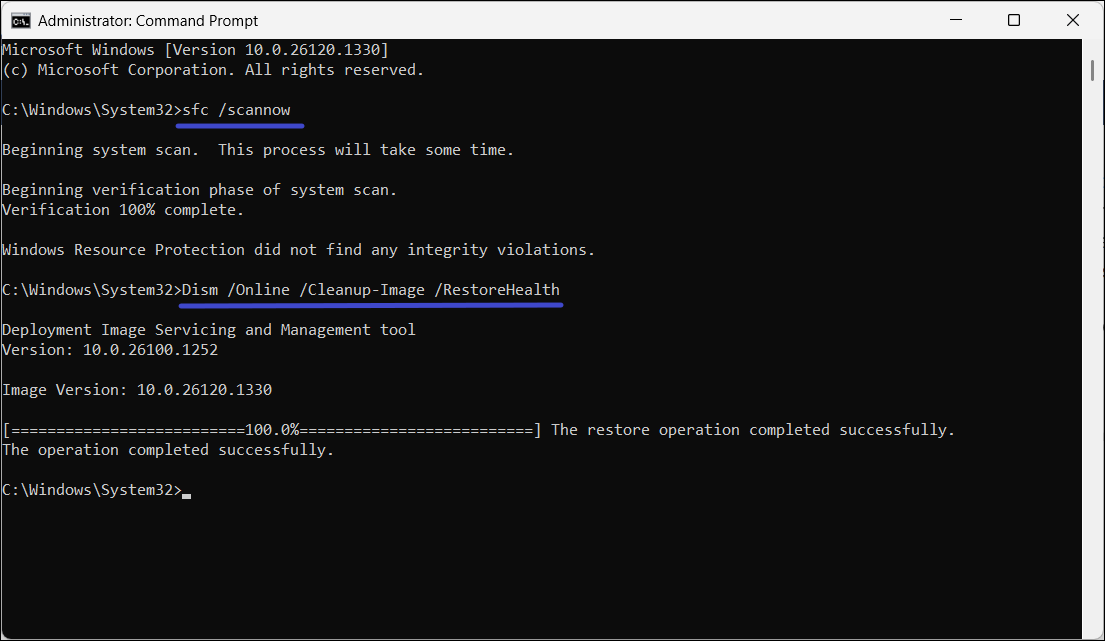
Fix 3: Run System File Checker and DISM from WinRE
This ensures system files are intact and can support the repair process.
1. Access advanced recovery options, open Command Prompt (Admin).
2. Run these commands one after another:
sfc /scannow
DISM /Online /Cleanup-Image /RestoreHealth
3. After completion, restart your PC.
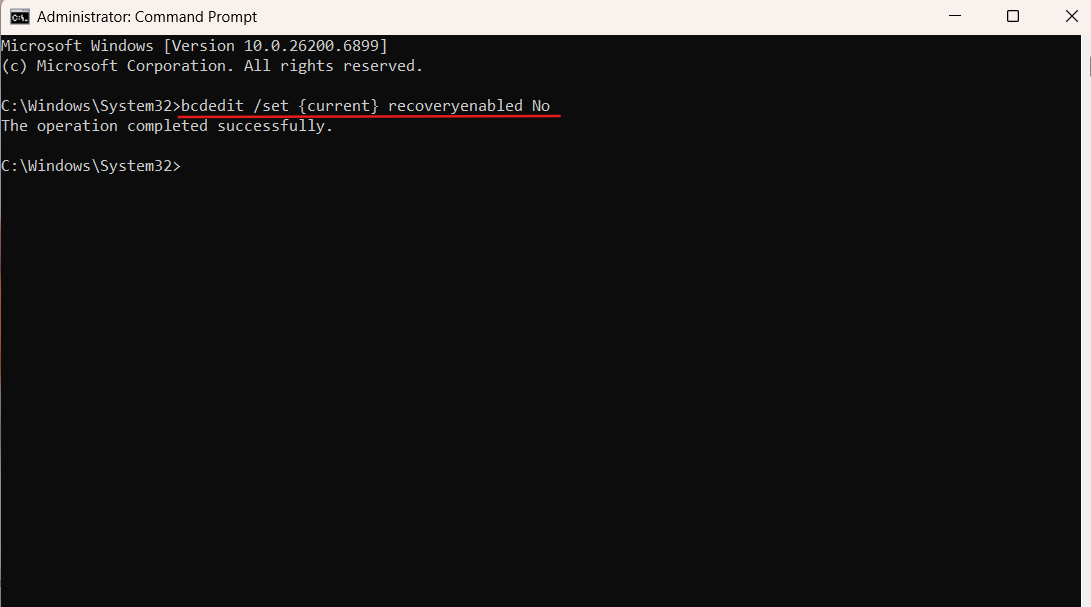
Fix 4: Disable automatic startup repair loop to fix ‘Automatic repair couldn’t repair your PC’
If the PC constantly loops into repair mode, disable the auto-repair trigger.
1. Open Command Prompt from WinRE.
2. Enter:
bcdedit /set {current} recoveryenabled No
3. Reboot and check whether Windows starts normally.
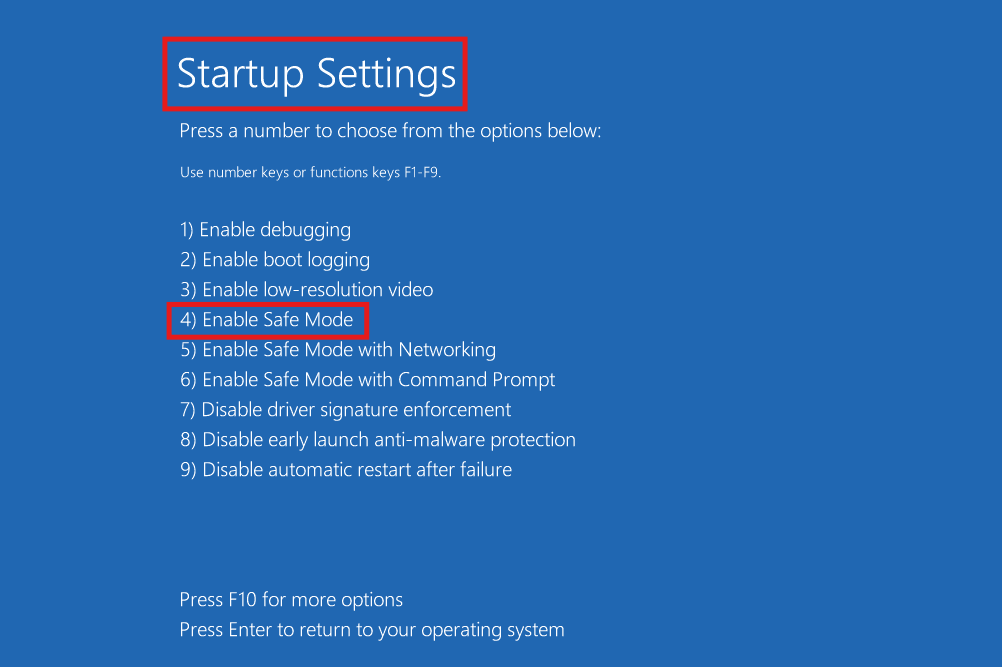
Fix 5: Uninstall recent updates
A recent update or driver may have triggered the failure.
1. Boot into Safe Mode: on the Automatic Repair screen, choose Troubleshoot, then Advanced Options, and after that Startup Settings, then select Enable Safe Mode.
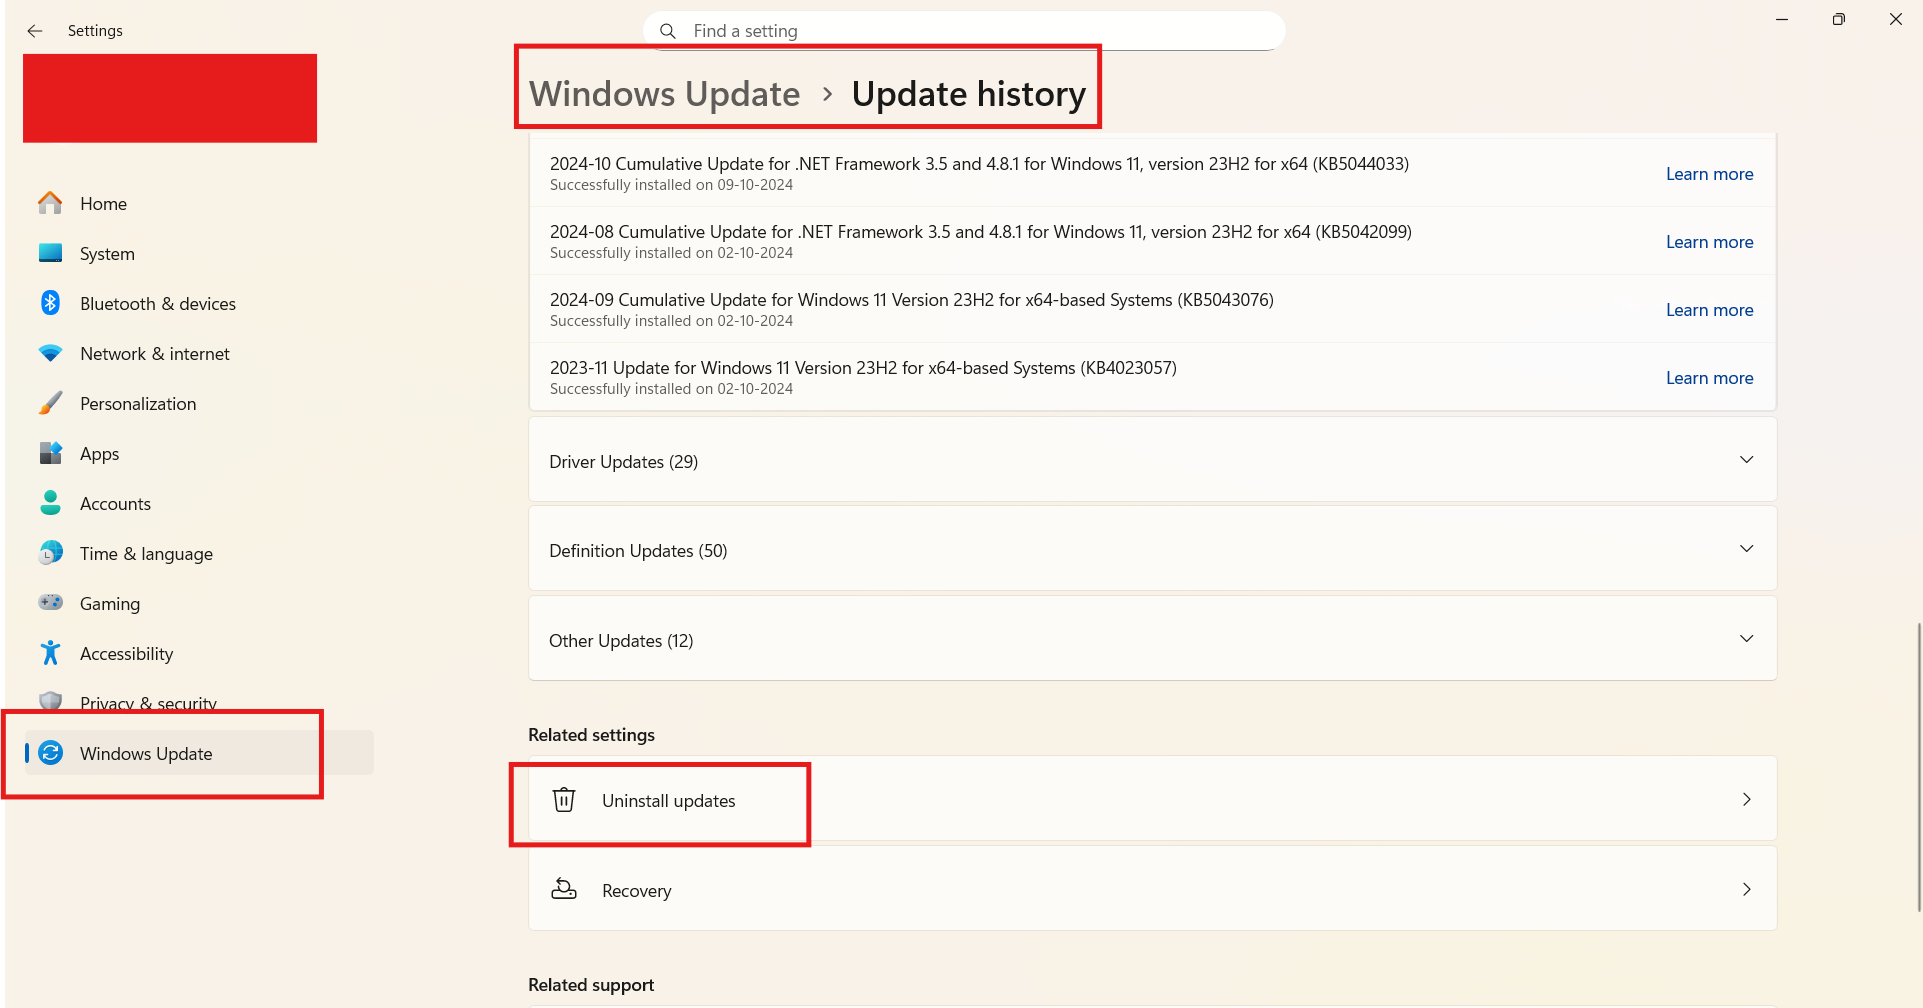
2. After it starts in Safe Mode, open Settings and go to Windows Update and then Update history and look under Uninstall updates. Remove any updates installed shortly before the problem started.
3. If you recently installed new drivers or hardware, open Device Manager, locate the device, right-click, and choose Uninstall device. Restart your PC normally and see if it boots without the error.
Fix 6: Use System Restore to go back to a working state
If you had a restore point before the error, this can undo the troublesome changes.
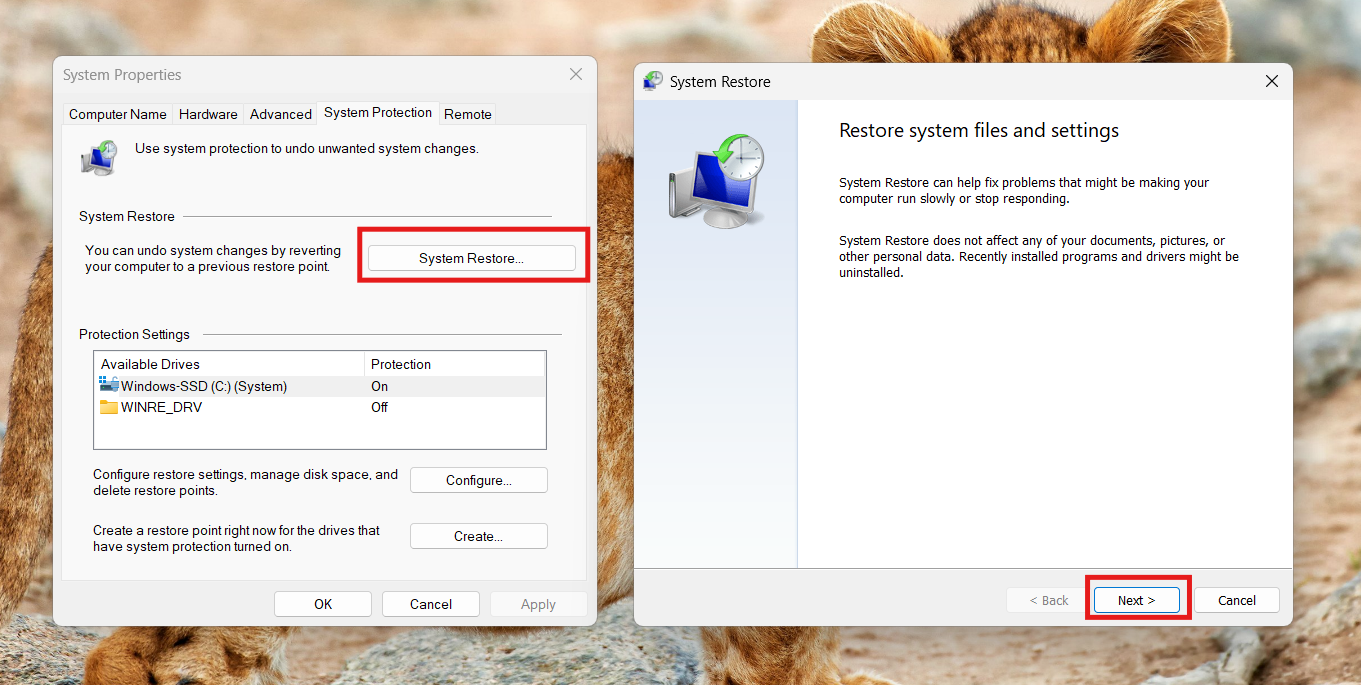
1. On the Automatic Repair screen, select Troubleshoot, go to Advanced options and then System Restore.
2. Choose a restore point from before the issue began.
3. Follow prompts and reboot once completed.
Fix 7: Perform a repair install or clean install of Windows
If none of the above work, you may need to reinstall Windows without losing files.
1. Create Windows 11 installation media using Microsoft’s Media Creation Tool and a USB drive.
2. Boot your PC from that USB drive.
3. When prompted, choose Install now, then select Keep personal files and apps if you want to preserve them (repair install).
4. If you prefer clean install, choose Remove everything.
5. Follow the on-screen instructions to complete installation. After the process finishes, your PC should start without the repair error.
Quick tips
1. Back up your files if you manage to boot successfully.
2. Keep your system updated once you regain access.
3. If hardware issues (like SSD failure) are suspected, run diagnostics from the PC maker.