When your external hard drive or USB storage device does not appear in File Explorer after connection, it can be frustrating. This issue of the external drive not showing up in Windows 11 often happens due to loose connections, missing drive letters, disabled devices, outdated drivers, uninitialized disks, or power-related problems.
Page Contents
External Drive Not Showing Up in Windows 11
Below are eight reliable solutions to help your PC detect and access the external drive again.
Fix 1: Check Physical Connection and Power
Before diving into software fixes, make sure your external drive is physically connected and powered properly.
1. Unplug the drive and reconnect it firmly to the USB port.
2. Try a different USB port on your PC.
3. If the drive has its own power adapter, ensure it is plugged in and turned on.
A secure connection and stable power supply are essential for detection.
Fix 2: Test the Drive on Another Computer
This confirms whether the problem is with the drive or your PC.
1. Disconnect the external drive and plug it into another computer.
2. Check if it appears in File Explorer there.
3. If it shows up on the other device, the issue is likely with your Windows 11 system, not the drive itself.
Fix 3: Enable the Drive in Device Manager
Sometimes the system disables the drive automatically.
1. Open Device Manager.
2. Expand Disk drives.
3. If the external drive is listed but disabled, right-click it and choose Enable device.
4. Restart your PC and check File Explorer again.
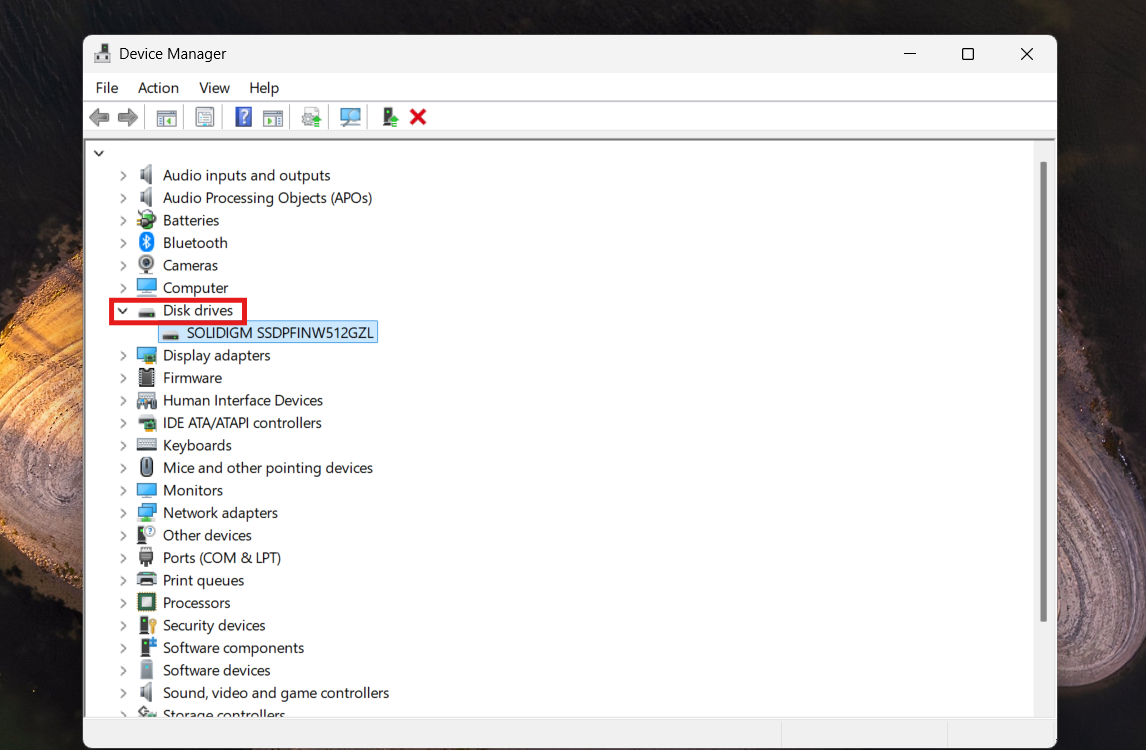
This ensures the external drive is allowed to function.
Fix 4: Assign or Change the Drive Letter
A drive without a letter won’t show in File Explorer.
1. Search for Disk Management and open it.
2. If the external drive appears, right-click its partition and select Change Drive Letter and Paths.
3. Click Add and assign an available letter.
4. Click OK, then close the window and check File Explorer.

Adding a drive letter makes it visible and accessible.
Fix 5: Initialize or Format the Drive
If the drive is new or corrupted, it may be uninitialized or formatted incorrectly.
1. In Disk Management, find the external drive.
2. If it shows as Unknown or Not Initialized, right-click and choose Initialize Disk.
3. After initializing, right-click the unallocated space, select New Simple Volume, and follow the prompts to format it with NTFS or exFAT.
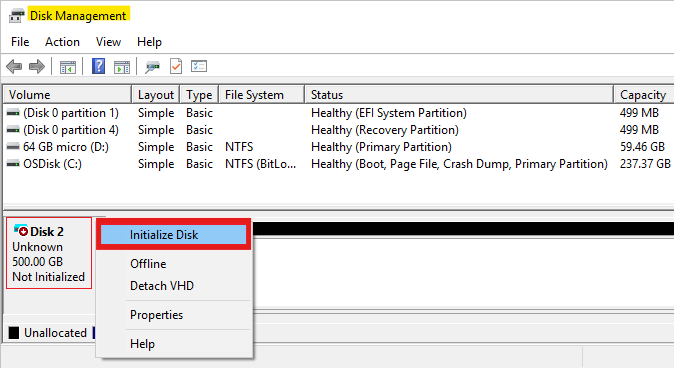
Be aware that formatting the drive erases all data on it.
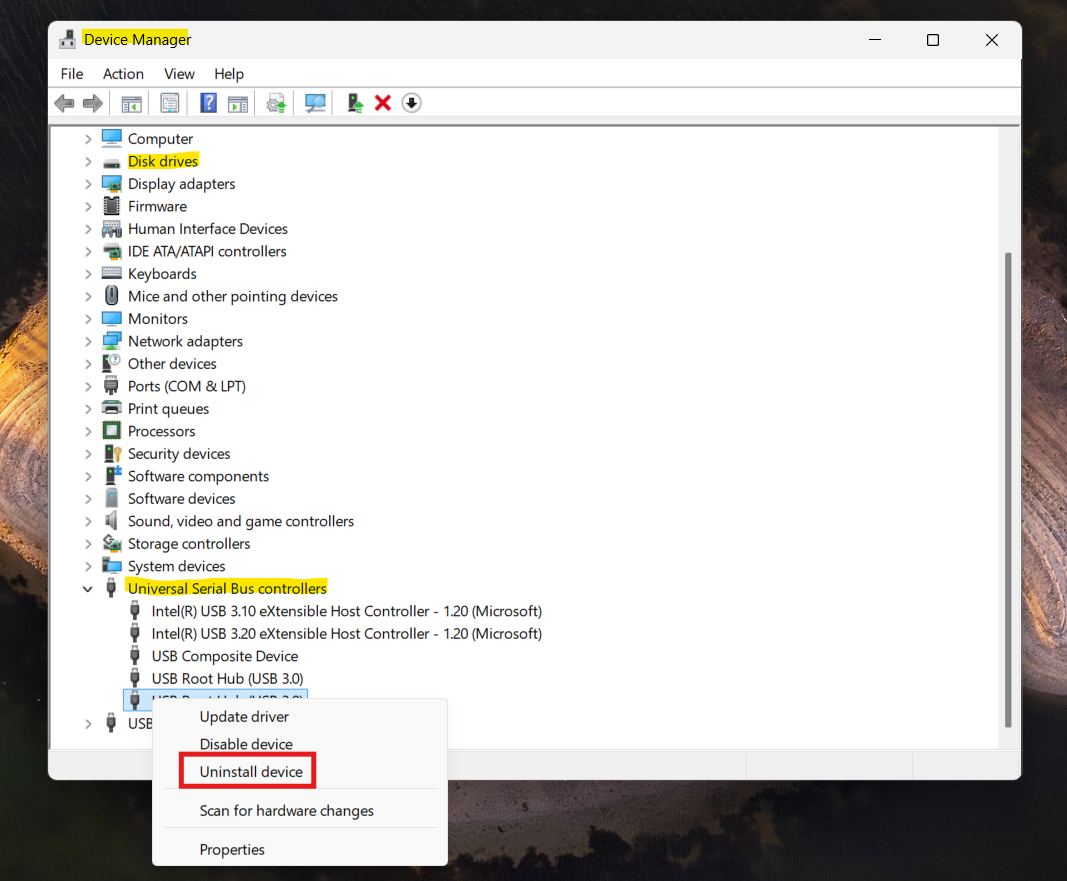
Fix 6: Update or Reinstall Drivers
Outdated or corrupt drivers can stop Windows from recognizing the device.
1. Open Device Manager.
2. Expand Disk drives and Universal Serial Bus controllers.
3. Right-click the external drive and choose Uninstall device.
4. Restart your PC so Windows reinstalls the drivers automatically.
Fix 7: Enable Auto Mount (If Applicable)
Windows should automatically mount new storage devices.
1. Open Command Prompt as administrator.
2. Type:
mountvol /E
3. Press Enter.
4. Restart your PC and reconnect the external drive.
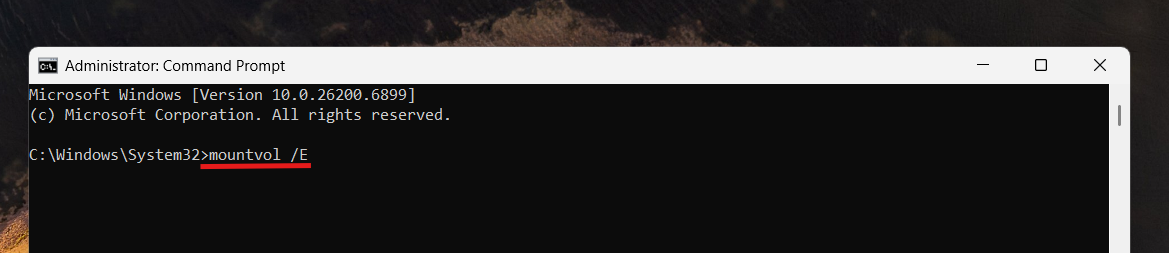
This enables Windows to assign drive letters automatically.
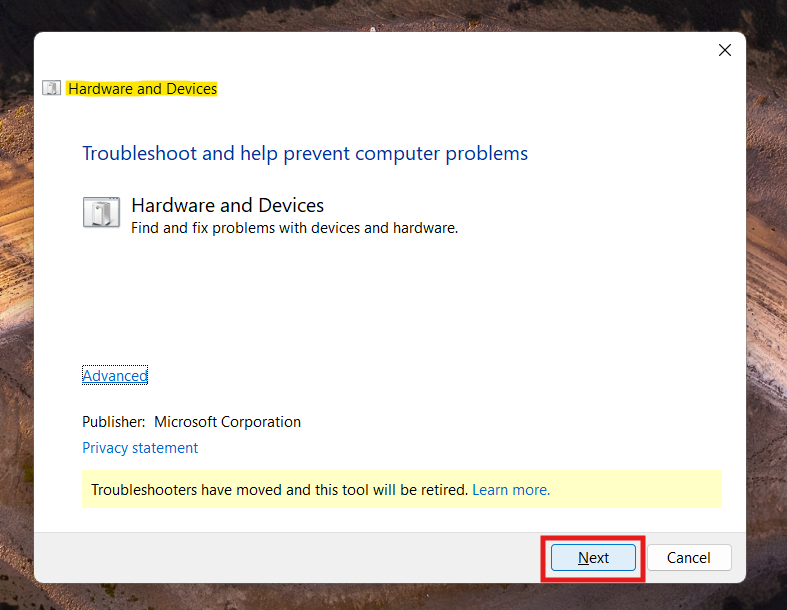
Fix 8: Run Hardware Troubleshooter
Windows includes basic tools to fix hardware detection issues.
1. Press Windows + R, type:
msdt.exe -id DeviceDiagnostic
2. Press Enter and follow the on-screen instructions.
3. This can detect and repair device recognition problems.
Quick Tips
1. Always restart your PC after trying each solution.
2. Use good-quality USB cables and connect directly to the PC rather than through hubs.
3. If your external drive works on another device but not yours, Windows settings or drivers are likely the issue.