
Connecting to wireless network is not a new thing for today’s generation. In Windows 10, when wireless network is available, and you connect to a particular network, you’re asked whether you should connect to this network automatically or not. If you allow Windows 10 to automatically connect the wireless network, your preference will be saved under network profile which is intact in the registry database.
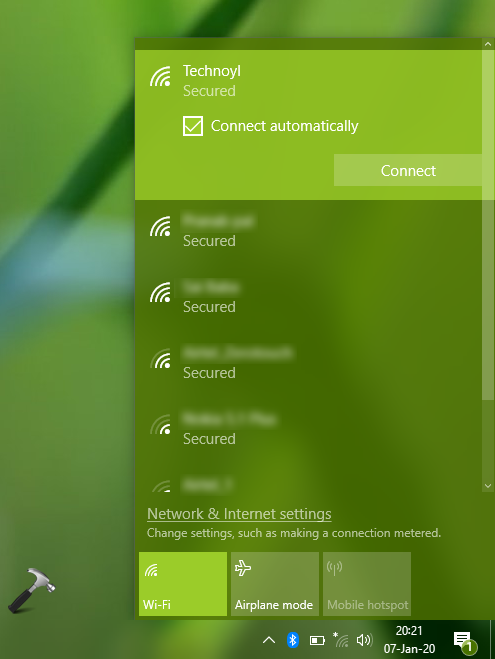
As Windows remembers your network and preference to connect automatically, you would then not able to change this preference from network fly-out on taskbar. So if you need to disable automatic connection for your wireless network, you can apply either of the methods mentioned below.
Page Contents
Connect Automatically To WiFi In Windows 10
Method 1 – Using Settings App
1. Right click Start Button or press  + X keys and select Settings.
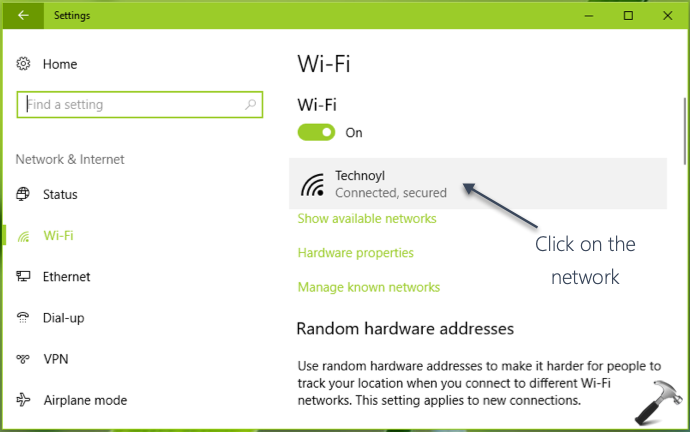
2. In the Settings app, navigate to Network & Internet > Wi-Fi.
3. Now in right pane of Wi-Fi, click on your currently connected wireless network.
4. Finally, in next window, under Connect automatically when in range, toggle to the switch to On/Off to enable/disable automatic connection for the wireless network, respectively.

You can alternatively configure this setting using Control Panel, as mentioned in Method 2 below.
Method 2 – Via Control Panel
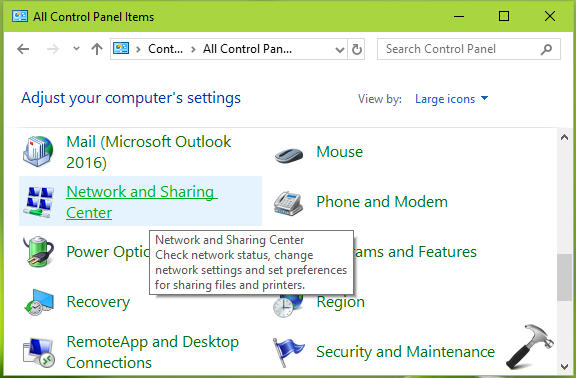
1. Open Control Panel and then click Network and Sharing Center.
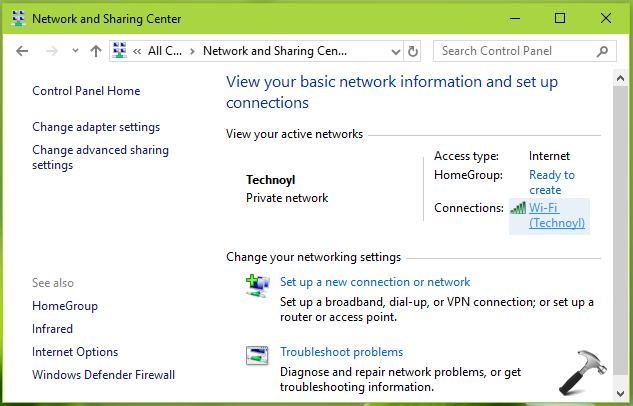
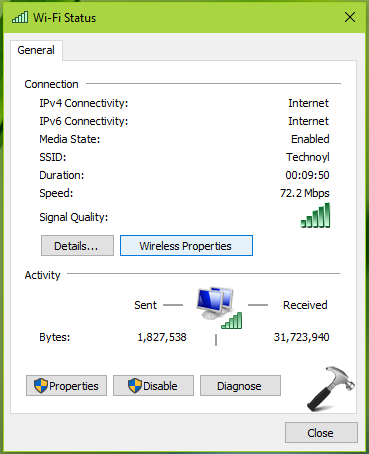
2. In Network and Sharing Center, against Connections, click on your currently active wireless network name.
3. Moving on, on the wireless status sheet, click on Wireless Properties button.
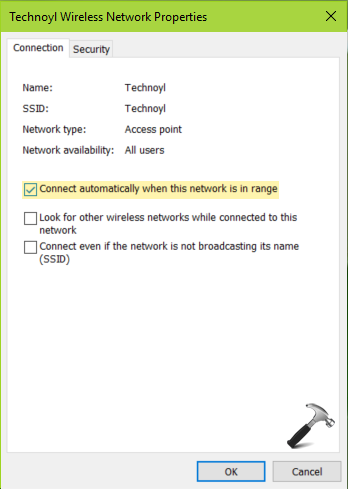
4. Under wireless network property sheet, at Connection tab, check/uncheck Connect automatically when in range option to allow/prevent automatic connection of wireless network. Click OK.
So this is how you can configure Windows 10 to automatically connect to WiFi networks.
That’s it!


![The mapped network drive could not be created [Detailed fix]](https://www.kapilarya.com/assets/Network-Drive-768x511.jpg)

![Stop sharing a folder in Windows 11 [Guide]](https://www.kapilarya.com/assets/Network-768x522.png)