
If you are using the latest preview build available for Windows 10, you might have noticed that there is extra padding introduced between File Explorer elements. Earlier, the File Explorer elements were having fixed padding which was now more visually. This is actually due to the new feature introduced to File Explorer. If you are on preview build 21337 or later, Microsoft has added a new feature called compact mode to File Explorer. In this article, we will see how to enable/disable compact mode in File Explorer for Windows 10.
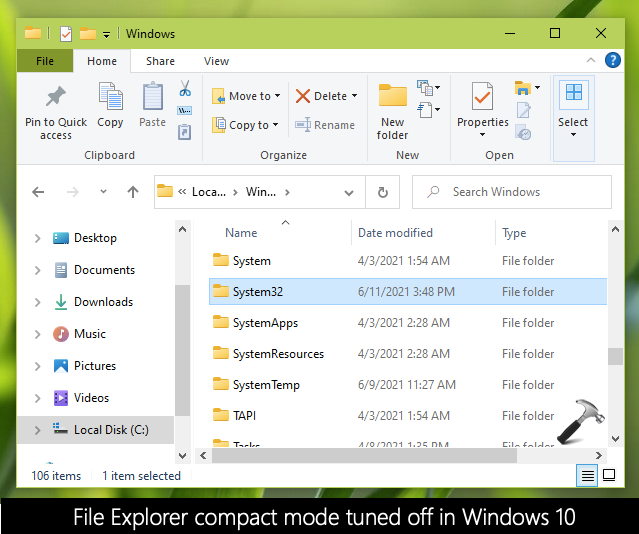
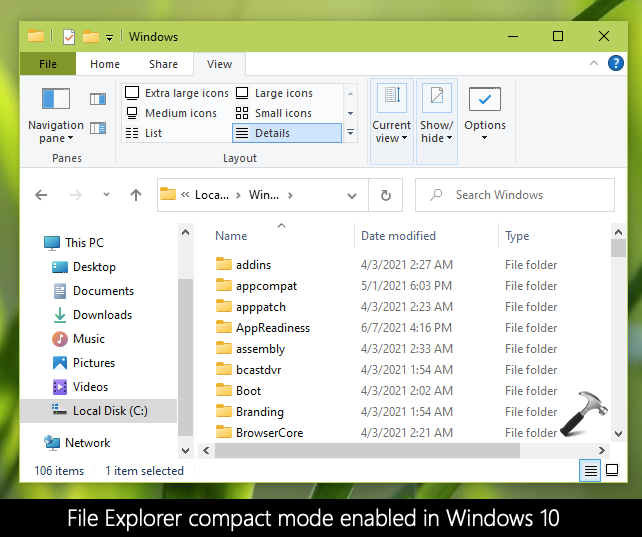
The gap or padding you are seeing between the file Explorer elements, can be clearly seen in below mentioned screenshot. In this condition, the compact mode is disabled or turned off. This is the default setting for File Explorer, as of this writing.
If you wish to disable compact mode and restore the classical layout of File Explorer, here is how you can.
Page Contents
Enable/disable compact mode in File Explorer for Windows 10
Method 1 – Using File Explorer
1. Press  + X keys and select File Explorer or directly press press + E keys to launch File Explorer.
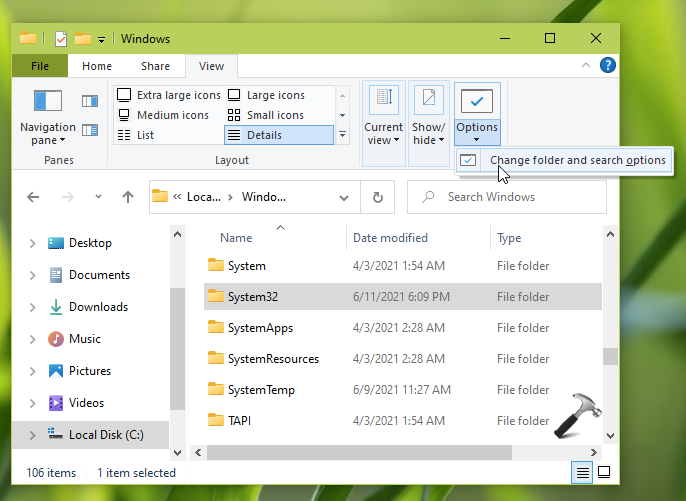
2. In the ribbon, switch to View tab and then click Options > Change folder and search options.
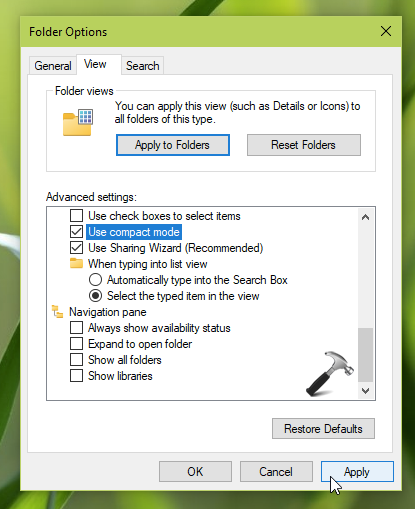
3. In the Folder options window, switch to View tab. Under Advanced settings, check the Use compact mode option to enable it. By default, this option is unchecked that means compact mode is disabled. Click Apply followed by OK.
In few seconds, you will see that changes are now applied to the File Explorer.
In case if this method does not works for you, try Method 2 mentioned next here.
FIX 2 – Using Registry
1. Run regedit command to open Registry Editor.
2. In Registry Editor window, go to following registry location:
HKEY_CURRENT_USER\Software\Microsoft\Windows\CurrentVersion\Explorer\Advanced
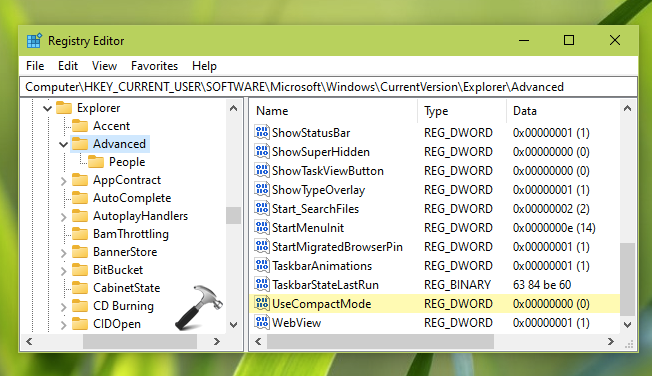
3. In the right pane of Advanced registry key, locate the registry DWORD named UseCompactMode. If you set its Value data to 0, it will disable compact mode. While if you set its Value data to 1, compact mode should be enabled.
4. Once you set the required Value data, close the Registry Editor & sign out then sign in back to make changes effective.
After disabling compact mode, you should be able to restore classical File Explorer layout, as seen in this image:
Check this video to illustrate this guide:
That’s it!
Read next: How To Show Hidden Files And Folders In Windows.


![Quick Access Crashes File Explorer in Windows 11 [6 Fixes]](https://www.kapilarya.com/assets/File-Explorer-1-768x552.png)
