Usually, when you create a disk partition in Windows 10, you can select what drive letter you want to assign to that partition. However, later if you need to change drive letter in Windows 10, this article will show you how to do that.
You can easily change the drive letter using Disk Management snap–in or via Command Prompt. Before changing the letter for a drive, make sure you have moved the apps and programs installed on that to other drive. If you don’t do that, the apps and programs will be no longer able to find that drive and hence won’t work. That’s why, it is often recommended that you do not change the letter for drive on which Windows or apps/programs are installed.
Here’s how to change drive letter in Windows.
Page Contents
How to change drive letter in Windows 10/Server/8.1/7
Method 1 – Change drive letter using Disk Management
1. Press  + R to open Run and type
 diskmgmt.msc in it to open Disk Management. Click OK or press Enter.
2. In the Disk Management window, right click on the volume/partition for which you want to change the drive letter and select Change Drive Letter and Paths.

3. Next, in the Change Drive Letter and Paths, click Change.
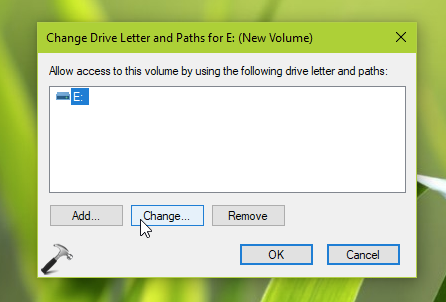
4. In the next window, click on drop-down next to Assign the following drive letter. Select the drive letter you want and click OK.

5. At this stage, there might be a warning appearing saying that if some programs rely on drive letter, they might not run correctly. To continue, click Yes here.

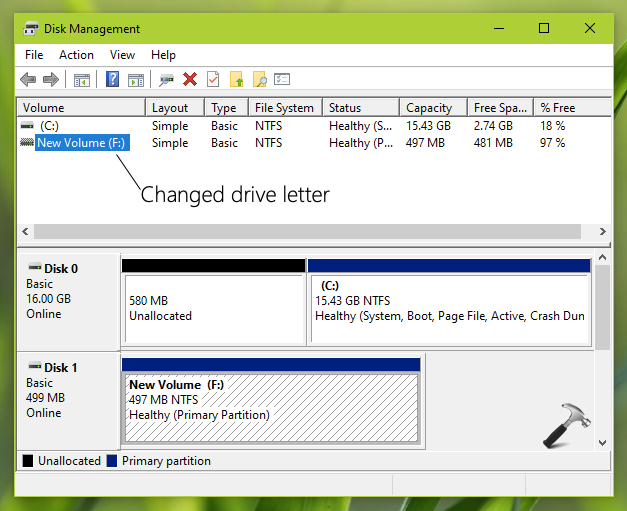
Finally, you will find that the drive letter is successfully changed, as you can see in the screenshot below.
Method 2 – Change drive letter using Command Prompt
1. In Windows 10/Server, right click on Start Button and select Command Prompt (Admin). On older Windows editions such as Windows 8/7, you can open Command Prompt as administrator, using search.
2. Now in the Command Prompt window, type following commands one-by-one and press Enter key after each:
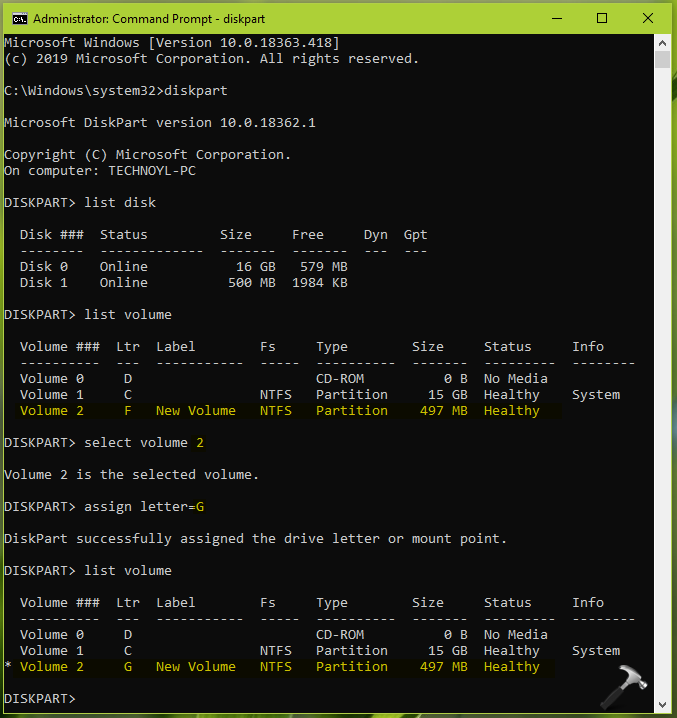
diskpart
list disk
list volume
select volume #
Replace # with volume/partition number, for which you want to change drive letter.
assign letter=*
Replace * with drive letter you want to assign.
3. You can again run list volume command to confirm, if the drive letter is changed. Close Command Prompt then.
That’s it!