
In Windows 11, the Start Menu has two primary sections. One section is for pinned apps while another section is about recommended stuff. The pinned apps will help you to quickly start them, while recommended stuff provides you quick access to your recent apps, documents etc. If you’re on Windows 11 build 22509 or later, you can customize the Start Menu sections as per your usage. In this article, we’ll see how to change Start Menu layout in Windows 11.
So the default layout for Start Menu in Windows 11 looks like this:

You can customize it to show more pinned apps as shown in this screenshot:

Or you can allow Start Menu to show more recommended stuff:

Here’s how to customize Start Menu layout.
Page Contents
How to change Start Menu layout in Windows 11
Method 1 – Using Settings app
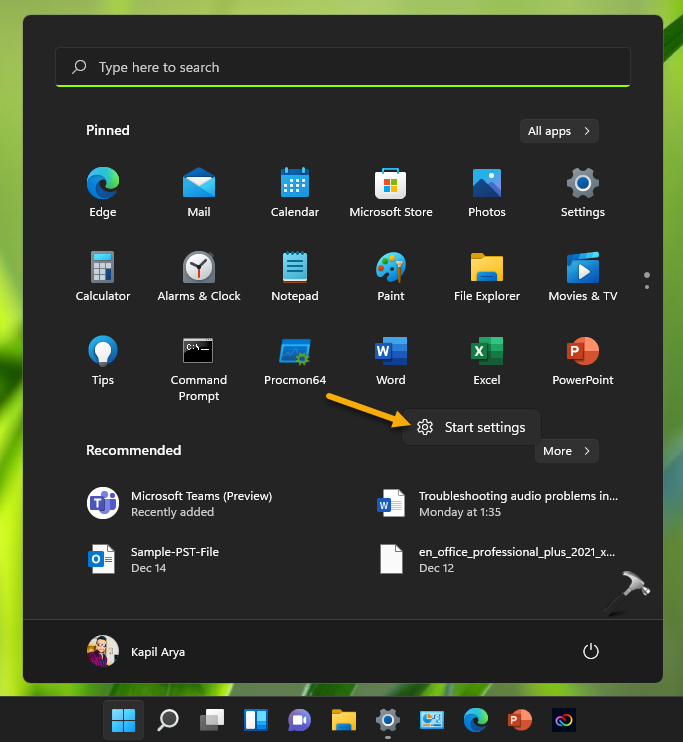
1. Press  + I keys to open Settings app. Or right click Start Menu and select Start Settings.
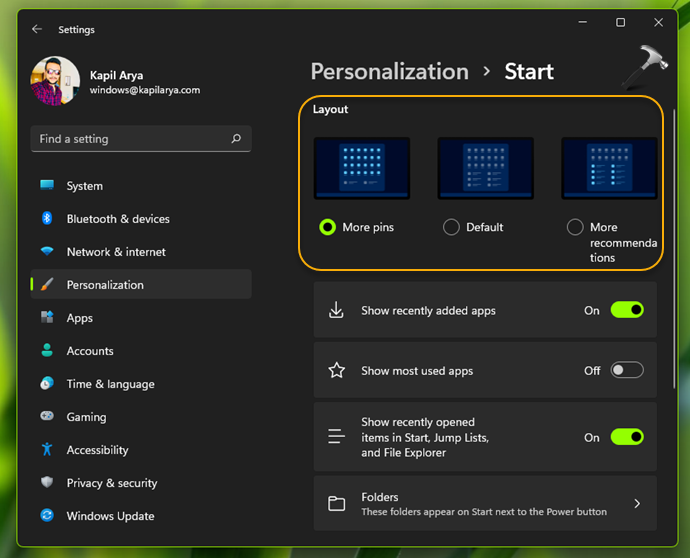
2. In Settings app, make sure you’re at Personalization > Start.
3. Under Layout, you can select a layout that suits you best. Here Default is already selected, so if you need more apps pinned to Start, you can choose More pins. In case, if you want less apps pinned and more recommended stuff, choose More recommendations instead.
Whatever you select here, your selection will be applied immediately to the start menu. You can close the settings app and return to your work now.
Method 2 – Using registry
 Registry Disclaimer: It is recommended to create a System Restore point first, if you’re not familiar with registry manipulation.
1. Run regedit command to open Registry Editor.
2. In left pane of Registry Editor window, navigate to:
HKEY_CURRENT_USER\Software\Microsoft\Windows\CurrentVersion\Explorer\Advanced

3. In the right pane of Advanced registry key, locate the registry DWORD named Start_Layout. By default, its Value data must be set to 0. If you want more pins, set the Value data to 1. Or if you want more recommendations, set the Value data to 2.
4. Close the Registry Editor and sign out, sign in back to make changes effective.
That’s it!
Related: Start Menu not working in Windows 11.


