
Before you know how to delete font cache in Windows 11, it is important to understand what font cache is. Font cache are the fonts stored as a cache file in your system. This builds up when your Windows system has to load different fonts used by different applications and programs on a frequent basis. Sometimes, you might face an issue with the font cache file while updating the existing fonts or installing new ones.
So, if the font cache gets corrupted, it is better to delete and reset it. Windows will rebuilt a new font cache in no time once you reboot the system. In this post, learn how you can delete the font cache in the easiest way!
How to delete font cache in Windows 11
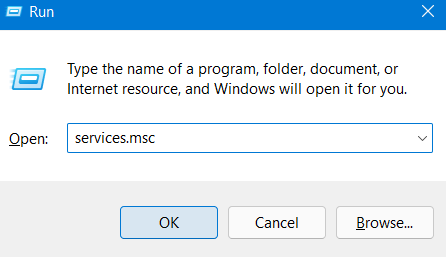
1. In the first place, open the Run dialog box by pressing the Windows + R tabs together on your keyboard. Once opened, type services.msc to open Services and hit Enter.
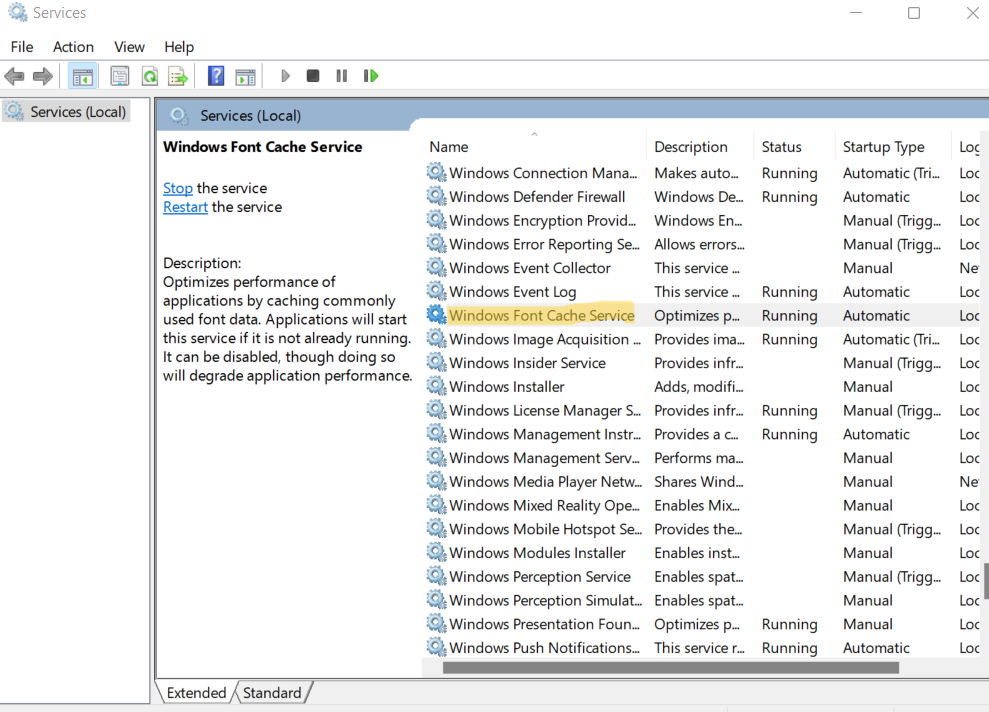
2. After that, look for the Windows Font Cache Service and double-click on it.
3. In the next window, select Disabled from the Startup type dropdown menu.
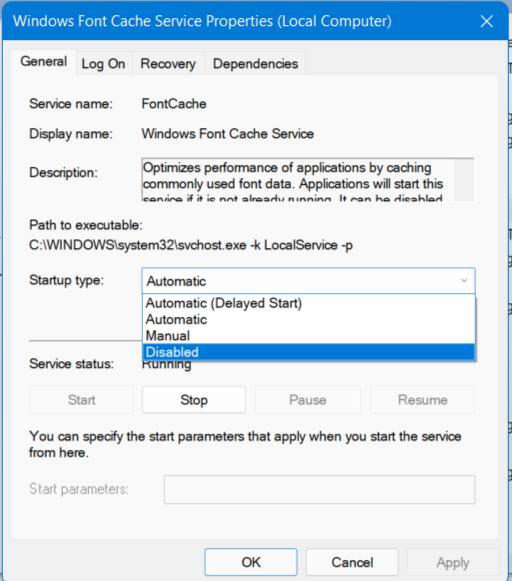
4. Now, click on Stop under the Service status and then, select Apply and press OK.
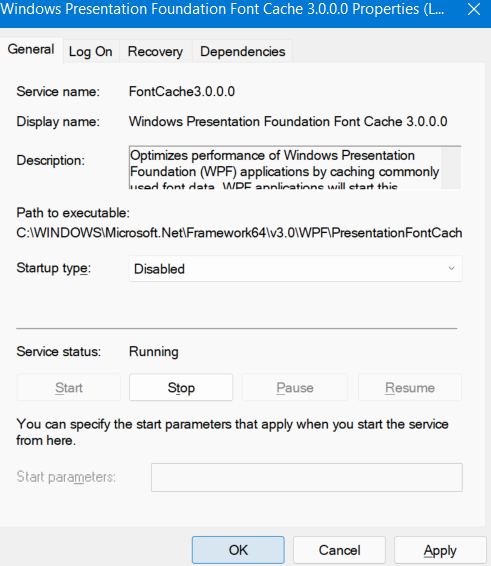
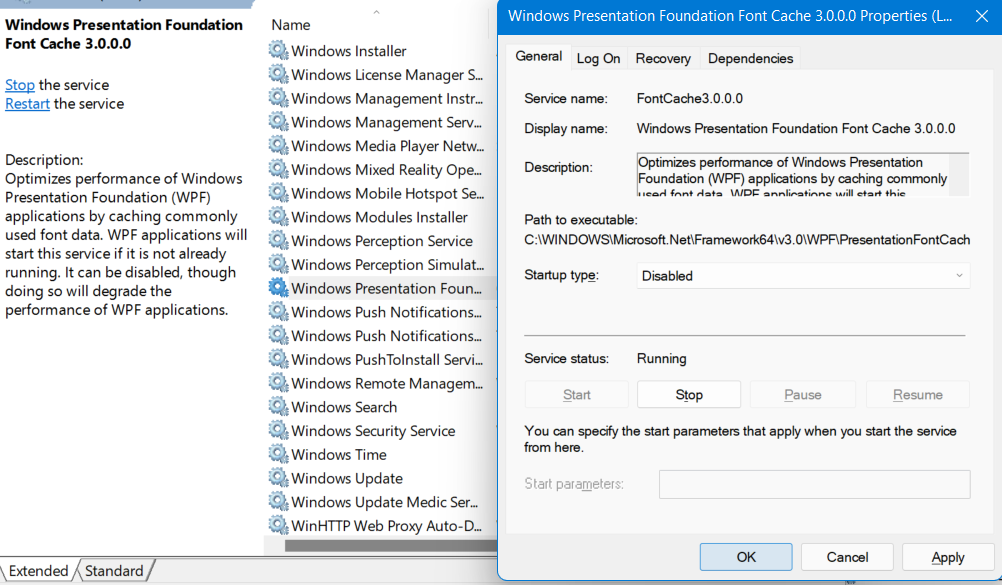
5. Once done, look for another service, Windows Presentation Foundation Font Cache 3.0.0.0, in the Services window. Repeat the same procedure to disable this service too.
6. Next, open Windows Explorer by pressing the Windows + E tabs simultaneously on your keyboard. Once there, navigate to the following location:
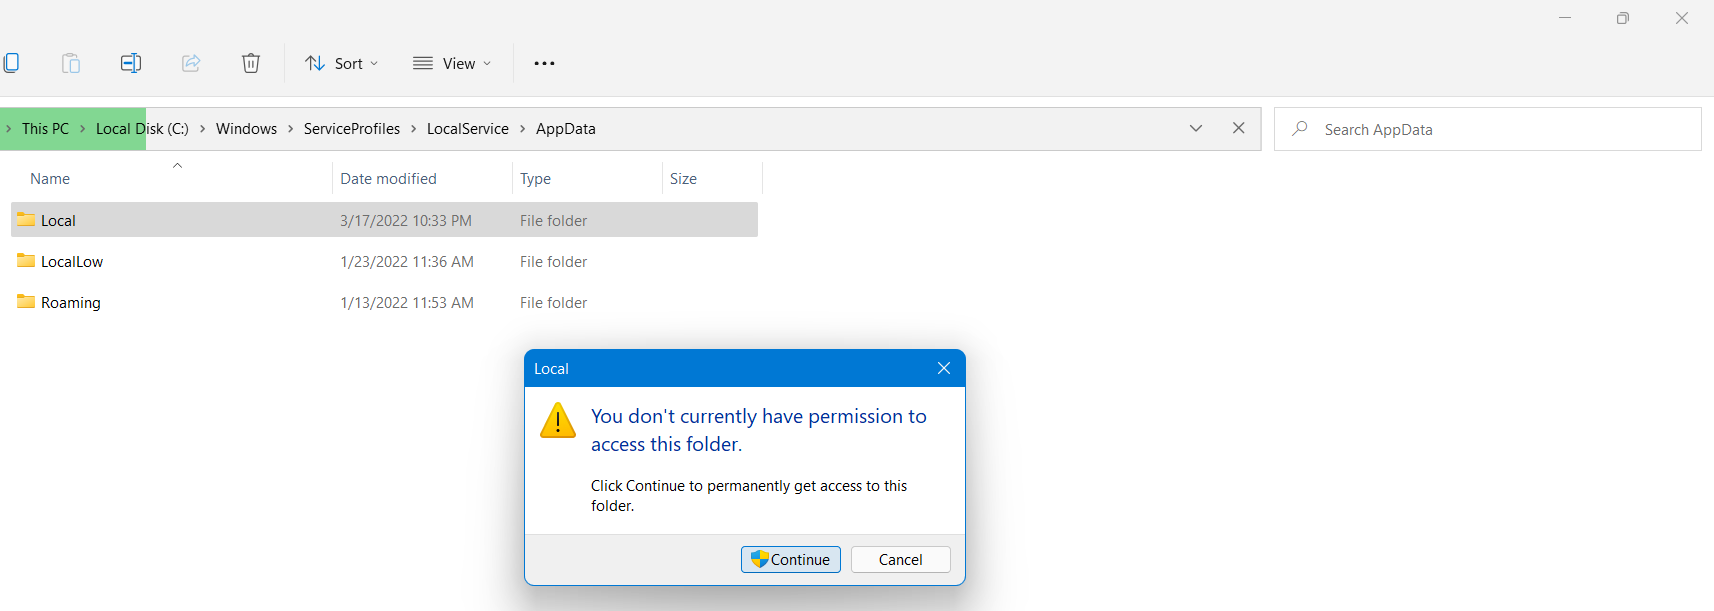
C:\Windows\ServiceProfiles\Local\AppData\Local
Note: Make sure you have selected to view Hidden items within the View tab. To do so, click on View and then, select Show and tick Hidden items.
7. Click on Continue if you come across a prompt saying, “You don’t currently have permission to access this folder.” If you’re denied access to any folder, you can take ownership of that folder.
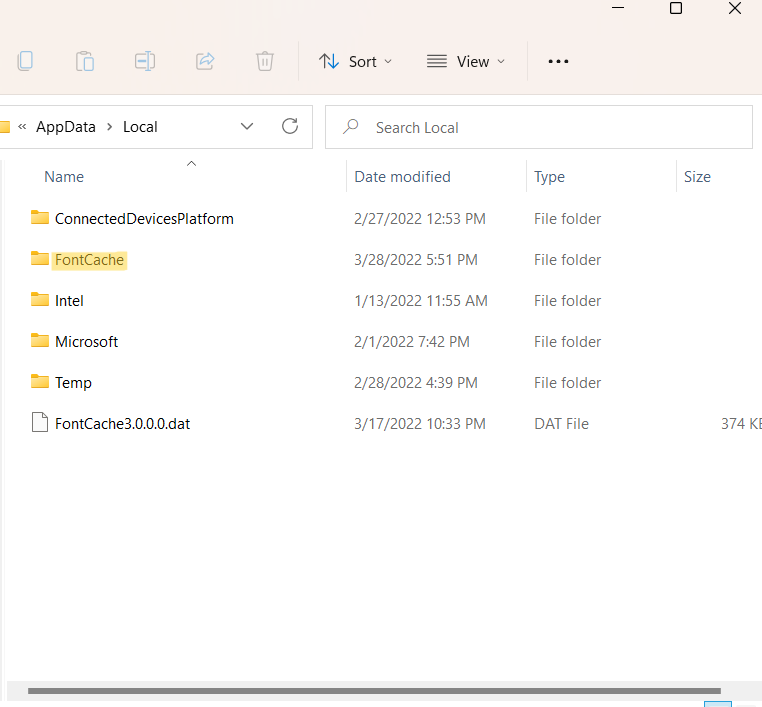
8. Now, click on the FontCache folder.
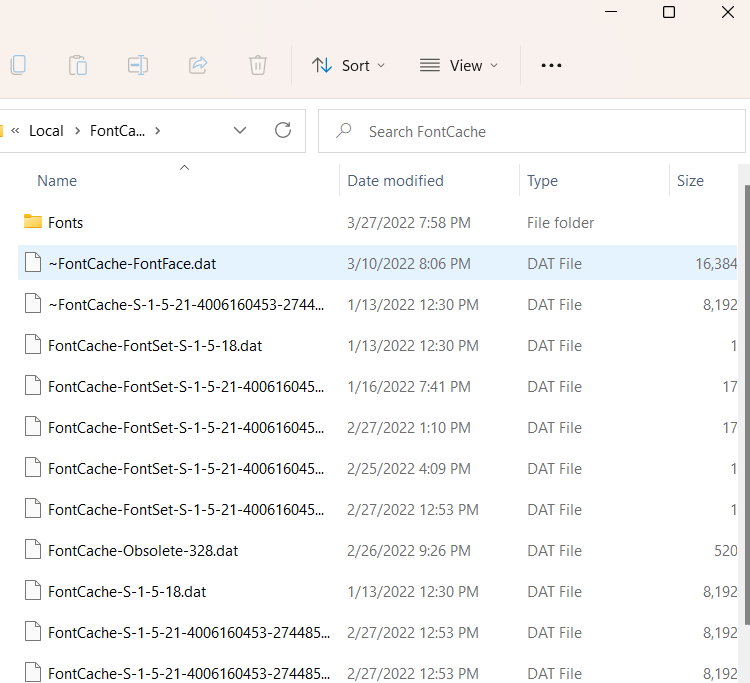
9. Now, delete all the files starting with ~FontCache~.
10. Lastly, reboot your system.
So, this is how to delete font cache in Windows 11.
Read next: How to change default font in Windows 11.


