Do you want to stop Windows Defender from deleting files on Windows 11? Well, in that case, this is what you want! Here, we will take you through step-by-step instructions so that you can prevent Windows Defender from deleting your files. Since they can be restored in quarantine and even sent to Microsoft to be looked into, these tricks will provide you with complete control of what remains on your PC.
Well, now, dive in, and ensure that your valuable files do not get lost, but at the same time, keep your computer secure.
Page Contents
Windows Defender/Security on Windows 11 System
Windows Defender/Security (formerly called Microsoft Defender Antivirus) is a built-in part of Windows 11 that ensures your possible safety against viruses, malware, and unwanted applications. It is trustworthy, free, and can also operate in the background, and does not require a lot of attention. And, however, at times, it is overprotective. A lot of users usually report that Windows Defender automatically erases files that are absolutely harmless, such as work documents, downloaded programs, and even custom applications.
Why Windows Defender Deleting Files Automatically?
Windows Defender applies real-time protection to scan files and applications. It can also delete or quarantine a file that it suspects can be harmful, even though it may be safe. Common reasons include.
- The false positives are situations when a clean file is classified as malware.
- Unknown source files are downloaded.
- The scripts in the application or file may mimic the workings of malware.
- The files could have been secondarily damaged or half-complete downloads.
Fortunately, you can reclaim the situation by the following methods.
Stop Windows Defender from deleting files on Windows 11
Fix 1: Restore Deleted Files from Quarantine
In some cases, Windows Defender will not delete the file but instead relocate it to quarantine. Such measures will enable you to restore things that were accidentally deleted without reducing the security of your system. You can easily restore it.
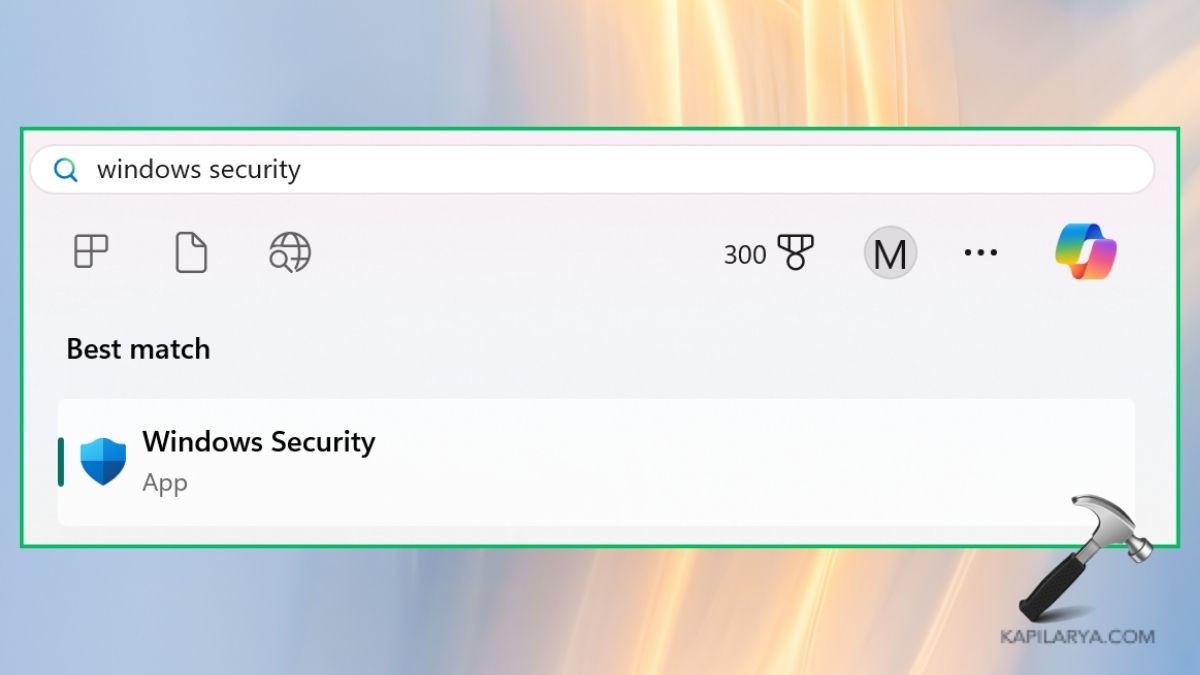
1. To access the search bar, press Win + S keys and type Windows Security.
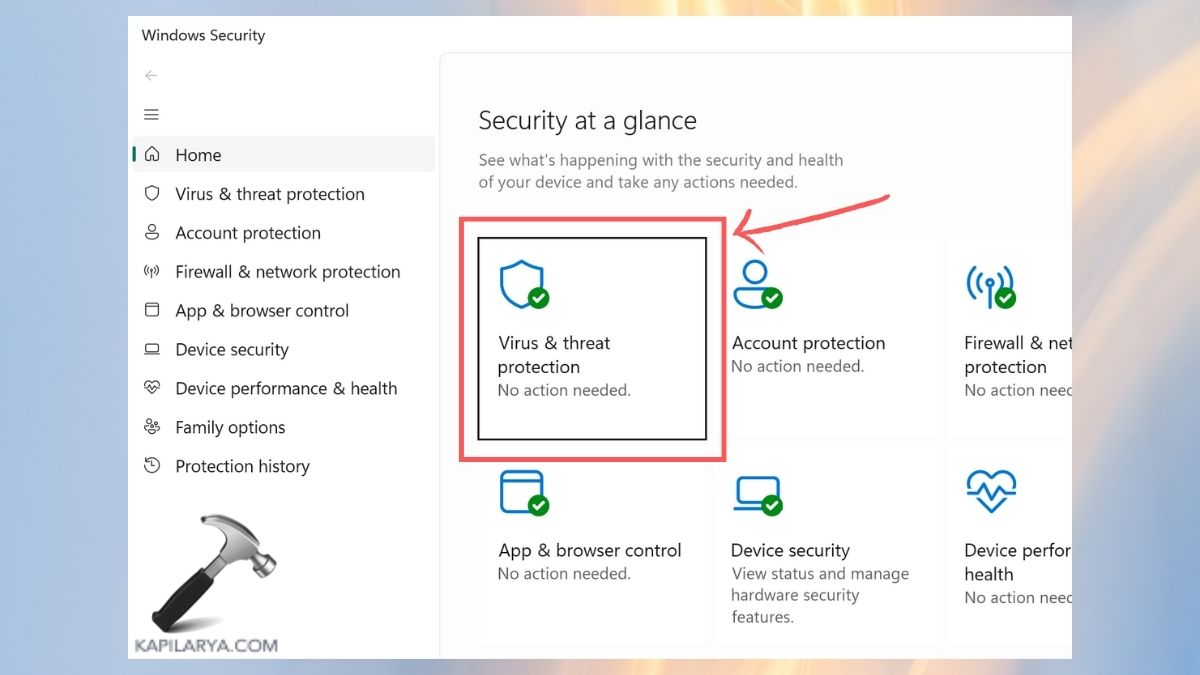
2. Tap Virus & threat protection. In Current threats, choose Protection history.
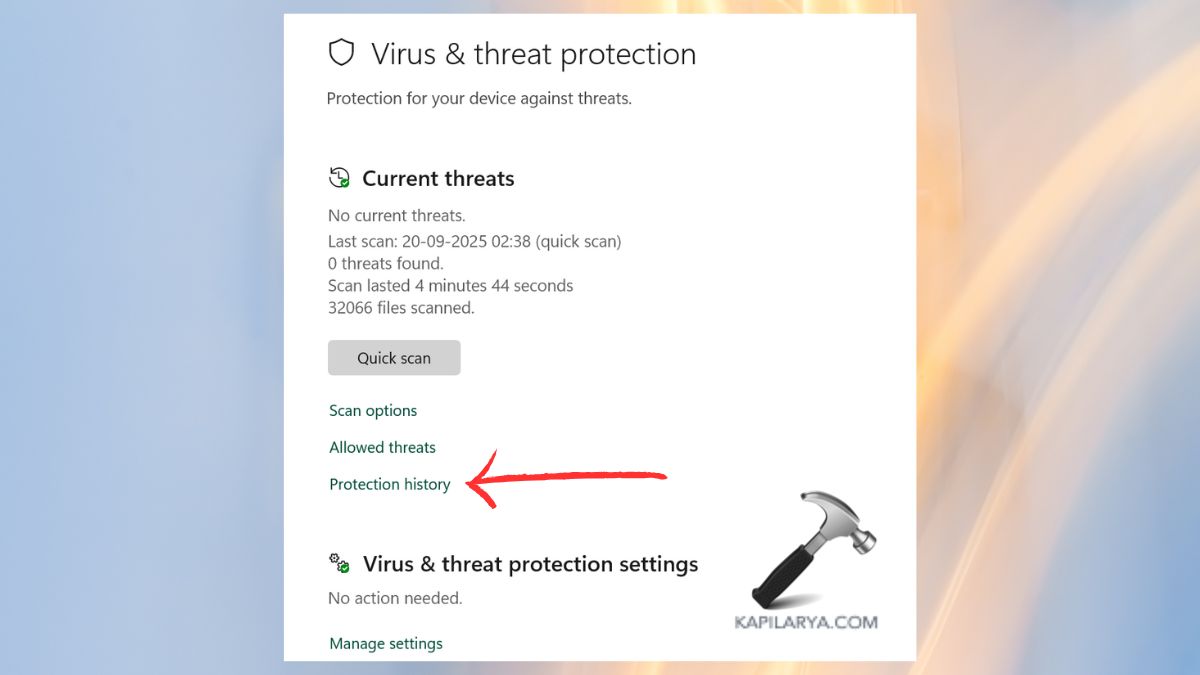
3. You must find out the file that is regarded as dangerous. In case you are confident that the file is safe, then select the Restore option.
Fix 2: Add an Exclusion for Safe Files or Folders
Defender does not scan exclusions, so it is certain that it will not be deleted. In case there are some files or applications that Defender is constantly deleting, it is possible to exclude them.
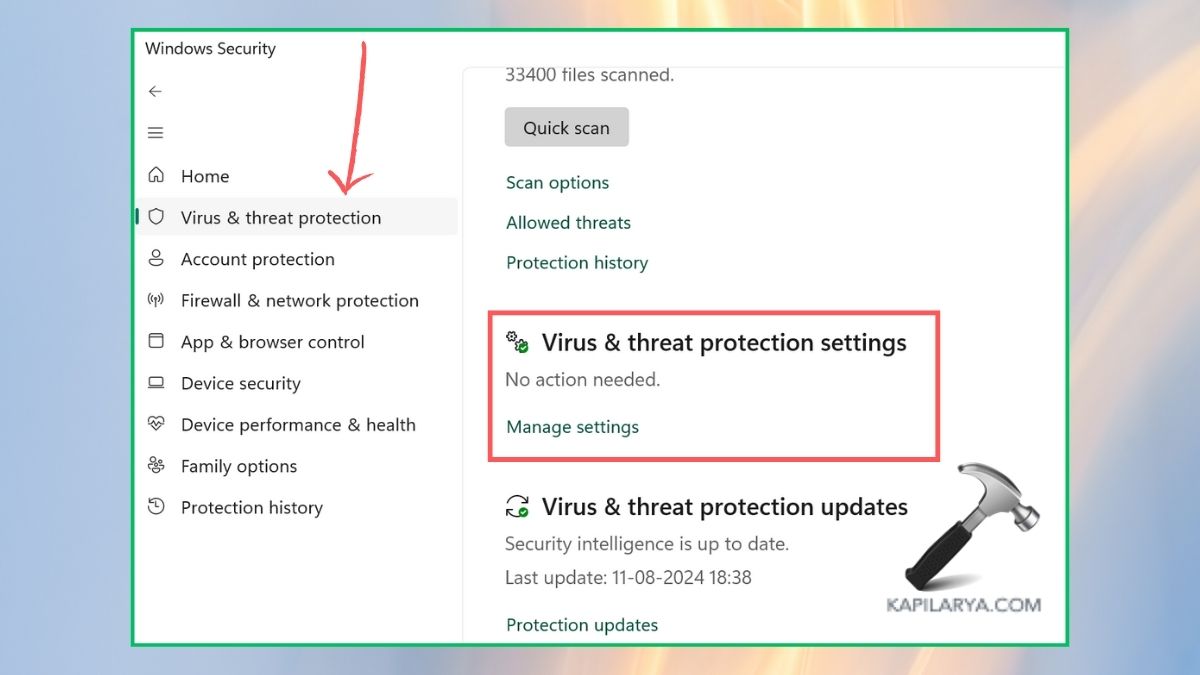
1. In the Windows Security, reopen it and select Virus and threat protection.
2. The next step is to scroll down and click Manage settings.
3. Now, select “Add or remove exclusions”.
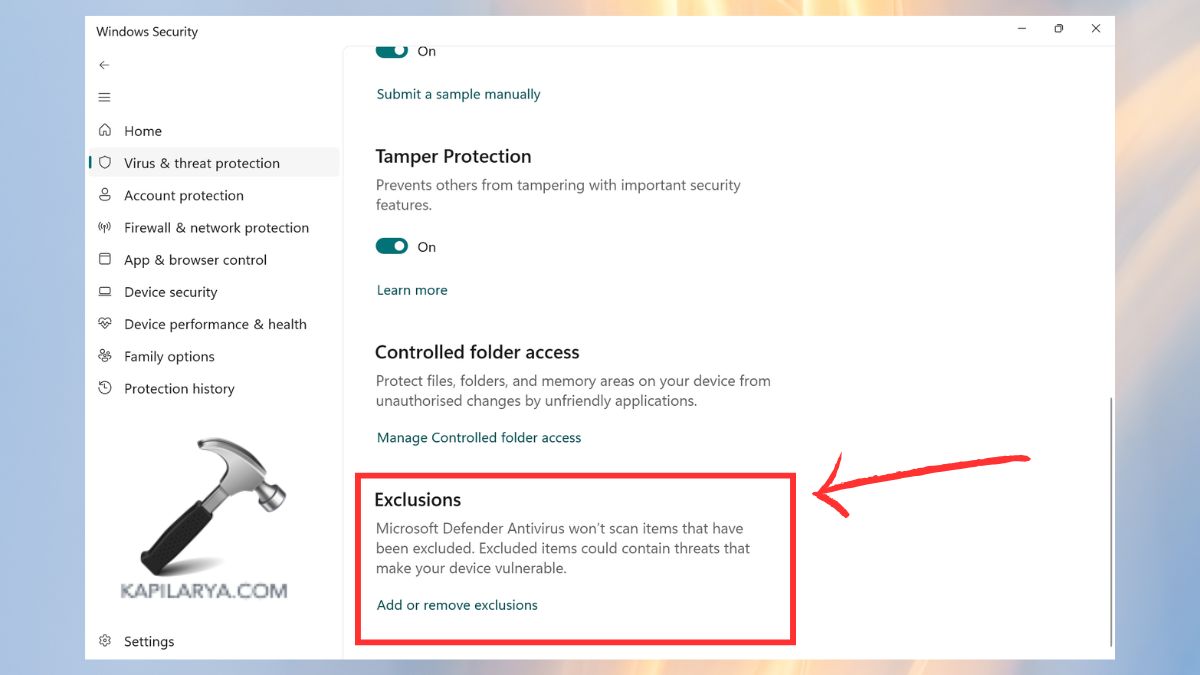
4. In the Add an exclusion window, select a File, Folder, File type, or Process.

Fix 3: Temporarily Disable Real-Time Protection
In case you are installing trusted programs that Defender keeps on blocking, you can turn on real-time protection off in the short term.
1. To accomplish this, once again move to Windows Security Virus and threat protection settings. Click Manage settings.
2. Switch the Real-time protection on and off.

Note: Also, make sure that you have it turned back on once installed to prevent the risk of leaving your PC unsecured.
Fix 4: Add Exclusions Using Group Policy Editor (Advanced)
Group Policy Editor also gives more control to advanced users. The approach is particularly helpful in the case of IT professionals dealing with a variety of systems.
1. Press the following keys simultaneously, which are Win + R. Then type the Group Policies command and press Enter.
gpedit.msc

2. Navigate to this path.
Computer Configuration > Administrative Templates > Windows Components > Microsoft Defender Antivirus > Exclusions
3. Turn on and turn off file, folder, or process exclusions. Implement and restart your system.
Fix 5: Submit the File to Microsoft for Analysis
In case Defender continues to delete a file that you suspect is safe, you may forward it to Microsoft to investigate further.
1. Go to the Microsoft Security Intelligence Submission Portal (https://www.microsoft.com/en-us/wdsi/filesubmission).

2. Add the file and give the specifications on the problem. Microsoft will run an analysis on the file, and once it is safe, it will update its definitions to prevent future false positives.

Frequently Asked Questions (FAQs)
That’s it!