USB Selective Suspend is a power-saving feature in Windows that allows the operating system to selectively suspend specific USB devices to conserve energy. While this feature can be beneficial for extending battery life on laptops or reducing power consumption on desktops, it may also cause issues such as USB devices disconnecting or not functioning properly. If you’re experiencing problems with the USB device system and suspect USB Selective Suspend might be the culprit, you can disable this feature to see if it resolves the issue. In this guide, we’ll walk you through the steps to disable USB Selective Suspend in Windows 11.
Page Contents
Disable USB Selective Suspend in Windows 11
Below are four simple methods to solve this issue:
Method 1: Using Command Prompt
1. Open the command prompt and run as administrator.
2. Copy and paste the below command and then press Enter:
powercfg /SETACVALUEINDEX SCHEME_CURRENT 2a737441-1930-4402-8d77-b2bebba308a3 48e6b7a6-50f5-4782-a5d4-53bb8f07e226 0

The above command configures a specific power setting related to processor power management for the current active power plan when the system is connected to AC power.
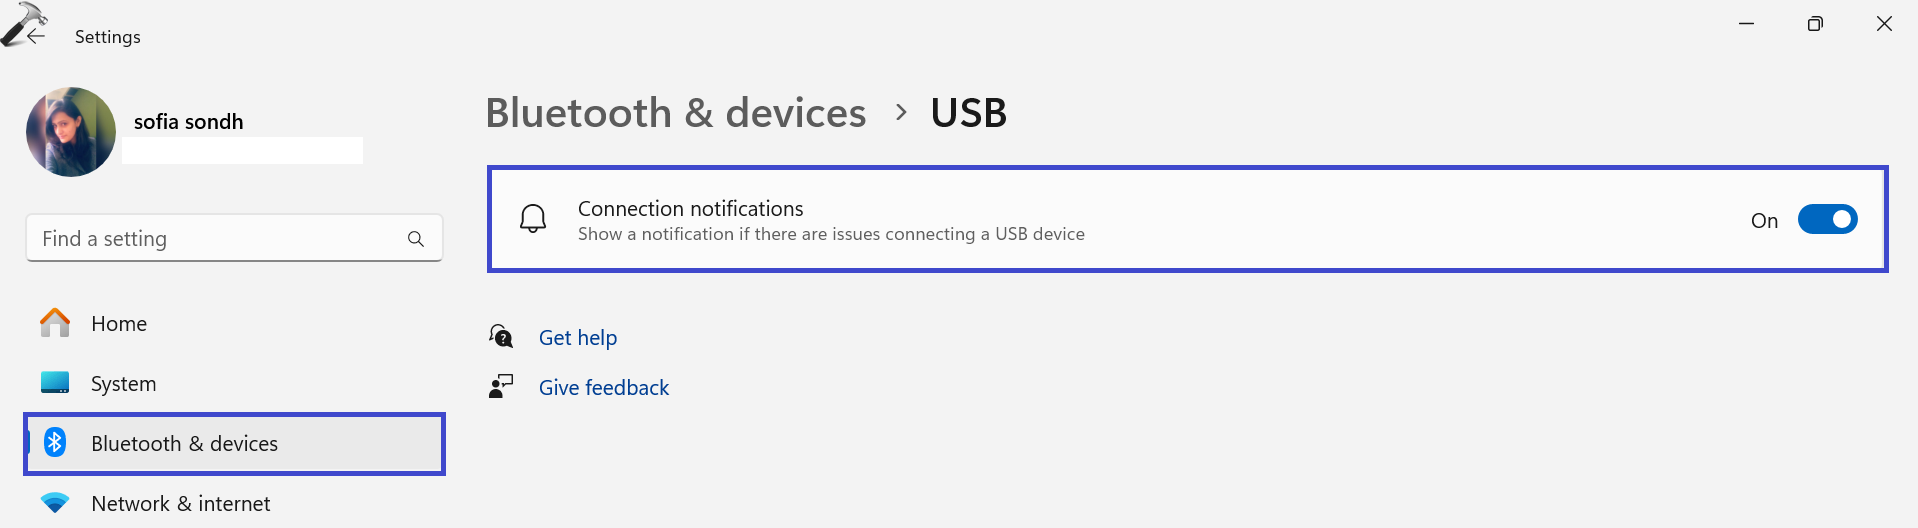
Method 2: Using Settings App
1. Open the Settings App and go to “Bluetooth & devices“.
2. Click on “USB“.

3. Here, turn off the “USB battery saver” option.
Restart the PC to save the settings.
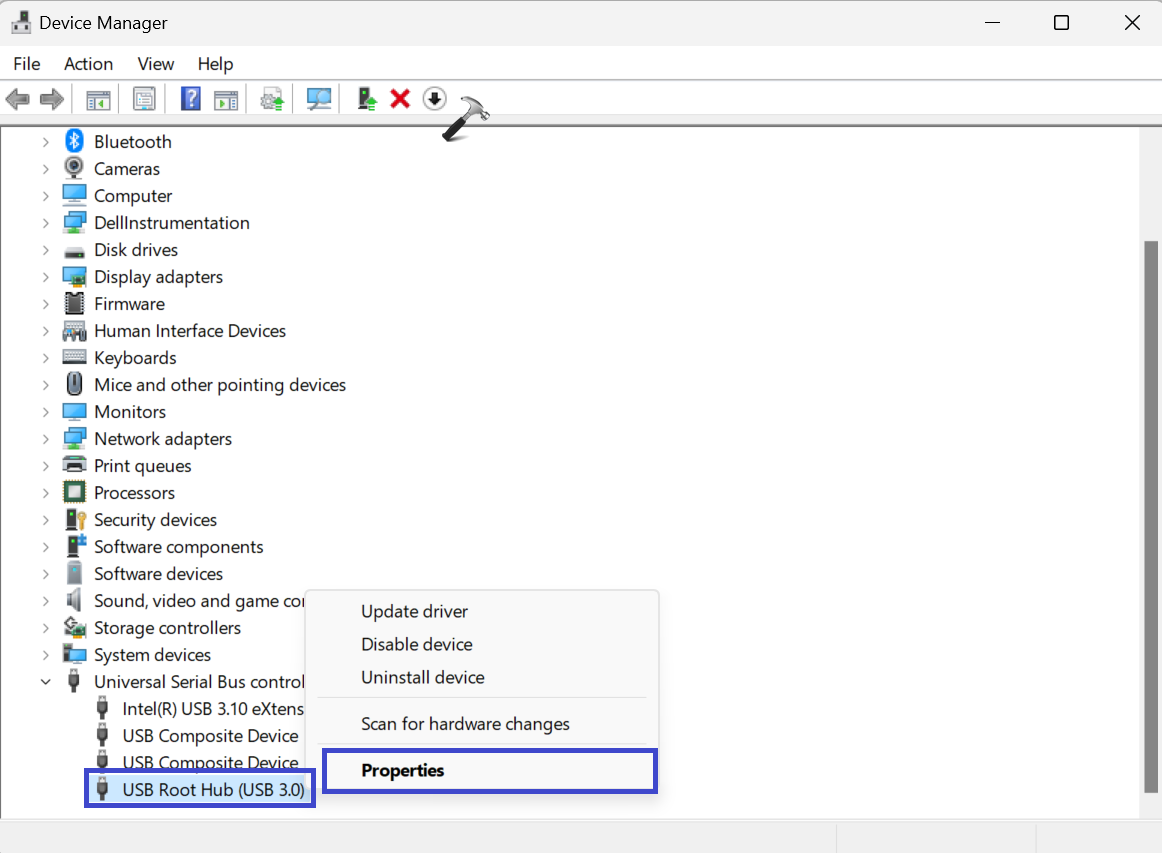
Method 3: Using Device Manager
1. Press the Windows key + X. Select “Device Manager“.
2. Expand the “Universal Serial Bus Controller” option.
Right-click on any USB Root Hub and click on “Properties“.
3. A dialog box will appear. Navigate to the “Power Management” section.
Uncheck the “Allow the computer to turn off the device to save power” option.
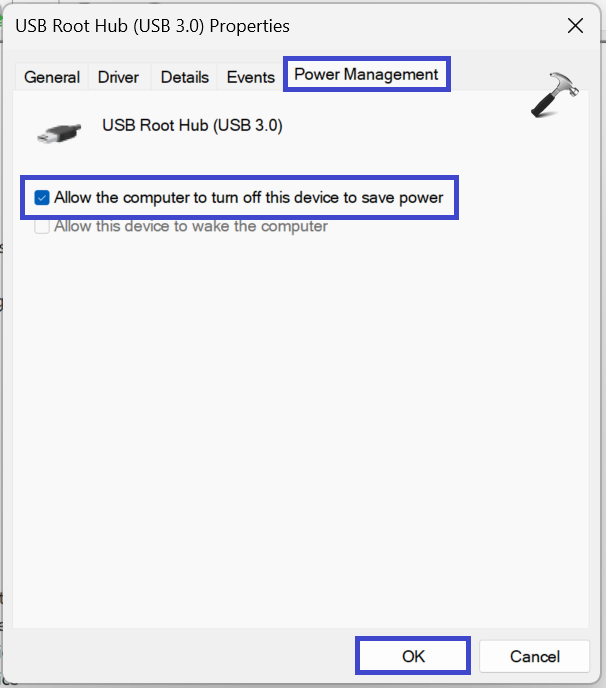
4. Click OK.
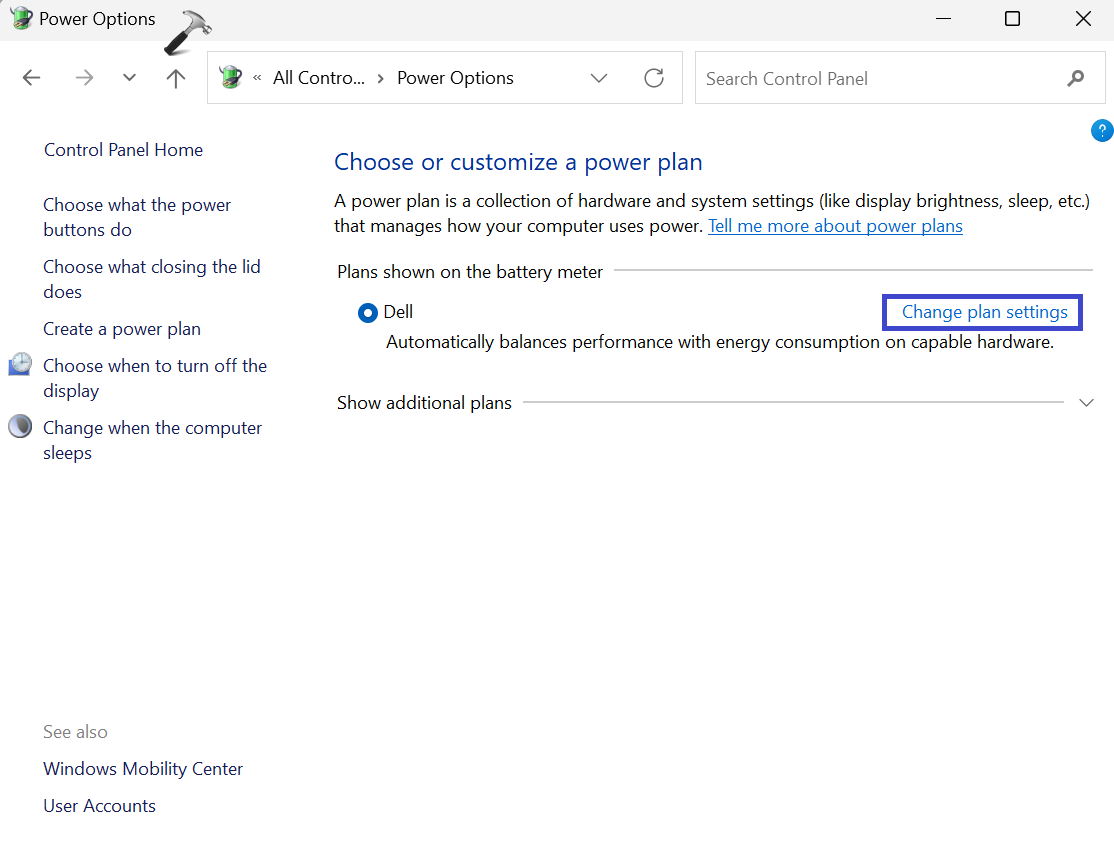
Method 4: Using Control Panel
1. Open the Control Panel. Make the “view by” to large icons. Select “Power Options“.

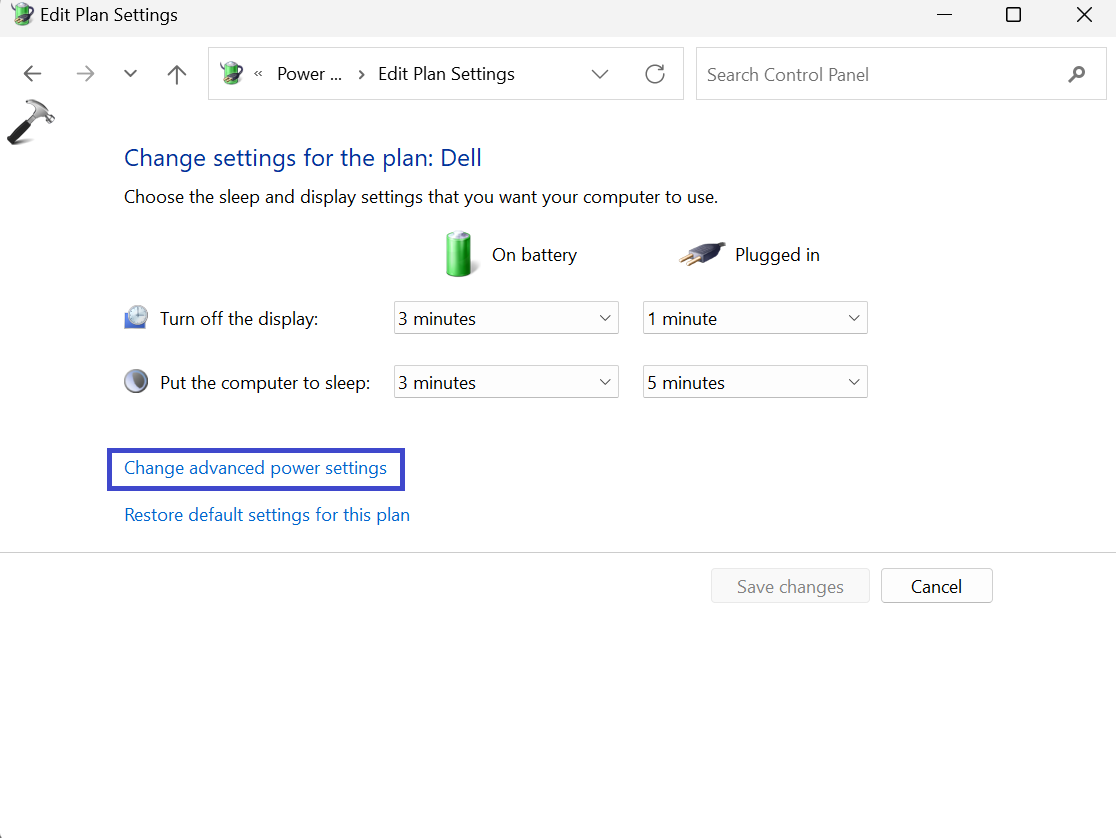
2. Now, click on the “Change plan settings” option.
3. Click on the “Change advanced power settings” option.
4. A Power options dialog box will appear. Expand the “USB settings” option.
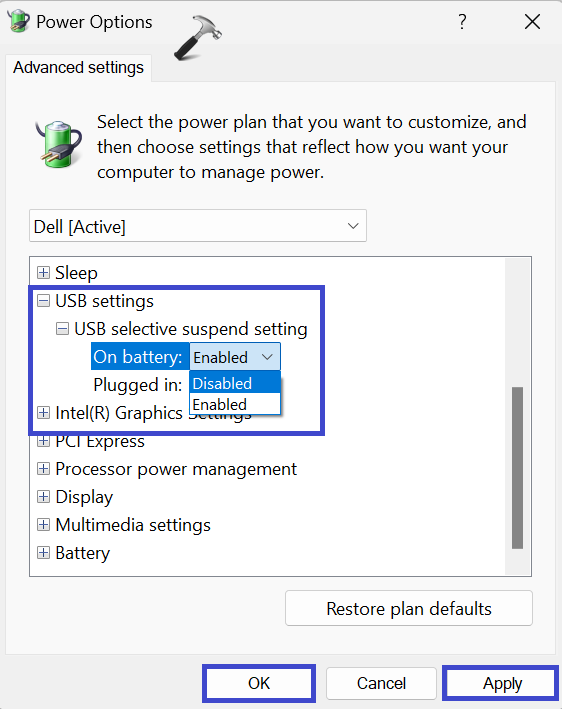
Again, expand the “USB selective suspend setting” option. Disable both options.
5. Click OK followed by Apply.
That’s It!