
Windows 11 introduces the eye-catching ‘Windows Spotlight’ feature, which transforms your lock screen with dynamic images and insights. If you wish to enable or disable this feature, follow the steps in this guide to Enable or disable Windows Spotlight in Windows 11.
Page Contents
What is Windows Spotlight?
Windows Spotlight enhances the lock screen experience by displaying a variety of images, including photography, artwork, and other visually appealing content. These images change regularly, often daily, offering users a fresh and dynamic background each time they log in.
In addition, Windows Spotlight can also provide users with interesting facts, tips, or app suggestions on the lock screen. This feature aims to provide a more engaging and personalized user experience by delivering content that is both visually appealing and informative.
Enable or disable Windows Spotlight in Windows 11
Below are three solutions that allow you to enable or disable Windows Spotlight in Windows 11:
Solution 1: Enable or disable Windows Spotlight in Windows 11 Using Settings App
Customizing your lock screen background in Windows is a straightforward process. Follow these steps to do it using the Settings app:
1. Open the Settings app and go to “Personalization“.
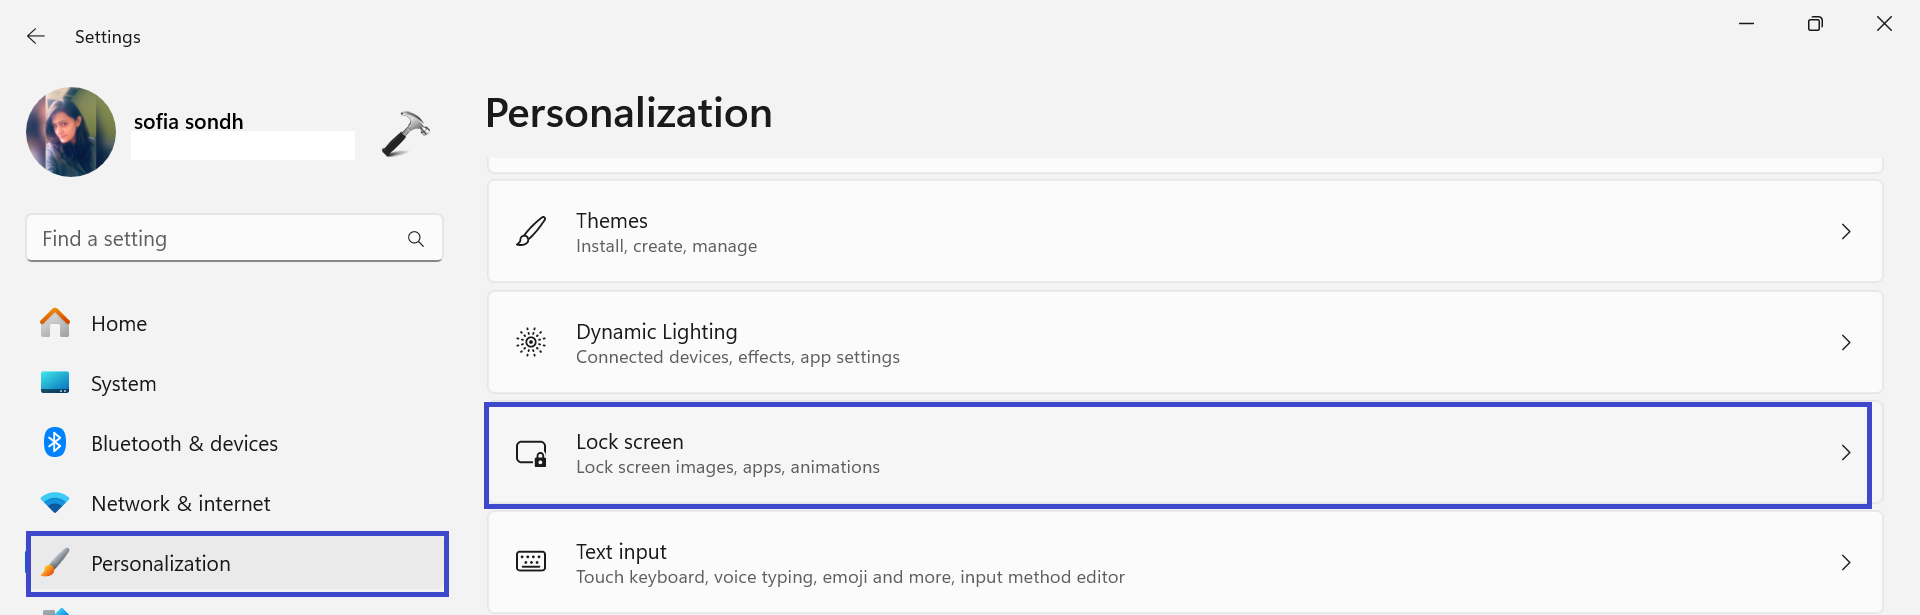
2. Now, click on “Lock screen“.
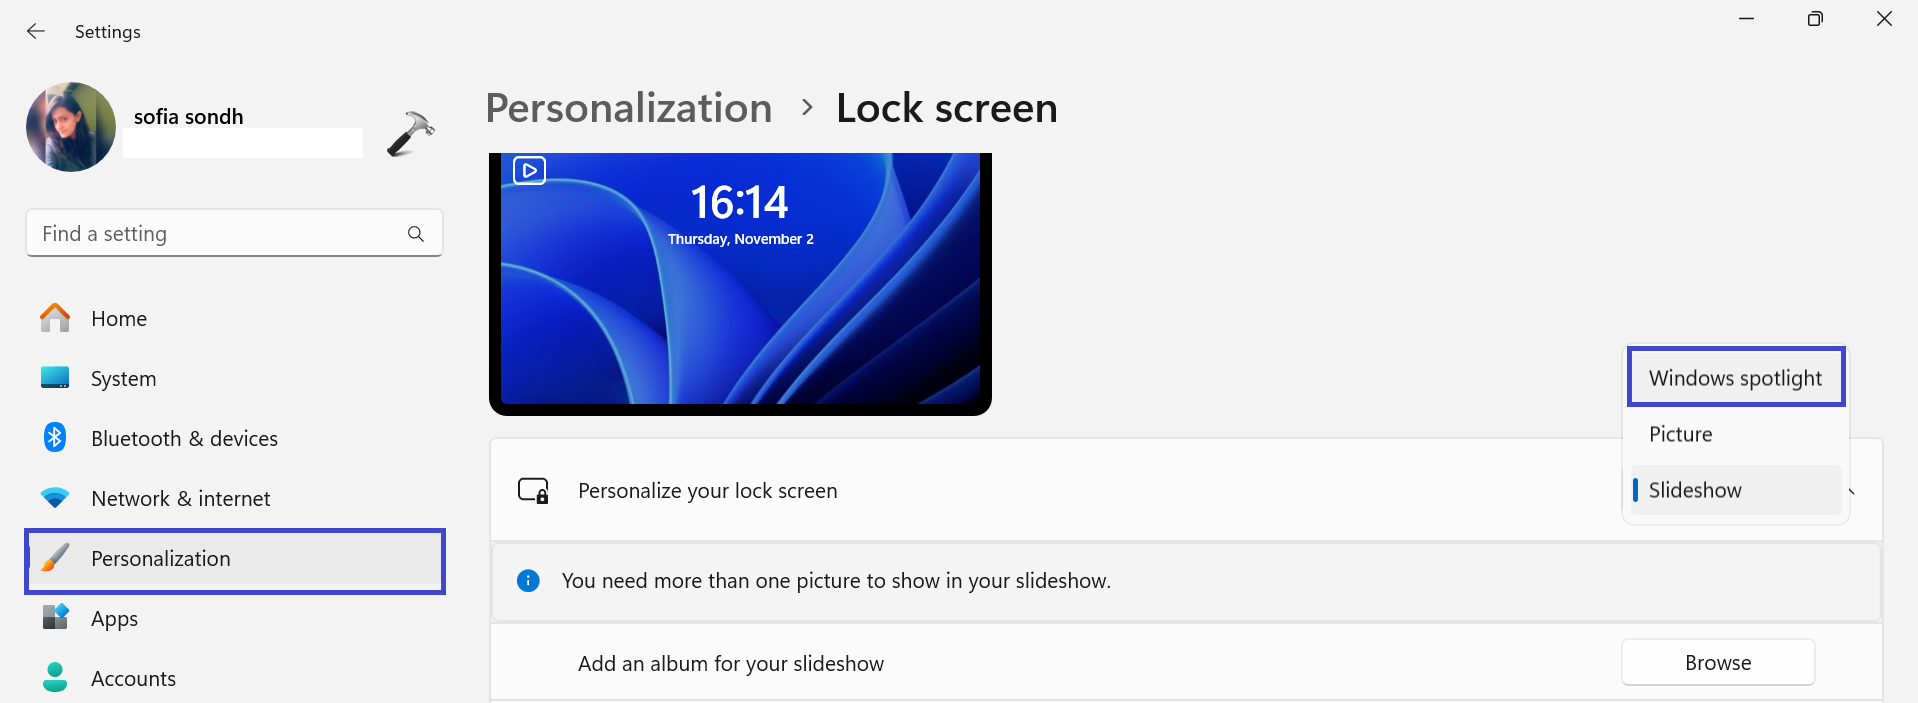
3. Under Background, select “Windows Spotlight” and select a different lock screen background.
Solution 2: Enable or disable Windows Spotlight Using Local Group Policy Editor
If you prefer to configure Windows Spotlight using the Local Group Policy Editor, follow these steps to gain more control over Windows Spotlight settings:
1. Press the Windows Key + R. Type “gpedit.msc” and click OK.
2. Navigate to the following path:
User Configuration > Administrative Templates > Cloud Content
3. Here, you will find 7 settings that you can do to enable or disable Windows Spotlight using Local Group Policy Editor.

1. Configure Windows Spotlight on lock screen
- Enabled: Enables Windows Spotlight on the lock screen.
- Disabled: Disables Windows Spotlight on the lock screen.
Additionally, if you select the “Include content from Enterprise spotlight” checkbox. 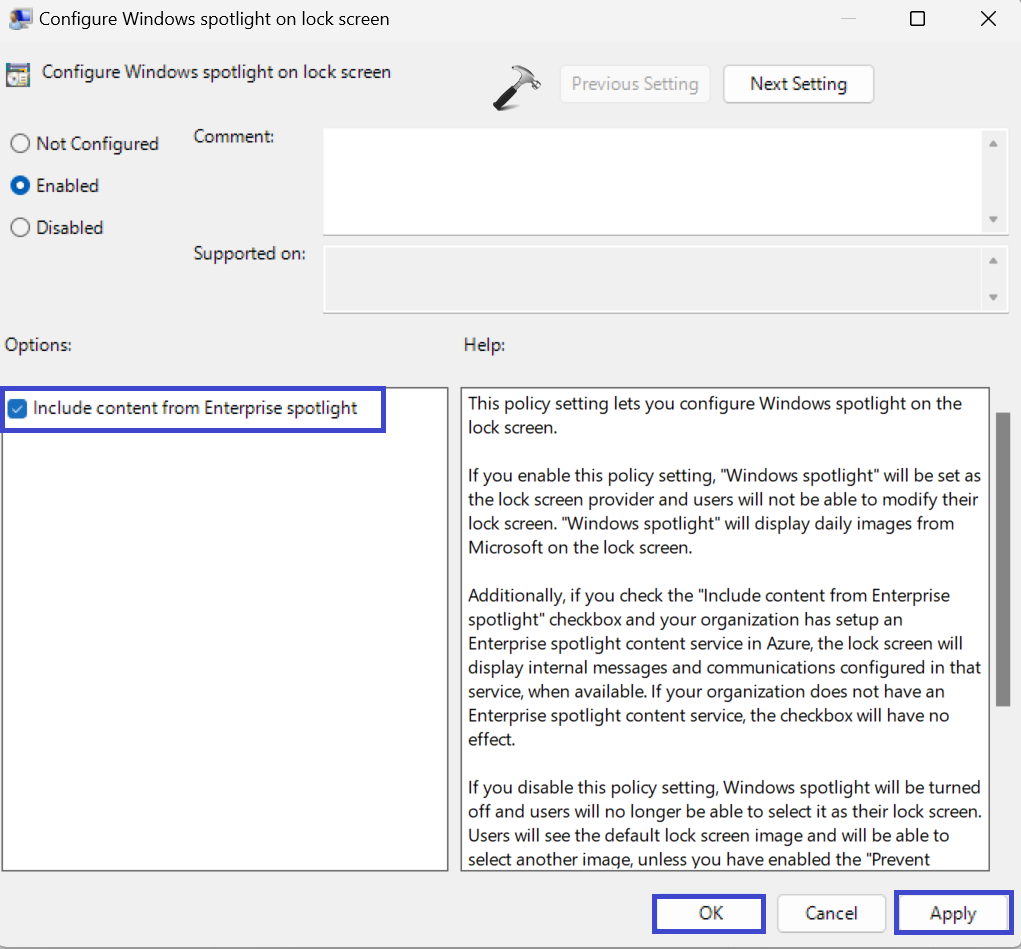
2. Do not use diagnostic data for tailored experiences
- Enabled: Prevents Windows from using diagnostic data to provide tailored experiences to the user.
- Disabled: Allows Windows to use diagnostic data to provide tailored experiences to the user.
3. Do not suggest third-party content in Windows spotlight
- Enabled: Prevents Windows Spotlight from suggesting apps and content from third-party software publishers.
- Disabled: Allows Windows Spotlight to suggest apps and content from third-party software publishers.
4. Turn off all Windows spotlight features
- Enabled: Disables all Windows Spotlight features, including the lock screen, Windows tips, and Microsoft consumer features.
- Disabled: Enables all Windows Spotlight features.
5. Turn off Windows Spotlight on Action Center
- Enabled: Prevents Windows Spotlight notifications from being shown on the Action Center.
- Disabled: Allows Windows Spotlight notifications to be shown on the Action Center.
6. Turn off Windows spotlight on Settings
- Enabled: Prevents Windows Spotlight suggestions from being shown in the Settings app.
- Disabled: Allows Windows Spotlight suggestions to be shown in the Settings app.
7. Turn off the Windows Welcome Experience
- Enabled: Disables the Windows Welcome Experience, which helps onboard users to Windows.
- Disabled: Enables the Windows Welcome Experience.
Solution 3: Enable or Disable Using Registry Editor
Adjusting Windows Spotlight settings through the Windows Registry Editor offers a high level of control. To begin, follow these steps closely:
1. Press the Windows key + R. Type “regedit.exe” and click OK.
2. Navigate to the following path:
HKEY_CURRENT_USER\SOFTWARE\Policies\Microsoft\Windows\CloudContent
3. Now, right-click on “CloudContent” and select “New => DWORD (32-bit) Value“.
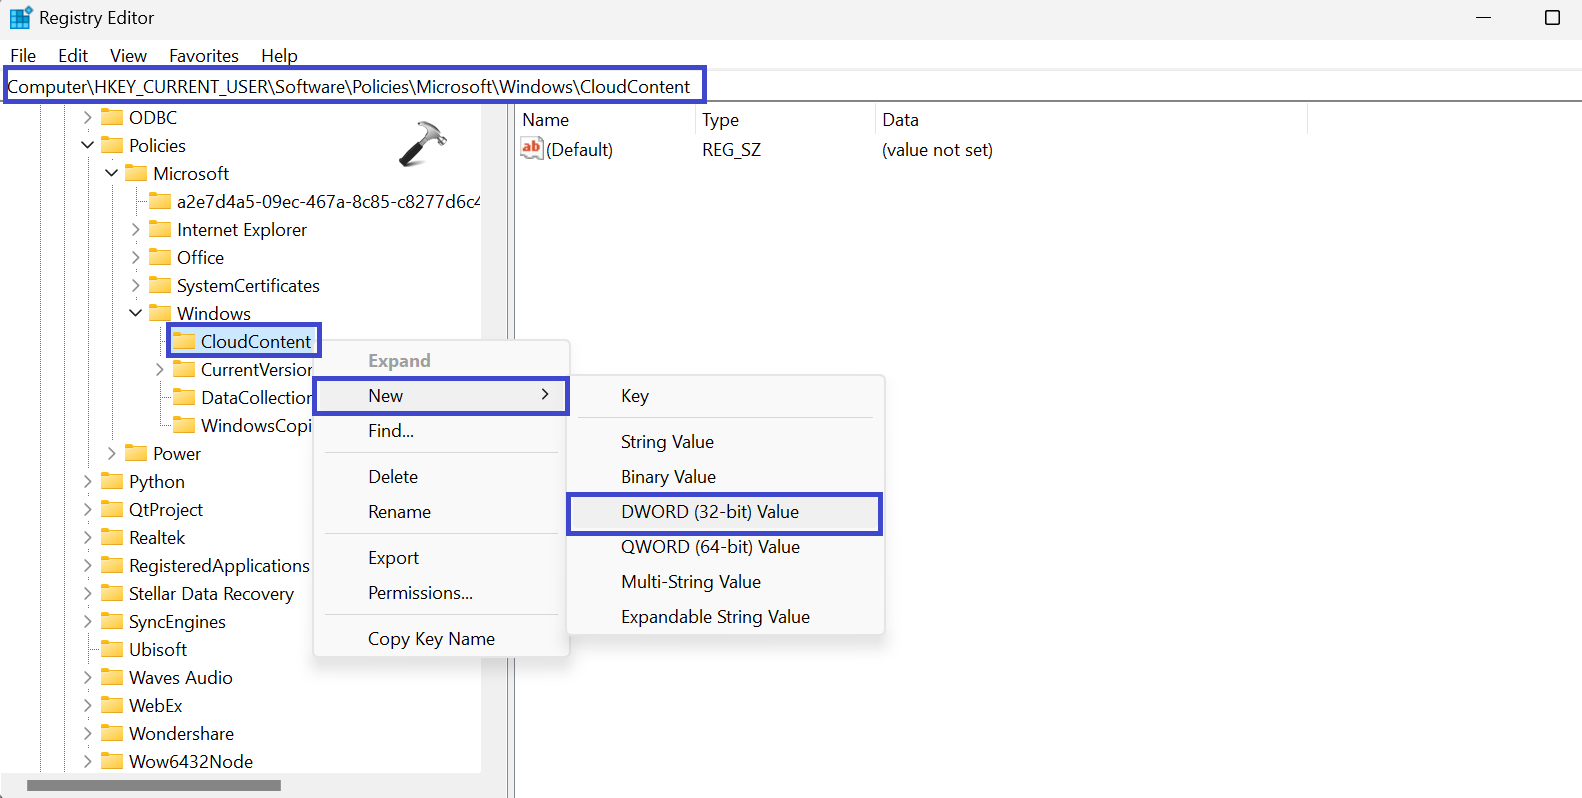
Type “DisableWindowsSpotlightFeatures” and press Enter.
4. Now, double-click on the “DisableWindowsSpotlightFeatures” registry key. Click “Modify“.
A prompt box will appear. Set the value to 1.
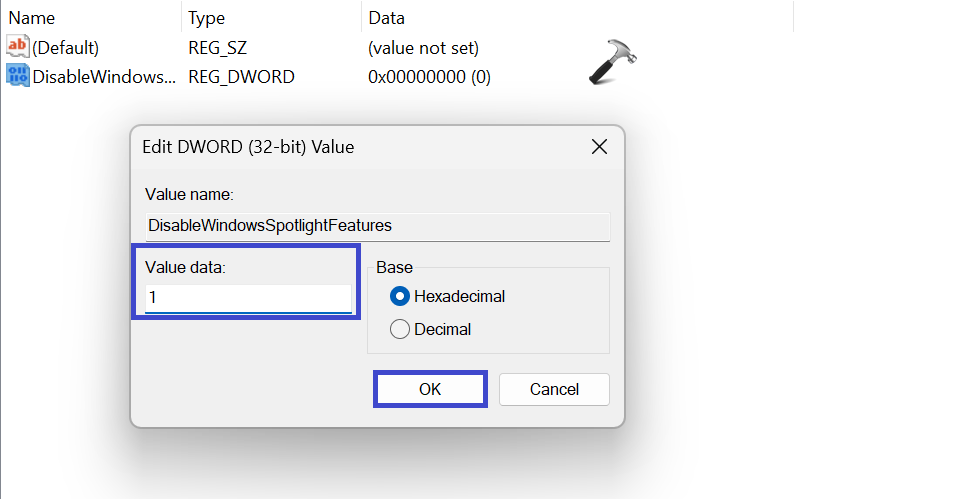
5. Click OK.
That’s It!


