If you’re working with different printers on Windows 10, you might have noticed that the default printer keeps changing every time. Actually, Windows 10 ships with a setting that allows it to manage the printers automatically and set the last used printer as default one. Some users may not like this behavior and they want to set their primary or single printer as default printer. To achieve this, they should first disable that setting which commands to Windows 10 to manage printer automatically.
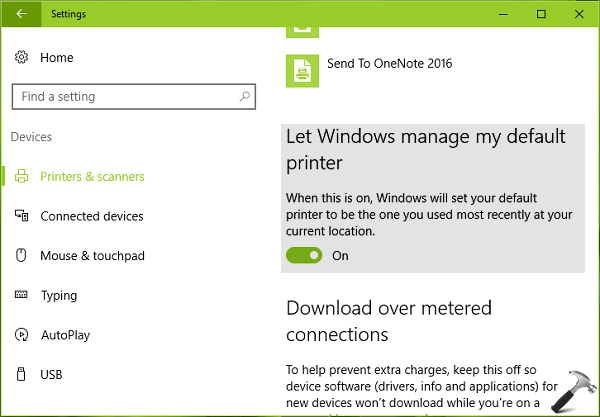
The setting is available in Windows 10 Version 1511 (build 10586) or later only and is located under Settings app at Devices > Printers & scanners. So to disable the Let Windows manage my default printer setting, simply toggle it to Off.
You can use the below mentioned advanced ways to force Windows 10 to turn off this setting.
Page Contents
FIX: Default Printer Keeps Changing In Windows 10
FIX 1 – Using Registry Editor
Registry Disclaimer: The further steps will involve registry manipulation. Making mistakes while manipulating registry could affect your system adversely. So be careful while editing registry entries and create a System Restore point first.
1. Press  + R and put regedit in Run dialog box to open Registry Editor (if you’re not familiar with Registry Editor, then click here). Click OK.

2. In left pane of Registry Editor window, navigate to following registry key:
HKEY_CURRENT_USER\Software\Microsoft\Windows NT\CurrentVersion\Windows
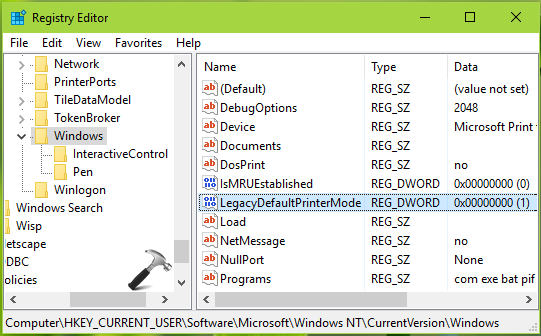
3. In the right pane of Windows registry key, right click and select New > DWORD Value. Name the newly created registry DWORD (REG_DWORD) as LegacyDefaultPrinterMode and double click on it to modify its Value data:
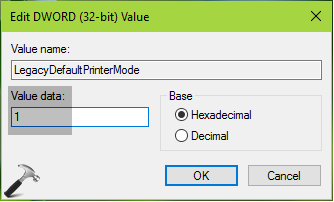
4. Finally, set the Hexadecimal base value to 1 and click OK. Close Registry Editor and reboot to make changes effective.
The registry method is good to follow for a standalone machine but if you’re working in an organization and you want to roll out same setting to hundreds of machines, you can configure the policy setting on centralized machine as mentioned below.
FIX 2 – Using Group Policy
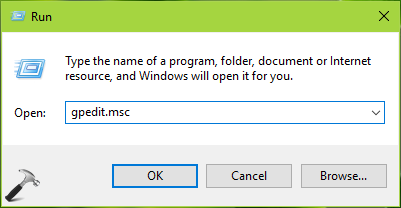
1. Press + R and put gpedit.msc in Run dialog box to open Local Group Policy Editor. Click OK.
2. Next, in the GPO snap-in window, navigate here:
User Configuration > Administrative Templates > Control Panel > Printers
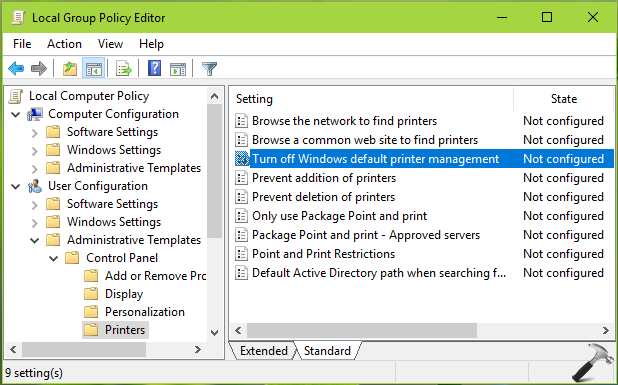
3. In the right pane of Printer, look for the Setting named Turn off Windows default printer management. Double click on it to modify its status:
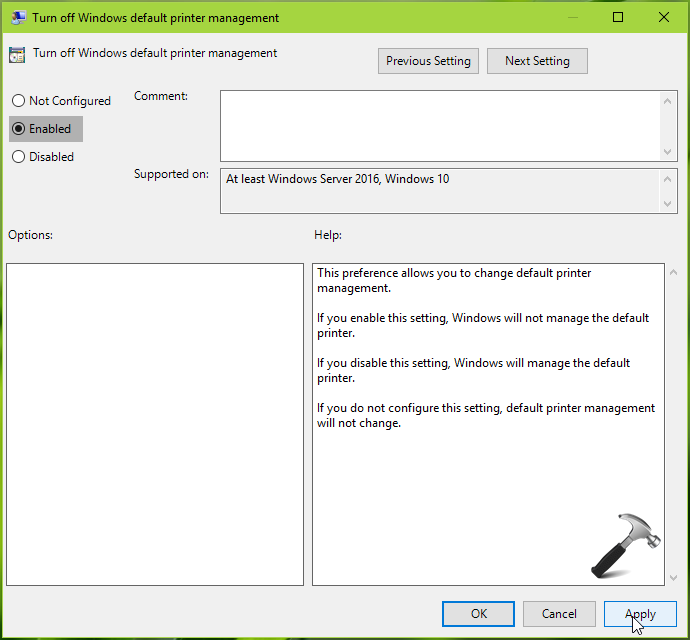
4. At policy configuration window, set the status to Enabled and click Apply followed by OK. Close Group Policy editor and run gpupdate /force command to refresh Group Policy engine. For standalone multi-user machine, you can reboot to make setting alive.
In this way, you can prevent Windows 10 for changing default printer on your system. See this article, if Windows 10 can’t set a default printer for you.
That’s it!