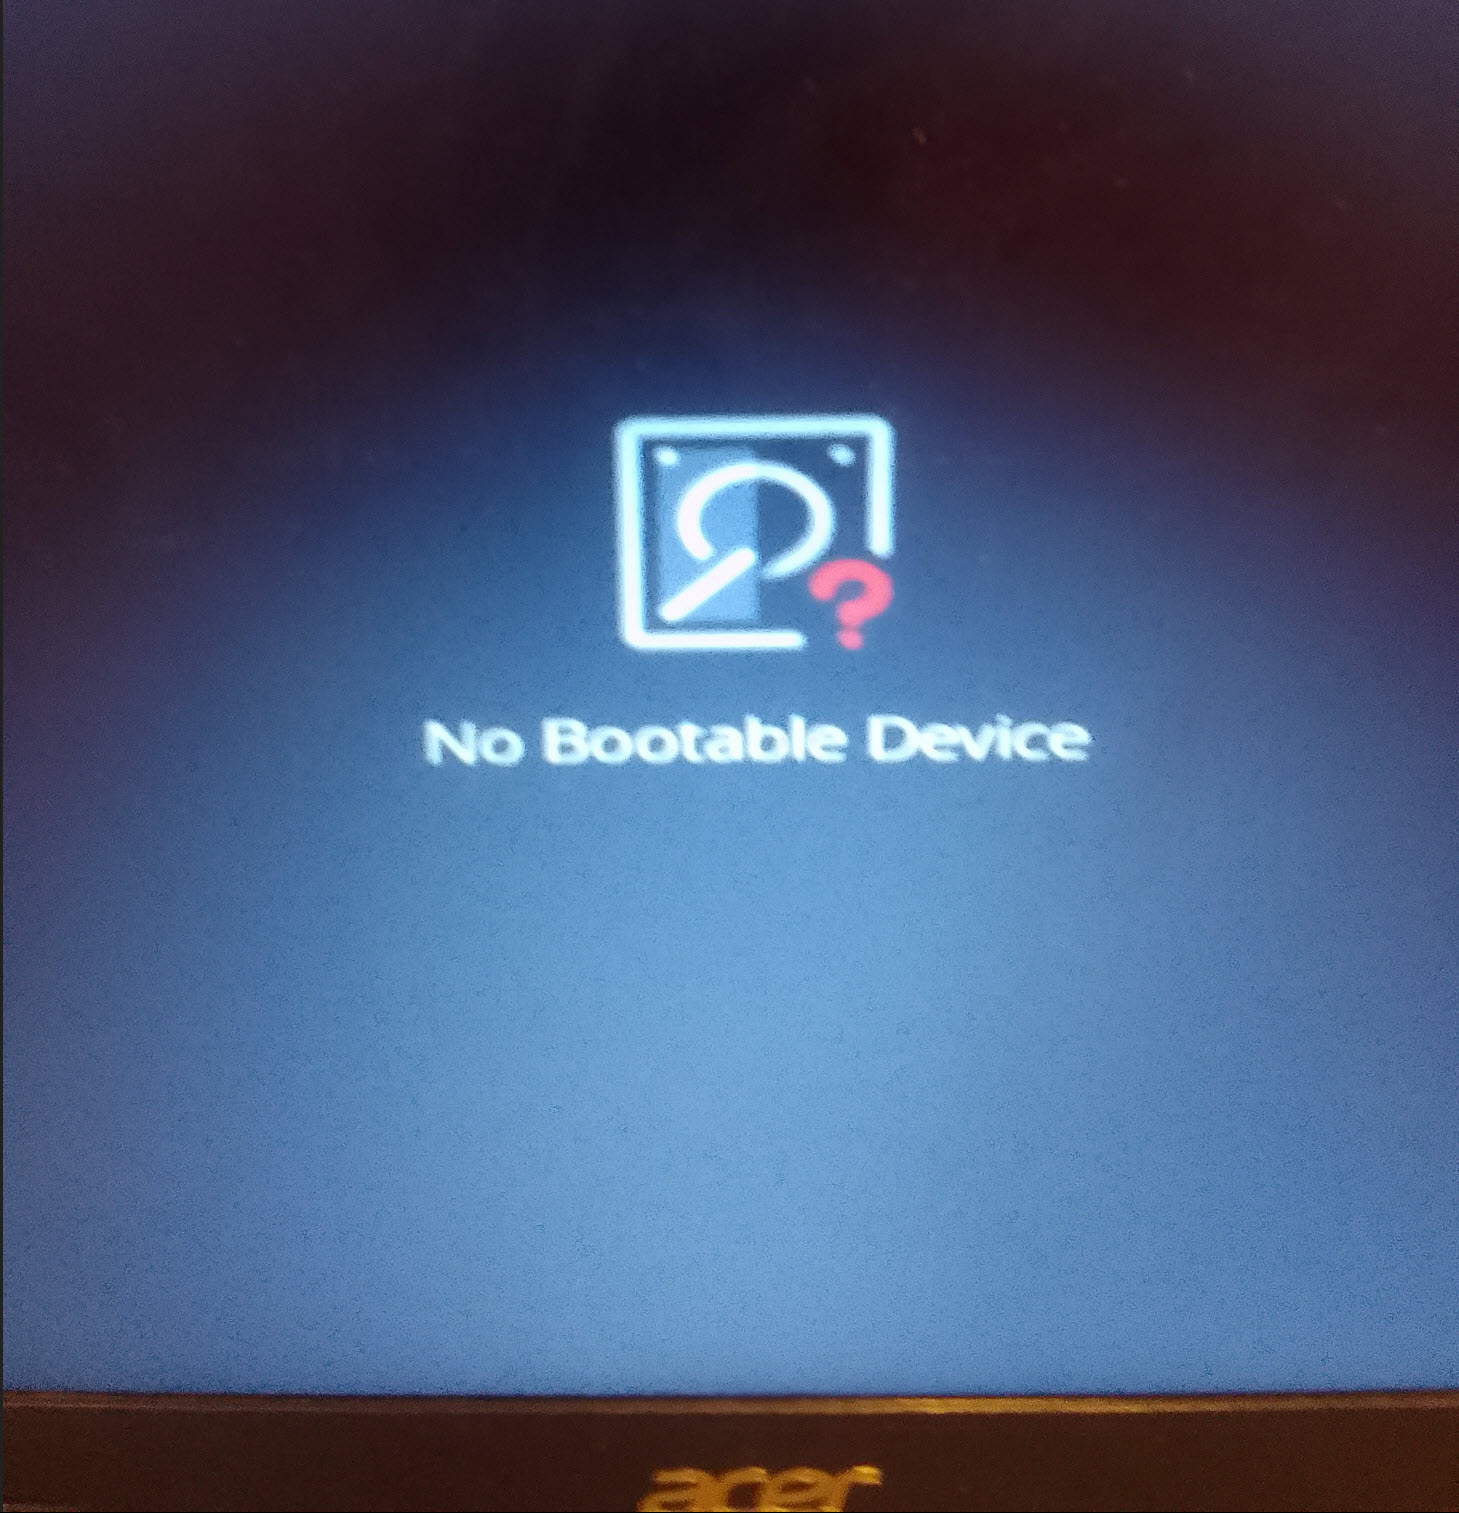
Encountering the dreaded “No bootable device” error on your Windows 11 PC can be frustrating and alarming. Fortunately, several troubleshooting steps can help you resolve this issue and get your Windows 11 PC up and running again. This guide will provide practical solutions to fix it, ensuring a smooth and hassle-free booting experience on your system.
Page Contents
Fix: No bootable device on Windows 11 PC
Fix 1: Run Startup Repair of Windows 11
1. Restart your Windows 11 PC.
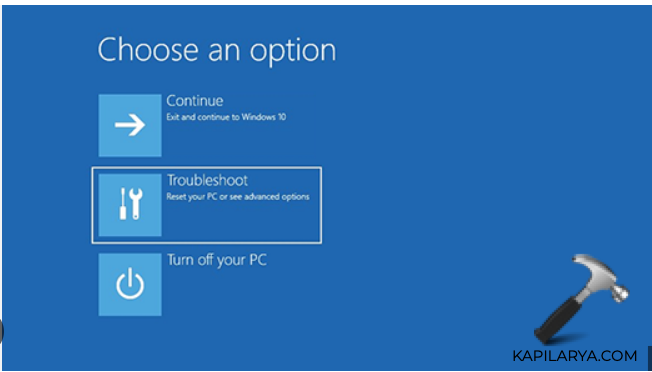
2. During the boot process, repeatedly press the power button until you see the Advanced Startup Options menu.
3. In the Advanced Startup Options menu, select “Troubleshoot.”
4. On the Troubleshoot screen, click on “Advanced options.”
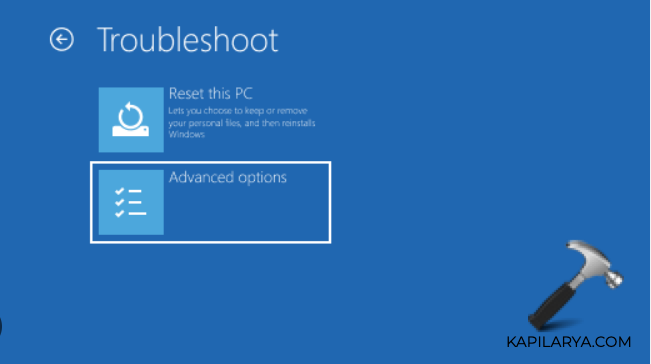
5. In the Advanced options menu, select “Startup Repair.”

6. If prompted, select the user account for which you want to run the Startup Repair. Enter the account password if required.
7. Windows will now attempt to diagnose and repair any startup issues automatically.
8. This process may take some time, and your PC may restart multiple times during the repair process.
9. Once the repair process is completed, you should see a message indicating whether the repair was successful or if any issues were found and fixed.
10. After the repair process is complete, click on the “Restart” button to reboot your computer.
Fix 2: Remove the Peripheral Device and Check the Hard Drive Cables
Try removing any peripheral devices (such as external hard drives or USB devices) that are connected to your computer. Sometimes, these devices can interfere with the boot process and cause an error message to appear. After disconnecting the peripherals, restart your PC to check if the problem persists.
If the issue persists, the next step is to check the hard drive cables inside your computer. Power off your PC and open the case to access the internal components. Locate the SATA cables connecting the hard drive to the motherboard and make sure they are securely plugged in. If any cables appear loose, gently reseat them to ensure a proper connection. Once you have checked the connections, close the case, power on your PC, and see if the “No bootable device” error is resolved.
Fix 3: Check Boot Order in BIOS to fix No bootable device on Windows 11 PC
1. Make sure your computer is powered on or restart it if it’s already running.
2. During the boot process, you need to press a specific key to access the BIOS setup. The key you need to press varies depending on the manufacturer, but common keys are: Del (DELETE), F2, F10, F12, Esc, F1
3. The BIOS key is usually displayed briefly on the screen during startup. If you’re not sure, try pressing one of the keys mentioned above multiple times immediately after powering on or restarting your computer.
4. Once you’re inside the BIOS setup, navigate to the “Boot” or “Boot Order” section. The navigation can be done using the arrow keys on your keyboard.

5. In the Boot Order section, you will see a list of devices that your computer can boot from. The order of the devices determines the priority in which your computer will attempt to boot from them.
6. Review the list of boot devices to see which one is set as the primary boot device.
7. If you need to change the boot order, use the instructions provided in the BIOS interface to move the desired boot device to the top of the list. Typically, you can do this by selecting the device and using the designated keys (usually “+” and “-“) to move it up or down in the priority order.
8. After adjusting the boot order, save the changes by following the on-screen instructions. Usually, you can press a key like F10 to save and exit the BIOS.
9. Your computer will now restart with the new boot order settings. It should attempt to boot from the device you set as the highest priority in the boot order.
Fix 4: Reinstall Windows 11
1. Insert Windows 11 installation media (USB/DVD).
2. Back up your important files.
3. Boot from the installation media.
4. Choose language, time, and keyboard settings.
5. Click “Install Now” and enter the product key if prompted.

6. Accept the license terms and select “Custom: Install Windows only.”


7. Delete existing partitions to start with a clean installation.
8. Select the unallocated space and click “Next” to install Windows.
9. Set up your account (Microsoft account or local).
10. Complete the setup and install drivers/software as needed.
That’s it!