When you upgrade your Windows from an existing version to newer version, the files of previous Windows installation may remain on your system. The older Windows installation files are moved to Windows.old folder, by default. This folder is located in system root drive.
If your Windows installation is limited on storage, you might want to delete older installation files to gain some storage space. Here is how you can remove previous Windows installation files in your Windows 10.
Page Contents
Remove Previous Windows Installation Files In Windows 10
Method 1 – Via Settings Apps
1. Right click Start Button or press  + X keys and select Settings.
2. In the Settings app, navigate to System > Storage.
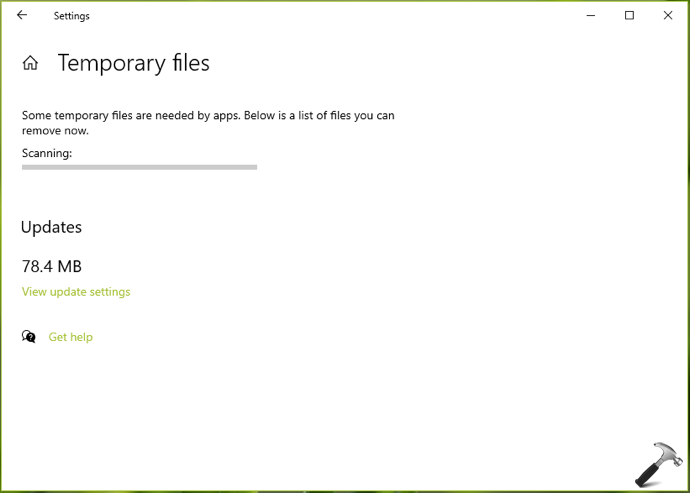
3. Now in right pane of Storage, checkout the information provided about your Windows installation drive. It must be showing you how much space is being used in temporary files. Click on Temporary files listing here.

4. In next screen, Windows will re-scan list of temporary files so wait here for few moments.
5. Once the scan finishes, you can select Previous Windows installation(s) and then hit Remove files button. The Previous Windows installation(s) contains all the files which can help you to restore your Windows to older version. It may also contain your other data which Windows might have migrated during upgrade.
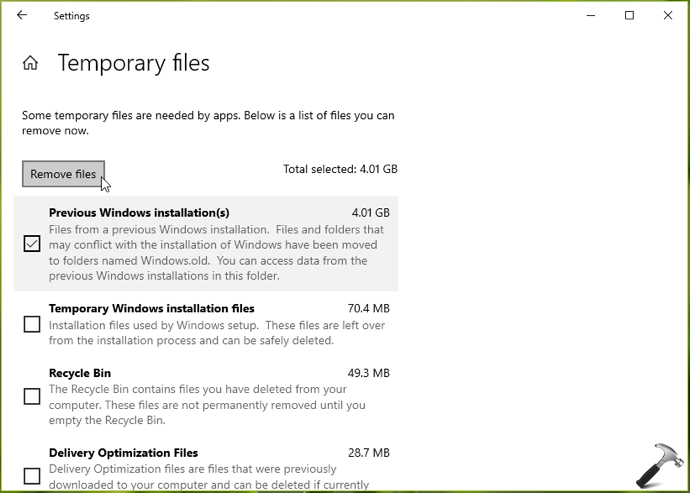
In few moments, the previous Windows installation data should be removed.
Method 2 – Remove Windows.old Folder Using Command Prompt
As all the files for previous Windows installation is housed inside Windows.old, you can directly delete that folder. Here are the steps to delete Windows.old folder using Command Prompt.
1. Right click on Start Button and select Command Prompt (Admin)
2. In administrative Command Prompt window, type following command and press Enter key:
RD /S /Q "<System Drive>\Windows.old"
In above command, you need to correctly substitute the drive letter for your system drive, for example RD /S /Q "C:\Windows.old". You can find it using diskpart in Command Prompt. Simply use list volume and notice the drive on which Windows is installed. Usually, it have Boot mentioned in its Info section.
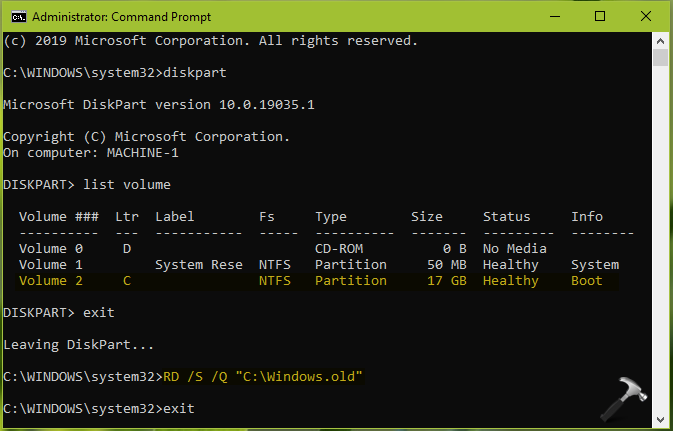
3. Once, you executed command to delete Windows.old folder, you can then type exit and press Enter key to close Command Prompt.
That’s it!