Basically, Lightweight Directory Access Protocol (LDAP) is a protocol for modifying and querying items under Active Directory, which supports LDAP. By default, LDAP traffic is non-secure. You can enable LDAP over SSL commonly known as LDAPS, and make this traffic secure. LDAPS requires installation of valid SSL certificate which may be from Microsoft CA or any third-party CA.
Client devices and applications can authenticate with AD using bind operations. In this article, we’ll see how to enable LDAP signing on your Windows Server. When deploying such a setting, you must first ensure that you don’t have any applications depending on simple binds. Because once you allowed DC to require signing, applications using simple binds will be rejected by AD.
Configure LDAP Signing In Windows Server
We’ve described below steps for your Windows Server, but be sure you make the relevant changes on client side as well. In absence of equivalent settings, client may loss connectivity to server (refer step 7 below for more info).
1. Open Group Policy Management window by running gpmc.msc command.
2. In the window, you can create a relevant GPO object or link it to an existing one. Or you can also proceed with Default Domain Policy as I’ve done. Right click on GPO object and select Edit.
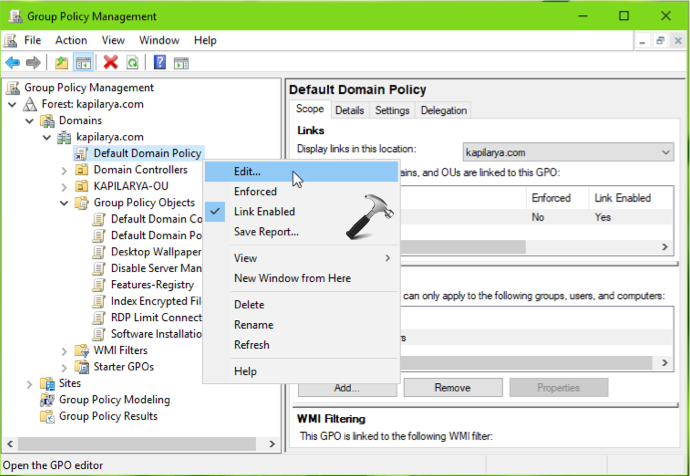
3. In GPO Editor, navigate to following location:
Computer Configuration > Policies > Windows Settings > Security Settings > Local Policies > Security Options
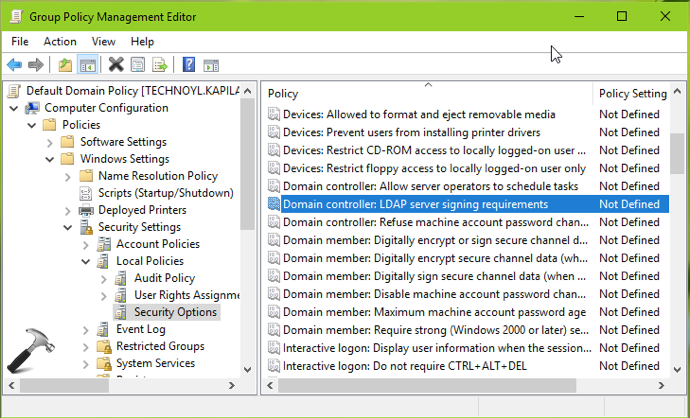
4. In the right pane of Security Options, double click on Domain controller: LDAP server signing requirements policy setting.
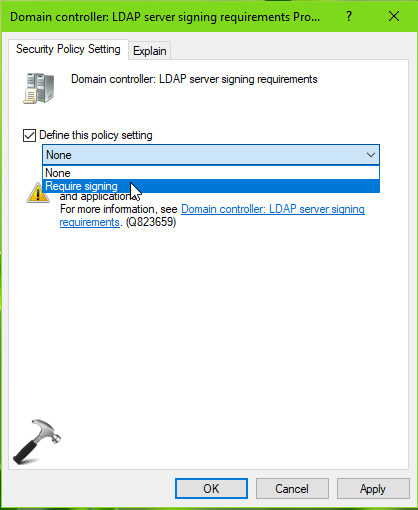
5. On the Security Policy Setting tab, check Define this policy setting option. Then from drop-down, select Require signing. Click Apply, OK. Close GP Management.
6. Reboot your server or use gpupdate /force to update GP engine.
7. Repeat above mentioned steps on client machine as well. Because if you don’t set require signing on client but set it on server, client may result loss of connection with server.
That’s it!