To create a System Image Backup in Windows 11 is as essential as updating it. A system image is basically a full backup of your Windows system that you can restore your computer to a previous working condition. To guard against an unexpected system failure and prevent the loss of your operating system, installed applications, settings, files and other important data.
In this Tutorial, we’ll show you how to create a System Image Backup in Windows 11, where to locate the System Image Backup feature, how to restore your PC with the image, and some things to know before making a backup.
Page Contents
Before You Create System Image Backup in Windows 11
Be sure to have an acceptable backup location prior to initiating the backup.
- If you can, use an External Drive: A system image is large because it includes a copy of your Windows installation and selected system partitions. It is recommended to use an external HDD/SSD with enough free space.
- Attach the Backup Drive: Attach the external storage device, Windows can detect it in File Explorer.
- Creating a system image will take some time if the Computer is not connected to Power. Connect the laptop to power if using. Connect to a power source before starting the process.
- Available Storage: Ensure that there is sufficient disk space available on the destination drive for the back up. Depending on how much data is on the drives to be backed up, the required space will vary.
Create a System Image Backup in Windows 11 Using Backup and Restore
The classic and simple method to make a system image with Windows 11.
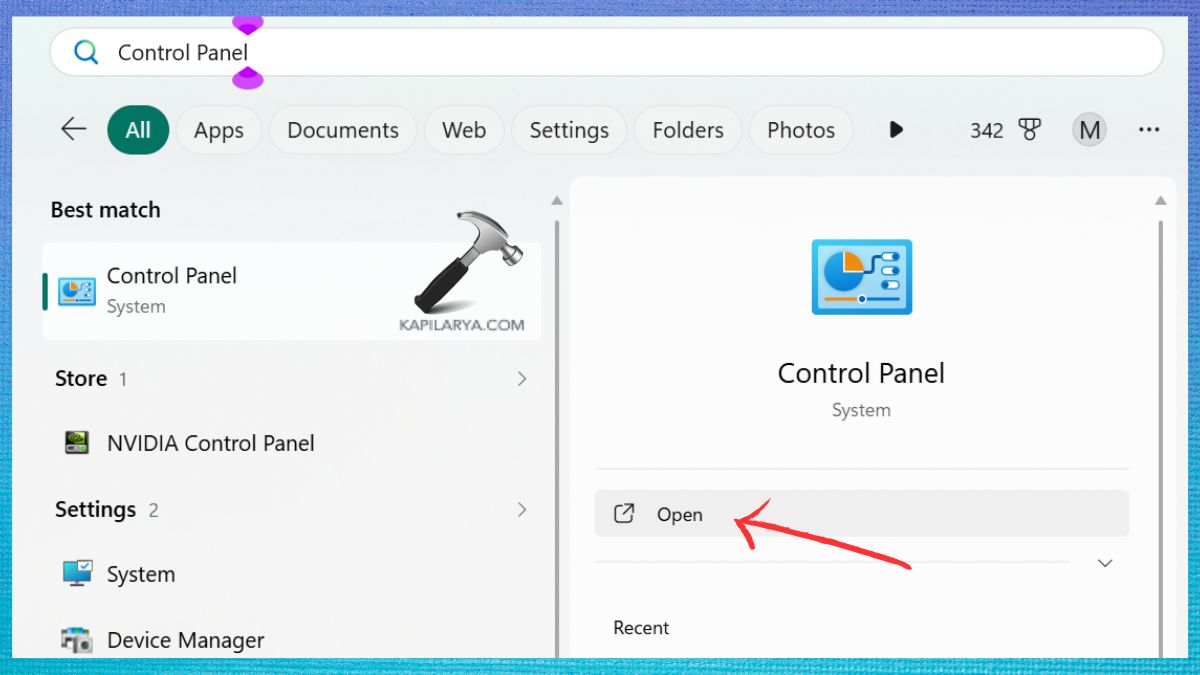
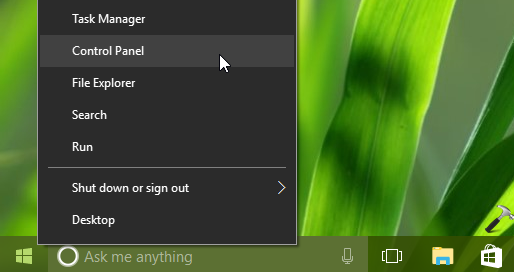
1. Open Windows Search by pressing Windows + S. Type Control Panel and open.
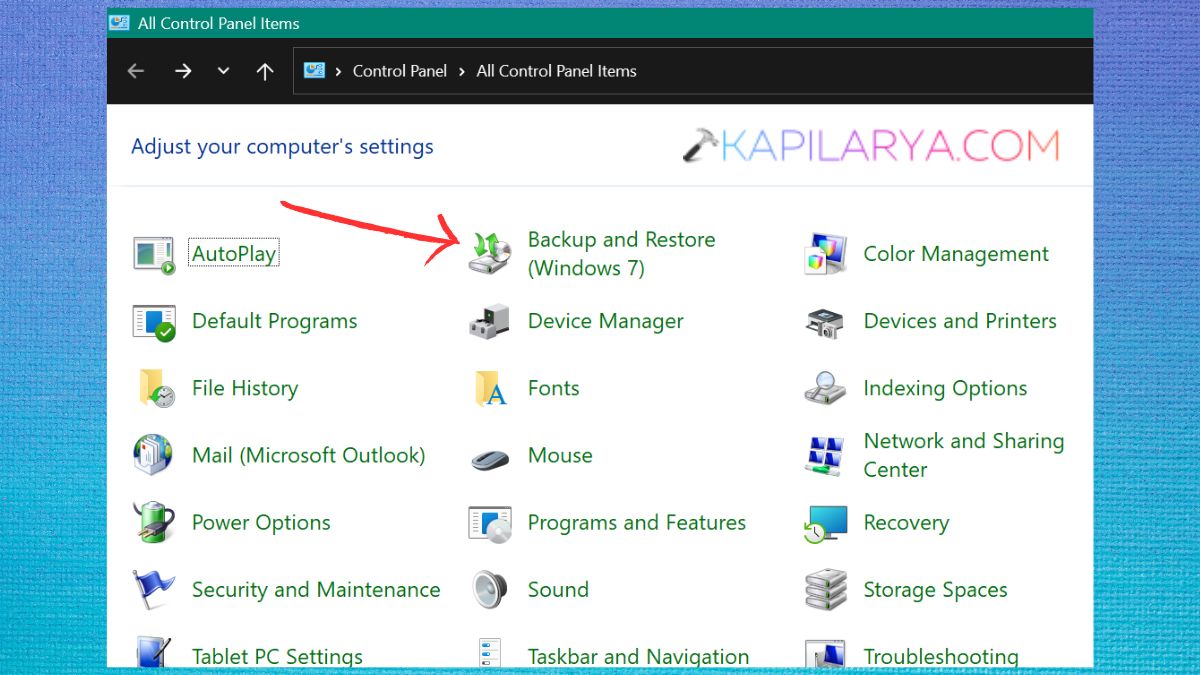
2. Now, choose Backup and Restore (Windows 7).
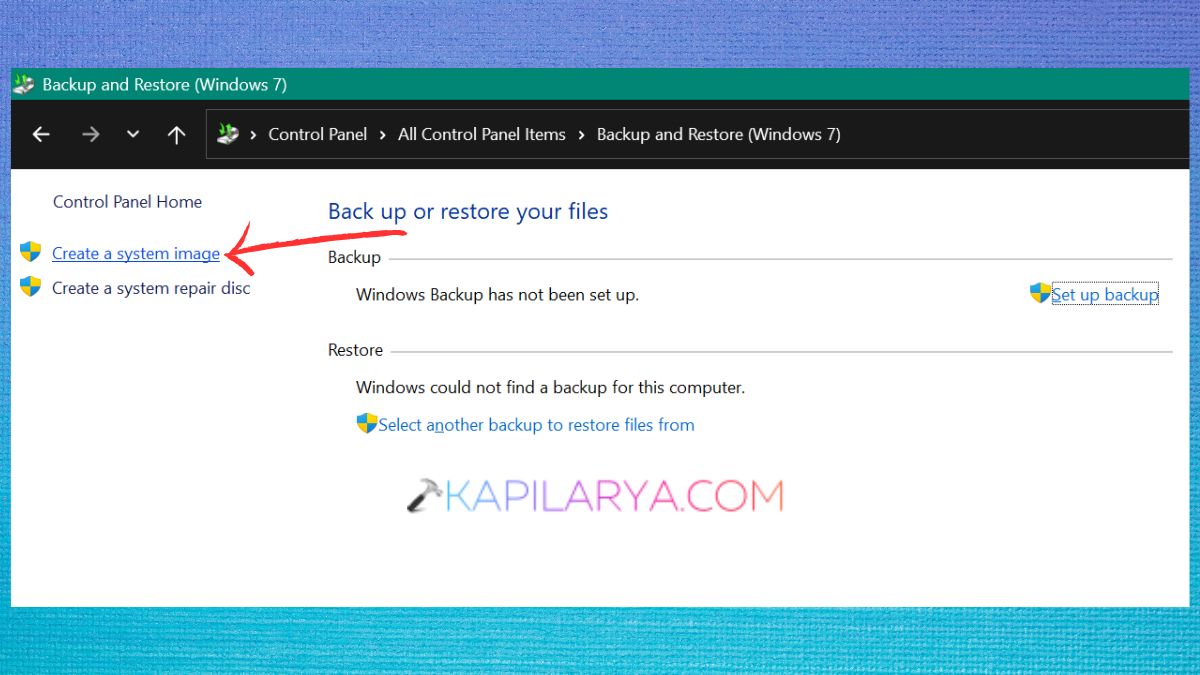
3. On the left side, click Create a system image.
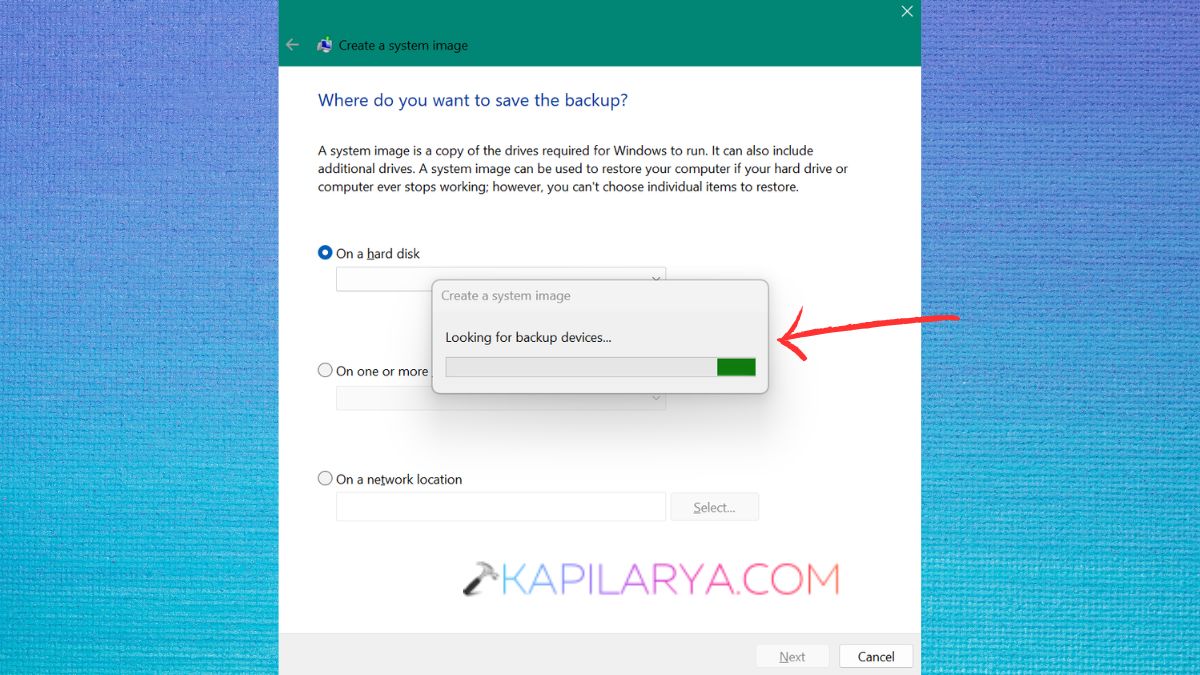
4. Windows will now look for locations in which you can save the system image. Most often, you can select from the options available for storage in these ways:
- On a hard disk
- On one or more DVDs
- In a network location
5. If you are using the computer for the majority of users, you should use an external hard drive or SSD. If you choose a network location, follow the on-screen instructions and click Next.
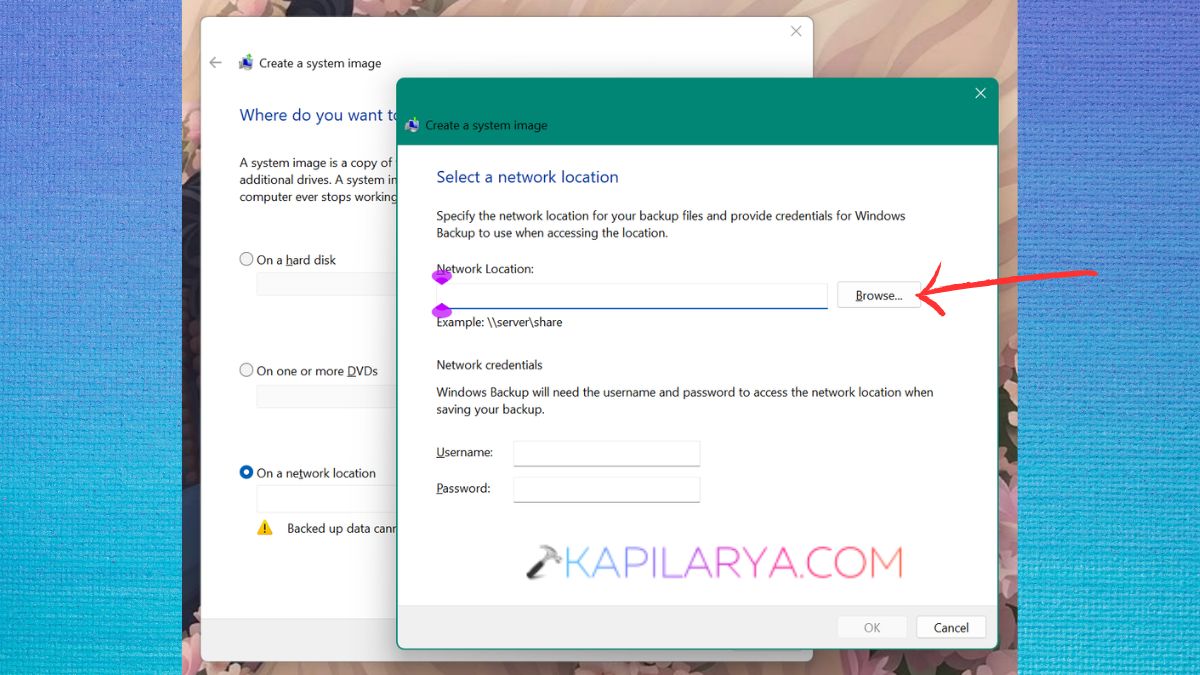
The partitions that need to run Windows are automatically selected in Windows. You can also optionally include other drives that you wish to include in the system image. Then, on the screen, a summary will appear with the following information:
- The backup location
- The drives that are to be included.
- The estimated space needed (required).
6. Review the information and then select Start backup. Windows will now create the system image. The amount of backup data and the speed of your storage device determine the duration.
Never stop the backup drive or turn off the PC during backup operation. When it’s complete, Windows will inform you that the system image was successfully created. The same process applies if you are still running Windows 10, but there may be other recovery options available and the interface may be different.
To find out how to perform a system image in Windows 10, do check out our walkthrough.
Restore Windows 11 Using a System Image
The problem of creating a backup is only half the job. Also, you should learn how to restore a system image in Windows 11 in case your PC faces a serious issue. Depending on whether Windows starts up normally, the specific recovery process might differ.
You can access the Windows Recovery Environment from Settings.
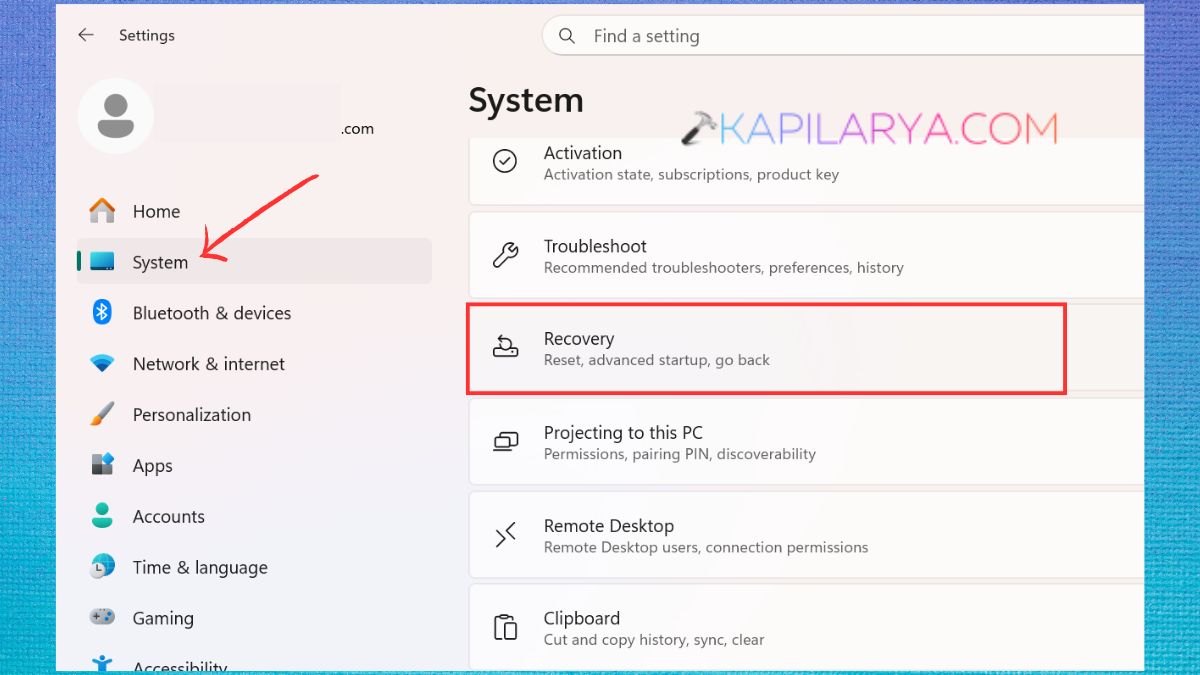
1. Press Windows + I to open Settings. Go to System > Recovery.
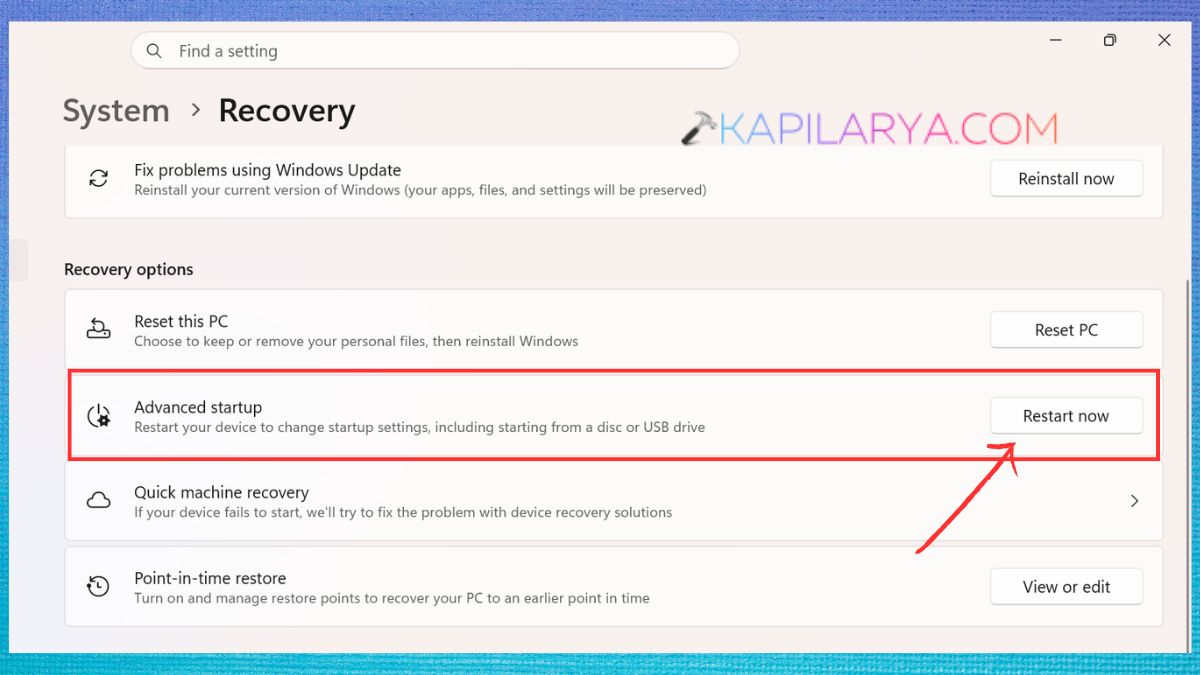
2. Look for Advanced startup in Recovery options. Then, click Restart now.
3. Once the PC restarts, click on Troubleshoot. Choose Advanced options. If available, choose System Image Recovery.
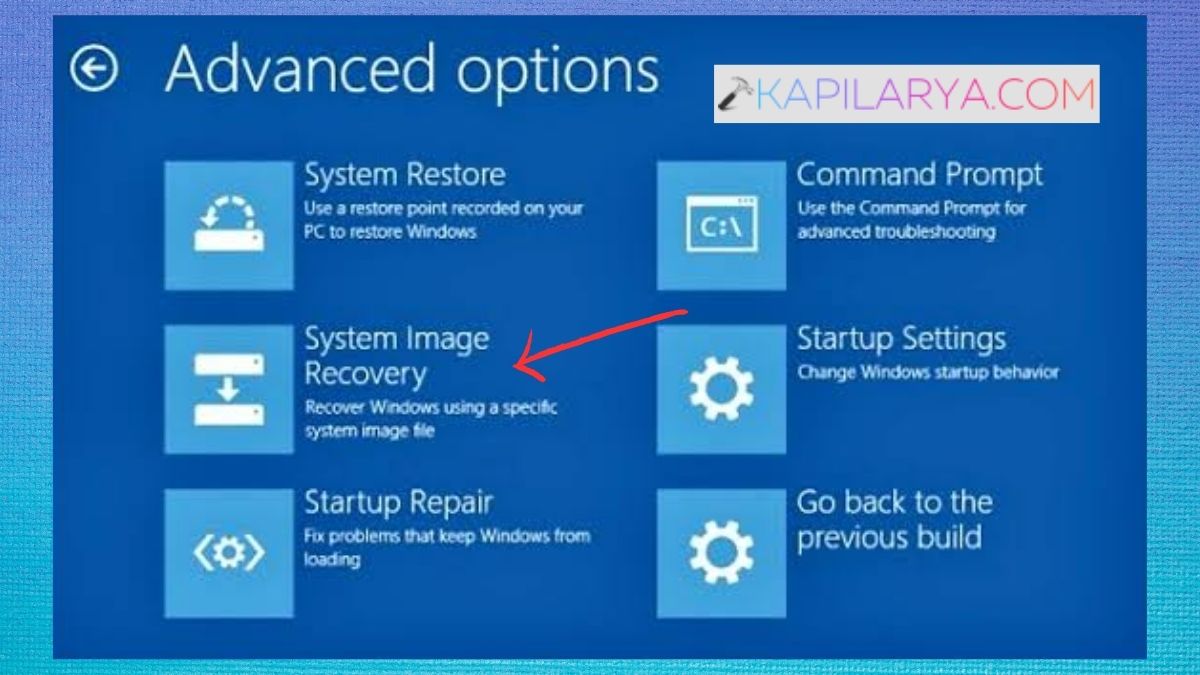
4. Choose your Windows 11 system image. Follow the on-screen instructions to reset the computer.
What Happens When You Restore a System Image?
A system image restores the computer to the condition that existed at the time the image was taken. It allows the restoration of applications, Windows settings, drivers and other system components to their previous state.
For instance, if the image is made on Monday and restored on Friday, the restored Windows environment might be quite similar to the one on Monday.
That’s why it’s crucial to have personal files backed up separately. Note that you can use a system image for system recovery, and not as the only way to protect your latest docs, photos and other personal files.