
The Virus & Threat Protection notifications are informational and do not require immediate action. You will receive notifications whenever there is a problem that requires immediate action. The setting will let you specify whether you want to know things or not such as threat was successfully blocked or the malware scan was completed uneventfully. This tutorial will show you how to Enable/Disable Windows Security Threat Protection Notifications.
Virus & threat protection in Windows 11 helps you scan for threats on your device. You can also run different types of scans and get the latest protection offered by Microsoft Defender Antivirus.
Page Contents
Enable/Disable Windows Security Threat Protection Notifications
Below are the options by which you can Enable/Disable Windows Security Threat Protection Notifications:
Option 1: Turn ON or OFF Windows Security Threat Protection Notifications using Registry Editor
1. Press the Windows Key + R. Type regedit.exe and click OK.
2. Navigate the following path:
Computer\HKEY_LOCAL_MACHINE\SOFTWARE\Microsoft\Windows Defender Security Center\Notifications
3. Double click on Registry key “DisableEnhancedNotifications”.
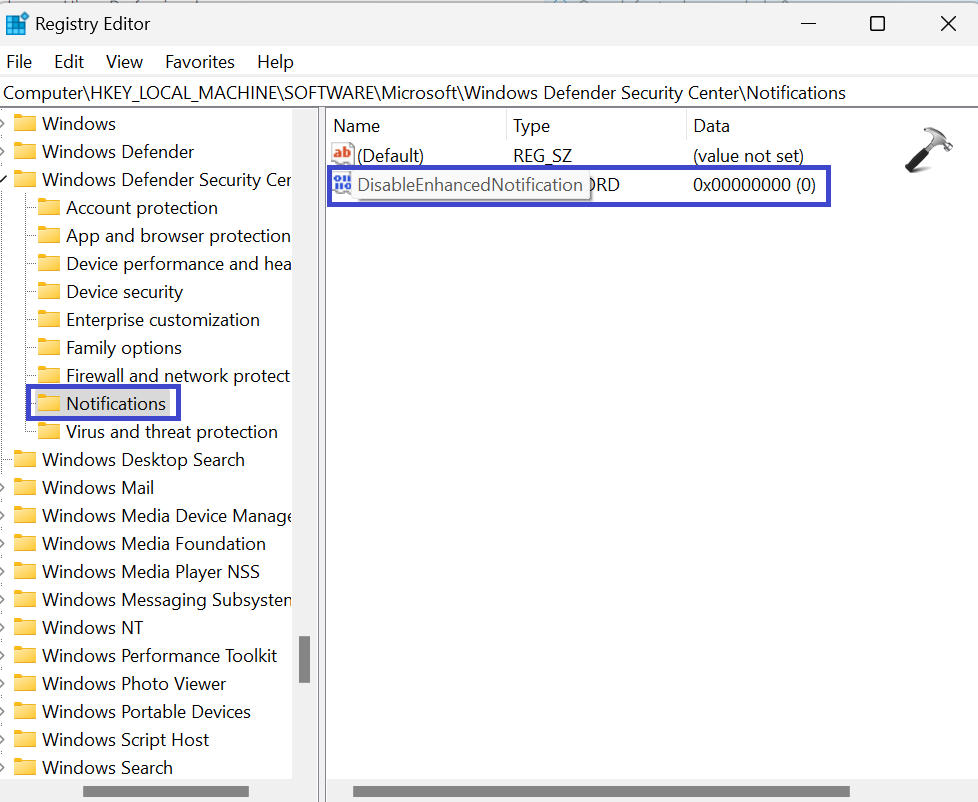
If you don’t have the registry key, you can create it.
Right-click on Notifications = New = DWORD (32-bit) value, Type “DisableEnhancedNotifications”.
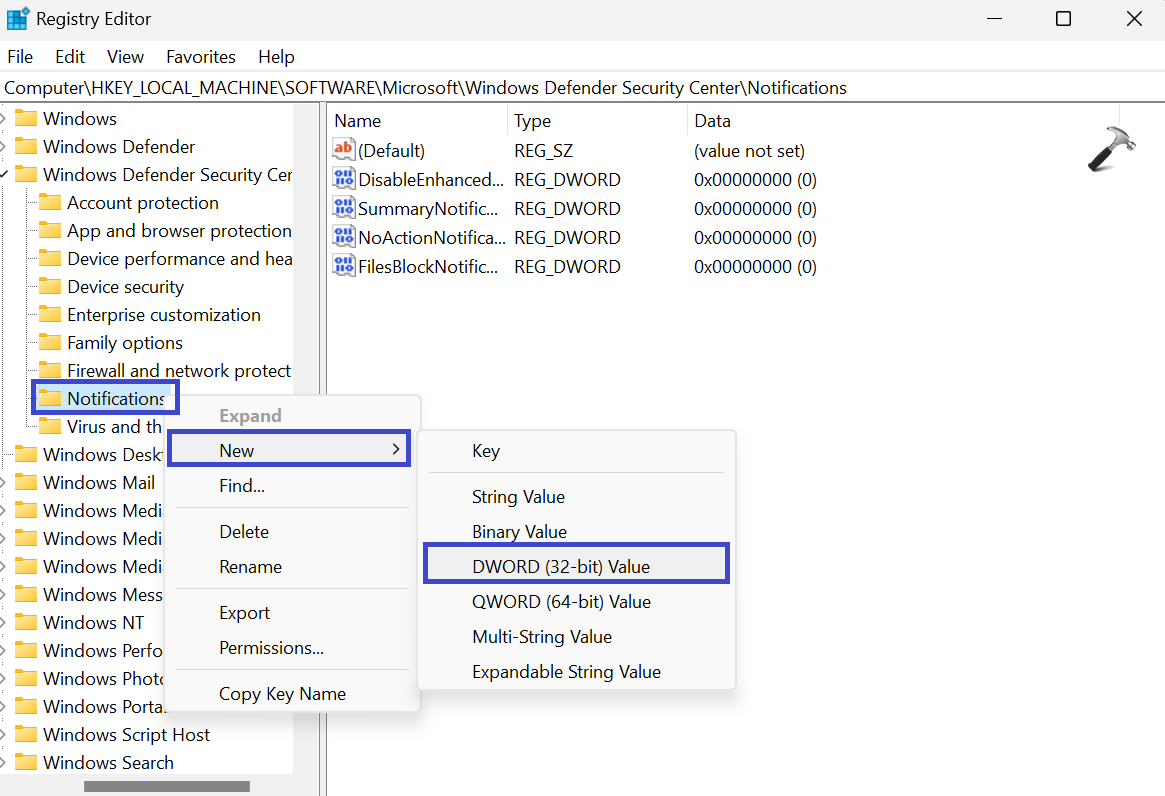
Your key is created.
4. Now, double click on the registry key “DisableEnhancedNotifications”.
Prompt box will appear.
Set the value to 0 to enable all virus and threat protection notifications.
Set the value to 1 to disable all virus and threat protection notifications.
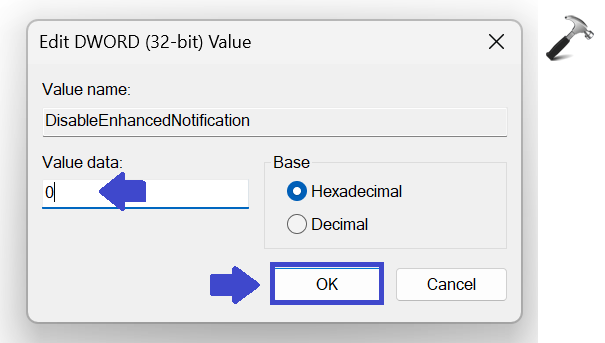
Click OK.
5. Now, repeat the STEP 3 and STEP 4 for the below Registry key:
- SummaryNotificationDisabled
- NoActionNotificationDisabled
- FilesBlockNotificationDisabled

Set the value to 0 or 1 to all the above Registry keys.
6. Close the Registry Editor Window and restart your PC to apply the settings.
Option 2: Enable or Disable using Registry Editor
1. Press the Windows Key + R. Type “regedit.exe” and click OK.
2. Navigate the following path:
Computer\HKEY_LOCAL_MACHINE\SOFTWARE\Microsoft\Windows Defender Security Center\Notifications
3. Double click on the registry key “DisableEnhancedNotifications”.
If you don’t have the registry key, you can create it.
Right-click on Notifications => New => DWORD(32-bit) value. Type “DisableEnhancedNitifications”. Click OK.
Your key is created.
4. In the right pane, double click on the Registry key “DisableEnhancedNitifications”.
5. Prompt box will appear.
Set the value to 0 to enable non-critical virus and threat protection notifications
Set the value to 1 to disable non-critical virus and threat protection notifications
6. Click OK.
7. Close the Registry Editor Window and restart your PC to apply the settings.
Option 3: Turn ON or OFF Windows Security Threat Protection Notifications using Windows Security
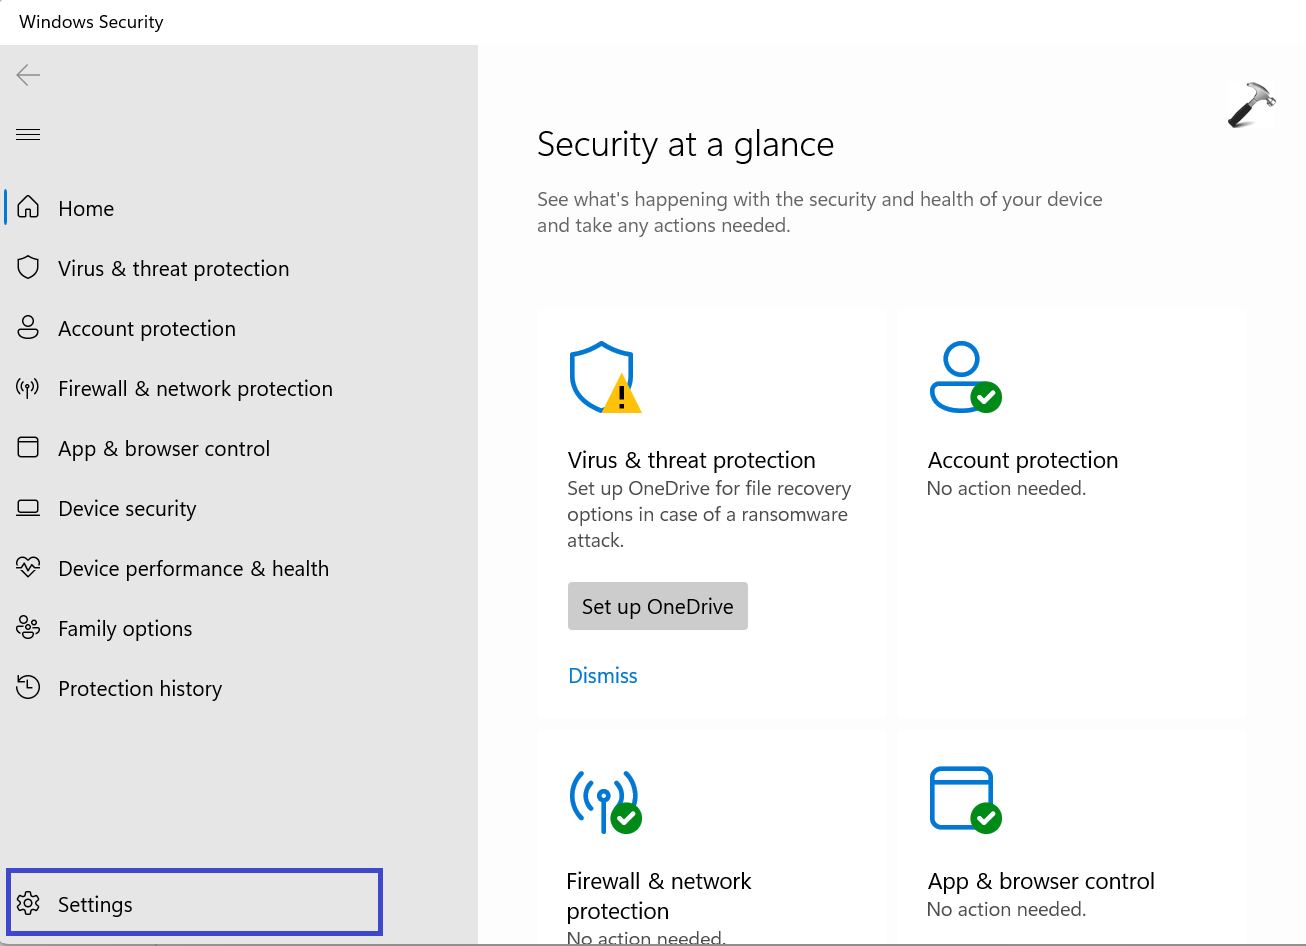
1. Open Windows Security.
2. Click on Settings.
3. In this right pane, under the Notification click on “Manage notifications”.

4. Turn off “Get informational Notifications” and turn it on.
Now, check or uncheck the options:
- Recent activity and scan results
- Threats found, but no immediate action is needed.
- Files or activities are blocked.

5. Click on Yes to approve.
6. Close the Windows Security Window and restart your PC to apply the settings.
Option 4: Enable or Disable using Local Group Policy Editor
1. Press the Windows key + R. Type gpedit.msc and click OK.
2. Navigate the following path:
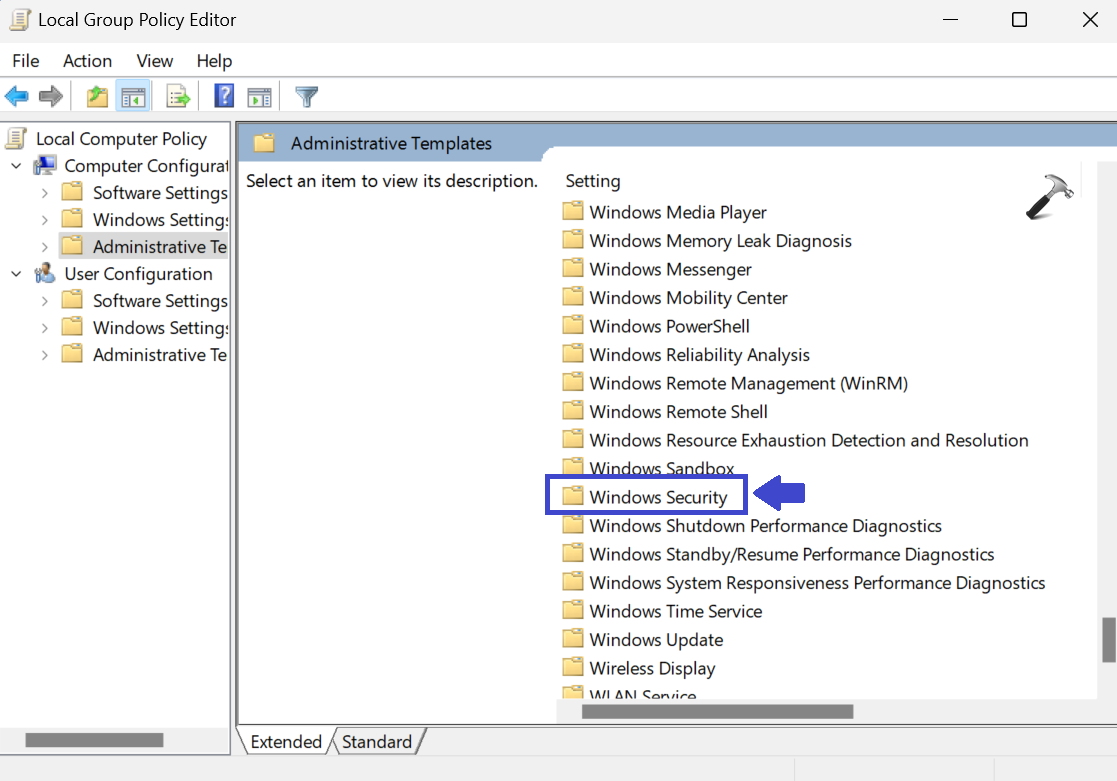
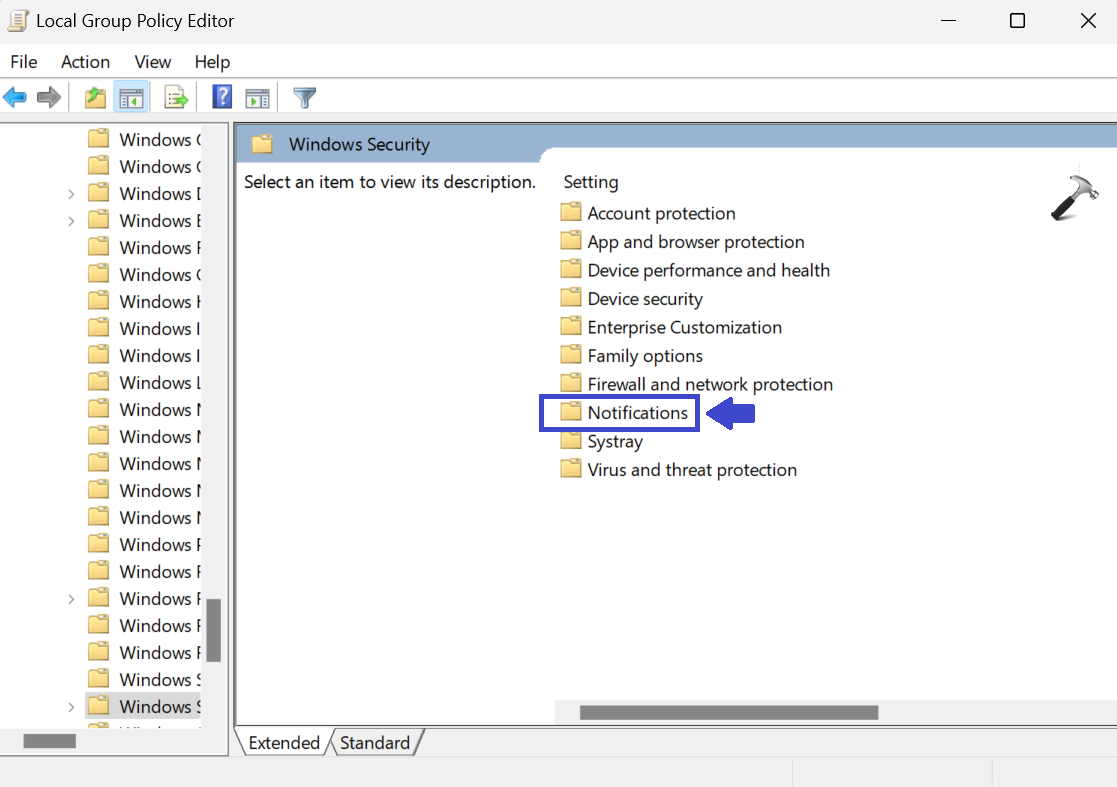
Computer Configuration\Administrative Templates\Windows Security\Notifications
3. In the right pane, double click on “Hide non-critical notifications”.

4. Prompt box will appear.
Select “Not Configured” to enable non-critical virus and Threat Protection Notifications.
Select “Enabled” to disable non-critical virus and Threat Protection Notifications.
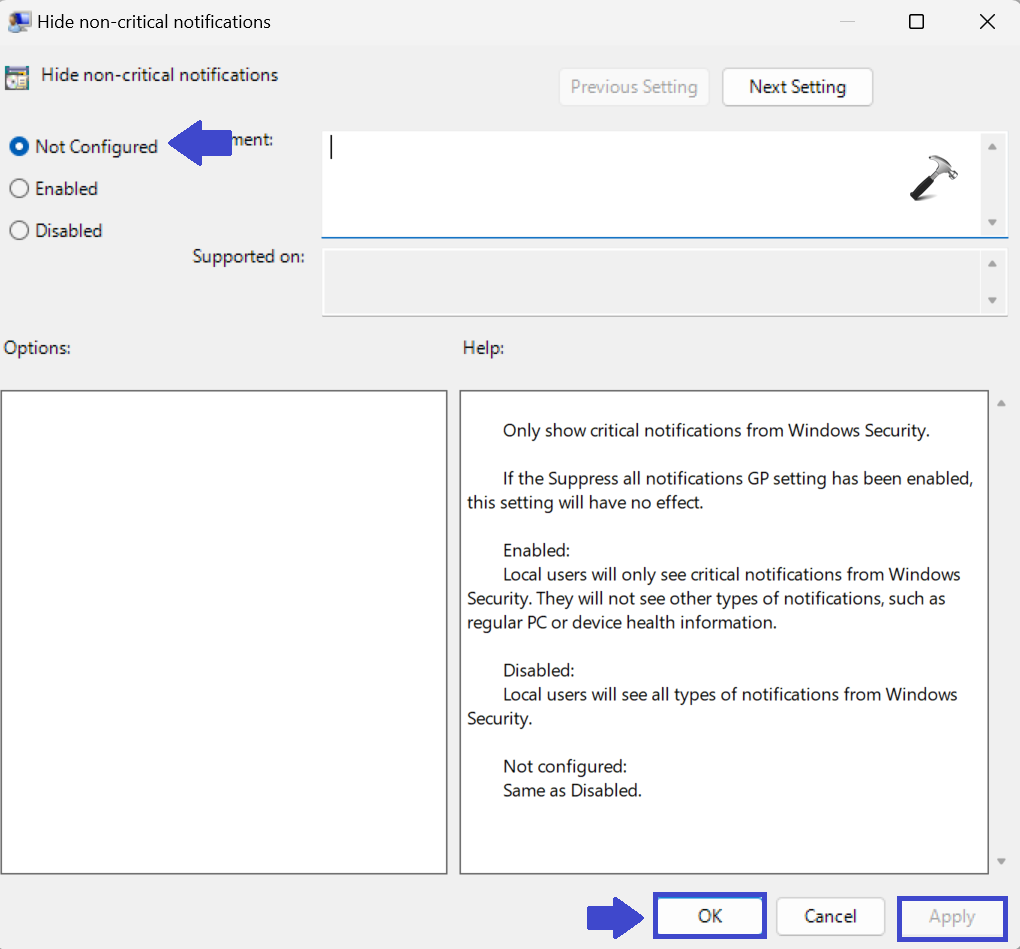
5. Click OK followed by Apply.
6. Close the Local Group Policy Editor Window and restart the PC to apply the settings.
That’s It!


Hi Sofia, in one of the screenshots you also configured SummeryNotification, NoActionNotification, FilesBlockNotification registry keys. I can’t find any documentation on this. Are these for the the individual settings:
– Recent Activity and Scan Results
– Threats found, but no immediate actions is needed
– Files or activities are blocked
Wondering if these are working individually?
Never mind, did not read correct.