In Windows 10, when you install new Desktop or UWP app, they appear in Recently added apps section of Start Menu. This section is hidden by default but as soon as you add a new app, it becomes visible.
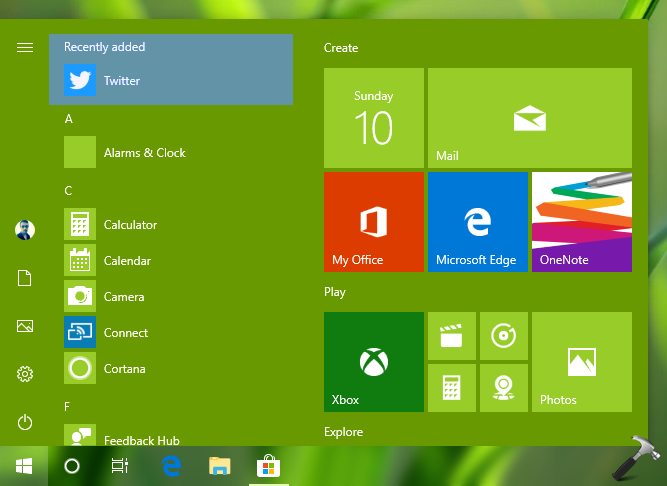
For some users, it is okay have recently added apps listed on Start Menu. While there are some other users who want completely remove this section from the Start Menu. If you belongs to those users, here’s how you can remove Recently added apps section from your Start Menu.
Page Contents
How To Remove Recently Added List From Start Menu In Windows 10
WAY 1 – Via Settings App
1. Right click Start Button or press  + X keys and select Settings.
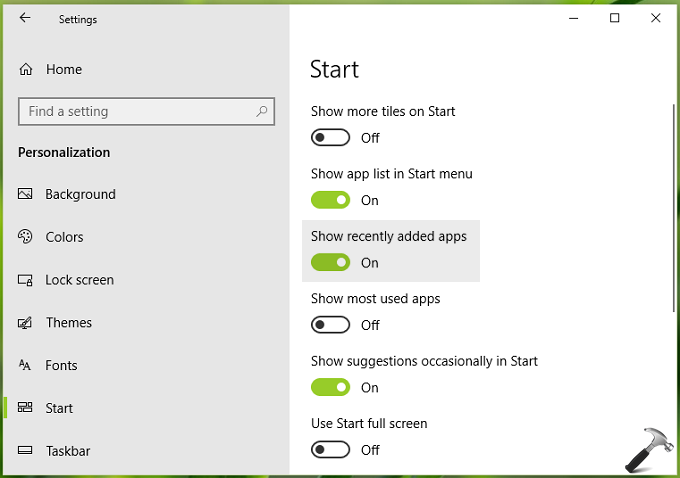
2. In the Settings app, navigate to Personalization > Start.
3. Under Start, you’ll find Show recently added apps option as Enabled by default. Turn Off this option to remove corresponding section from Start Menu.
Close Settings app and return to Desktop, if you like.
WAY 2 – Via Registry
Registry Disclaimer: The further steps will involve registry manipulation. Making mistakes while manipulating registry could affect your system adversely. So be careful while editing registry entries and create a System Restore point first.
1. Press + R and put regedit in Run dialog box to open Registry Editor (if you’re not familiar with Registry Editor, then click here). Click OK.
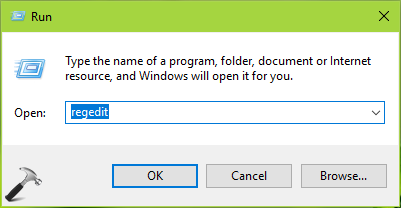
2. In left pane of Registry Editor window, navigate to following registry key:
HKEY_LOCAL_MACHINE\SOFTWARE\Policies\Microsoft\Windows
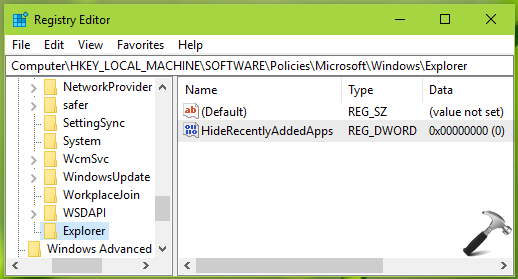
3. Right click Windows registry key, select New > Key. Name the newly created sub-key as Explorer. If Explorer registry key exists already, skip creation of new sub-key. Now in the right pane of Explorer registry key (HKEY_LOCAL_MACHINE\SOFTWARE\Policies\Microsoft\Windows\Explorer), right click and select New > DWORD Value. Name the newly created registry DWORD (REG_DWORD) as HideRecentlyAddedApps. Double click to modify the DWORD’s Value data:
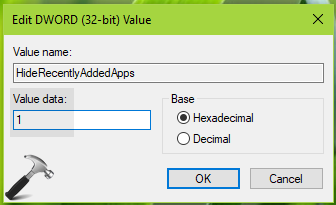
4. Set the Value data to 1 and click OK. Close Registry Editor and reboot the machine.
After restarting your system, recently added apps section should be removed from Start Menu.
It is obvious that registry tweak or applying GPO setting will override manual settings.
That’s it!