

By default, Windows 11 features password protected sharing. This feature allows users to share files with only those who have accounts on the system. When this feature is enabled, only account holders can access the shared files, folders, printers, or even the public folders. That’s why it serves as a great security feature. So, how to enable or disable password protected sharing on Windows 11? Well, this guide is the answer.
In Windows 11, this feature is enabled by default. However, you can turn off this feature if you want anyone to access shared resources and folders on the same network. In this post, you will get to learn how to turn on or off password protected sharing in Windows 11.
Page Contents
Enable or disable password protected sharing in Windows 11
Method 1: Using Control Panel
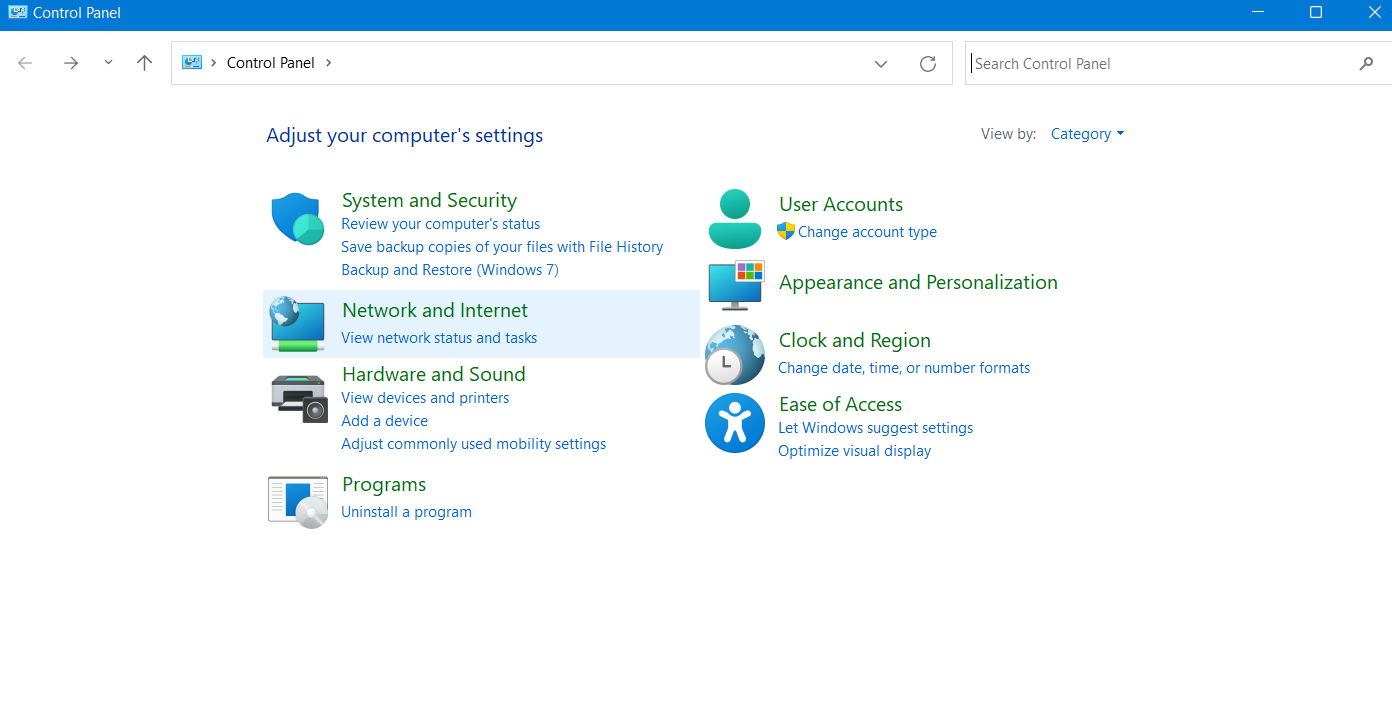
1. In the first place, open Control Panel on your system. Next, choose Network and Internet.
2. After that, go to Network and Sharing Center.
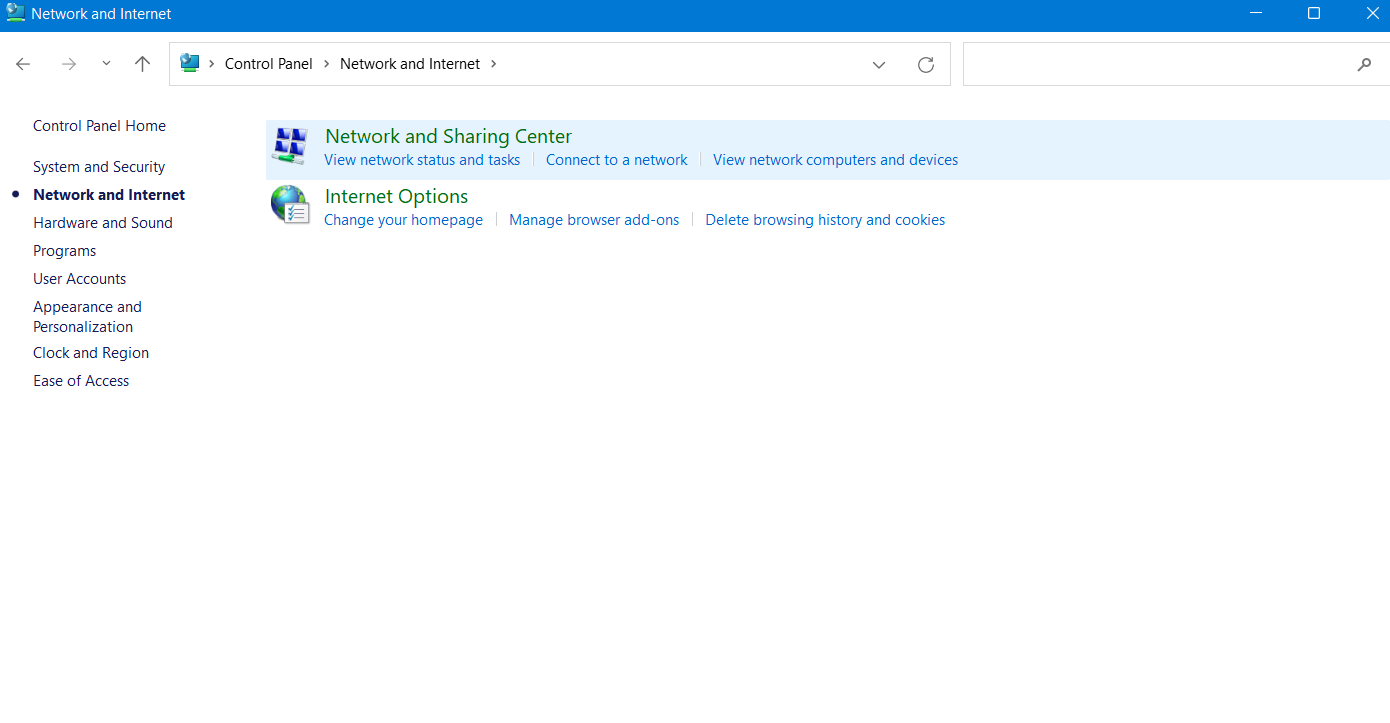
3. Once there, select Change advanced sharing settings from the left pane.

4. Now, expand All Networks and go to the Password protected sharing section. From there, click on Turn off password protected sharing to disable the feature. Once selected, click on Save changes.
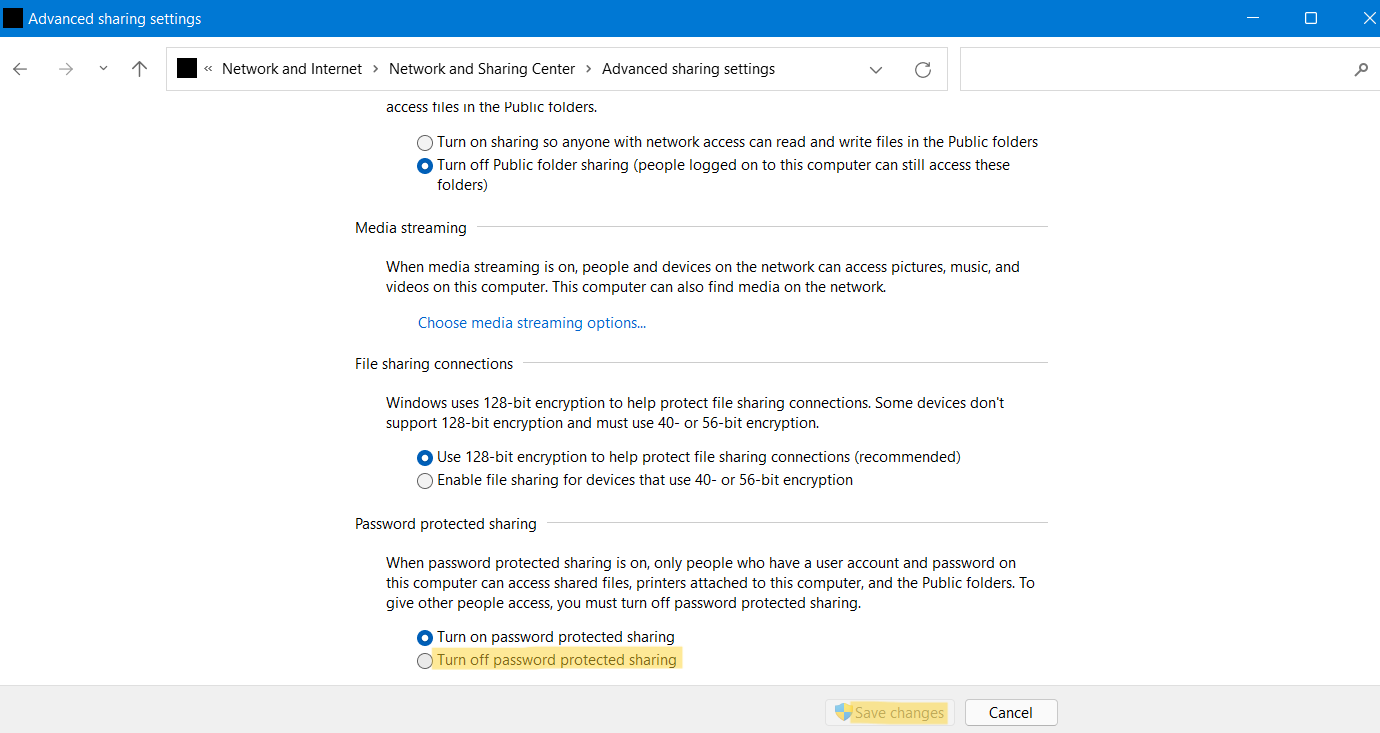
After rebooting your Windows system, the password protected sharing feature will be disabled successfully.
Method 2: Using Settings app
- Press Windows + X keys and select Settings.
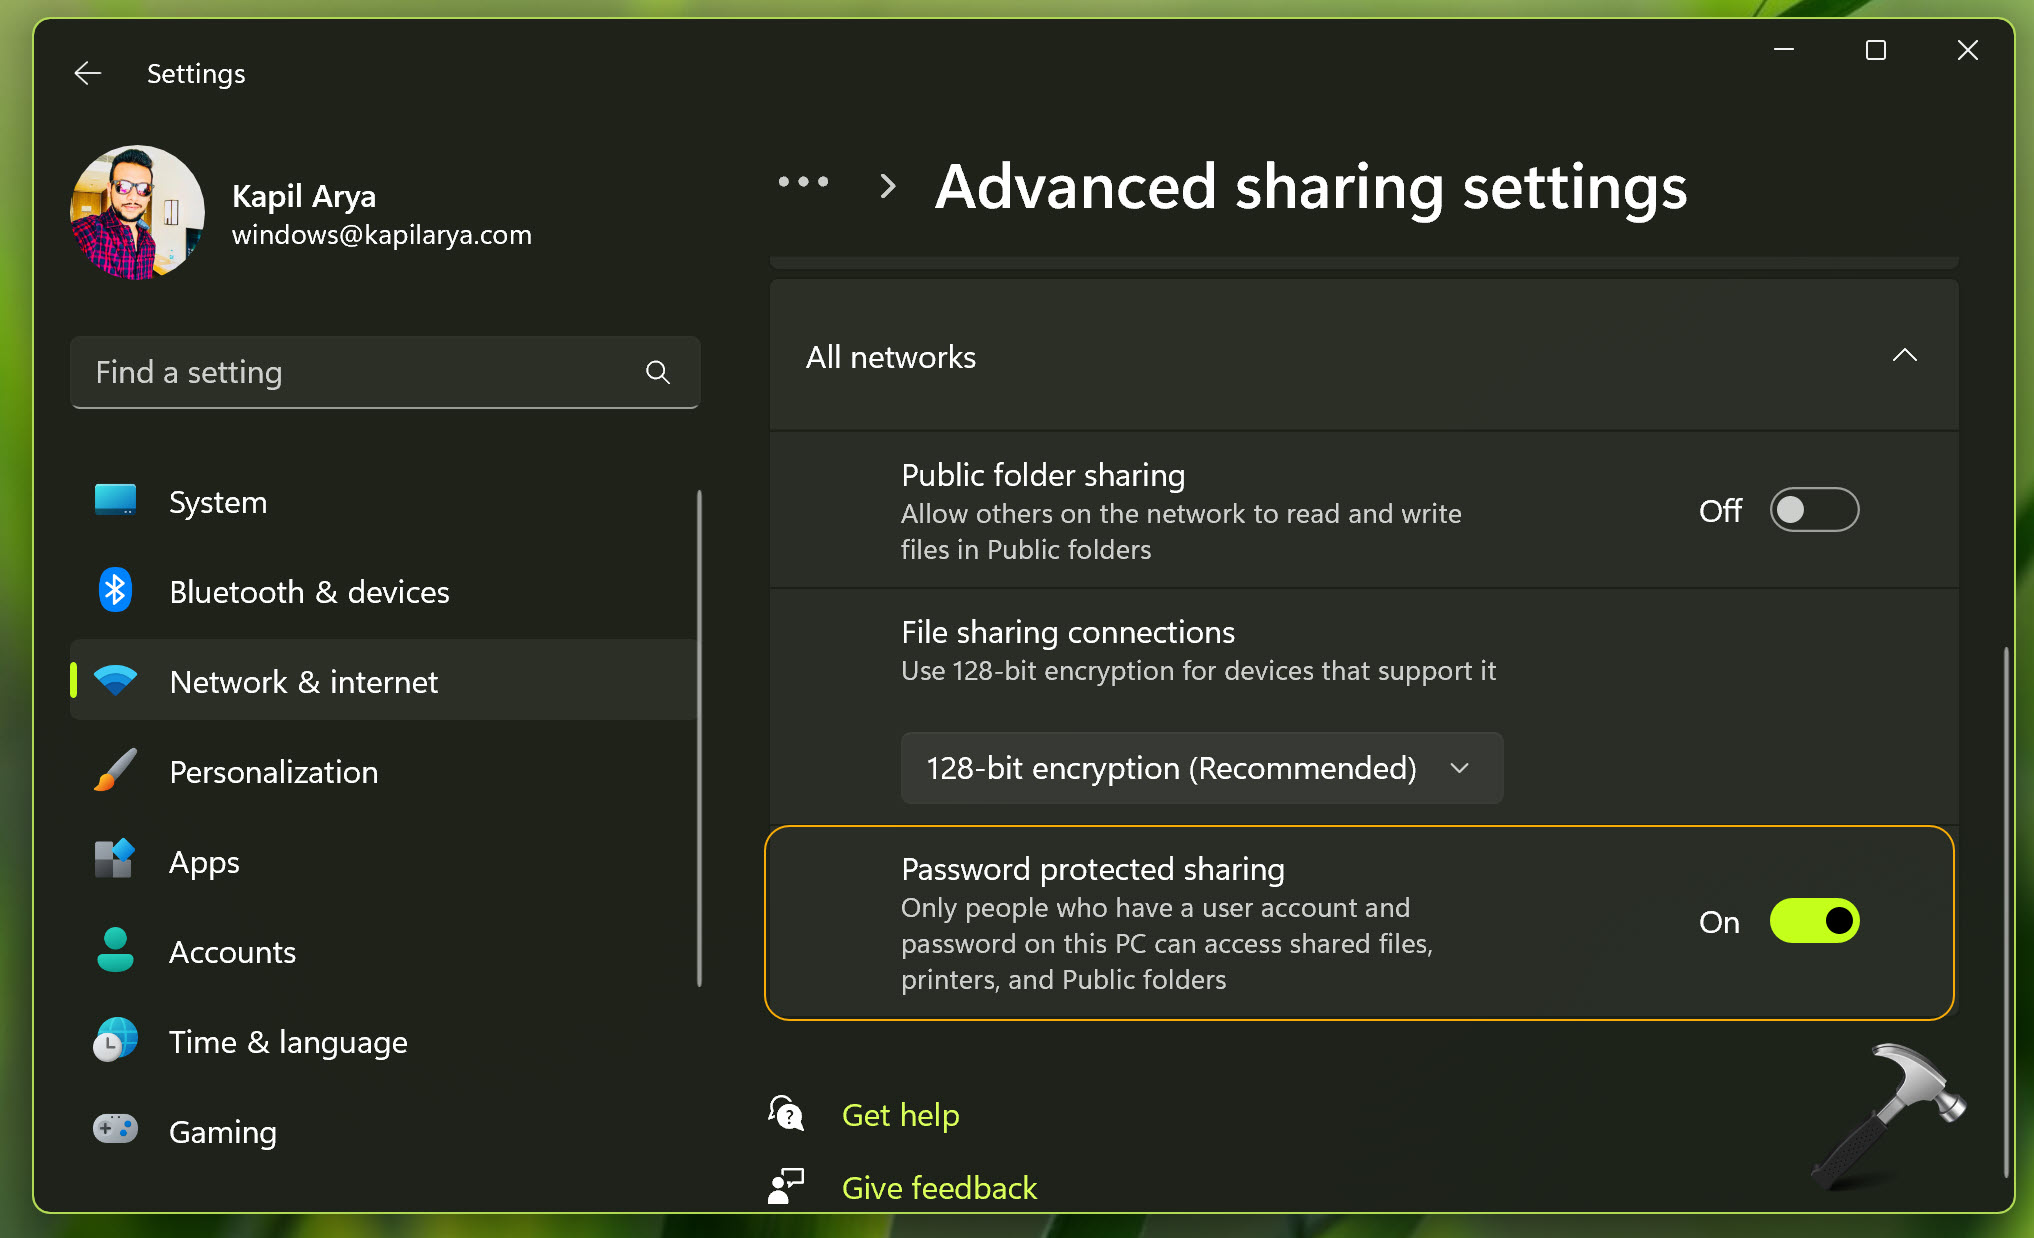
- Go to Network & internet > Advanced network settings > Advanced sharing settings.
- Expand All networks. Turn On or Off Password Protected Sharing option, to enable or disable the Password Protected Sharing feature, respectively.
Method 3: Using Command Prompt
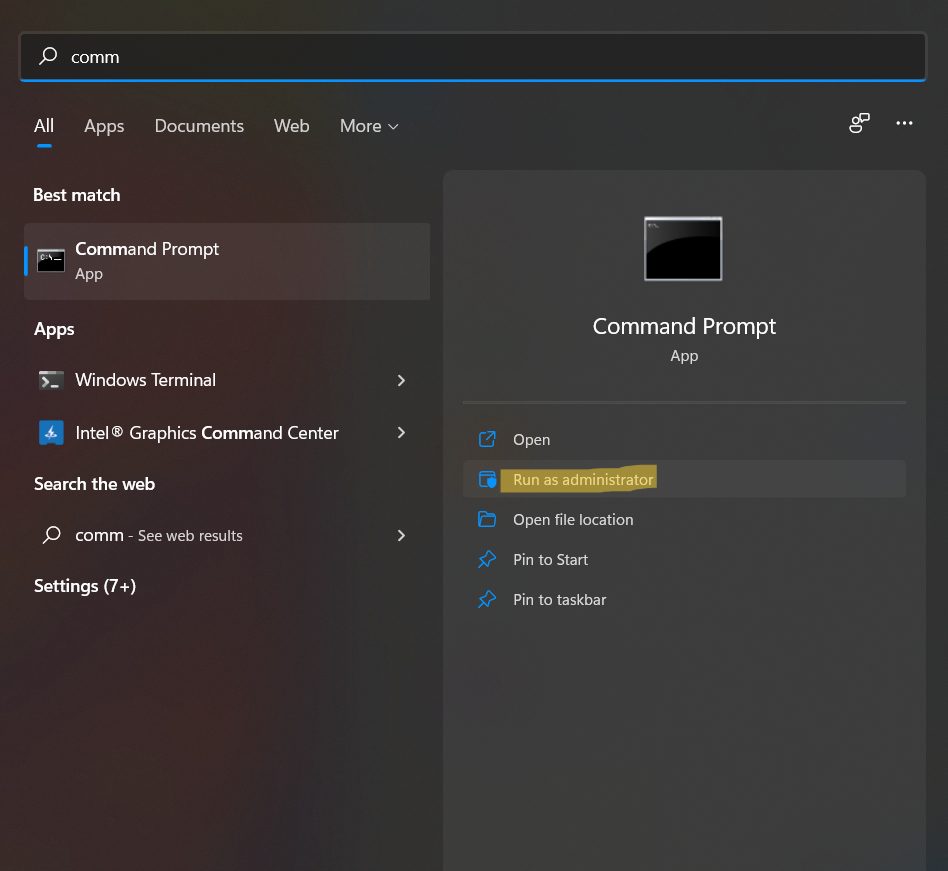
1. Firstly, open Command Prompt and run it as administrator through Start.
2. After that, type Net user guest *.
3. Next, on asking for a password, leave it empty and hit Enter.
4. Again, on asking to confirm the password, do not write anything and press Enter.
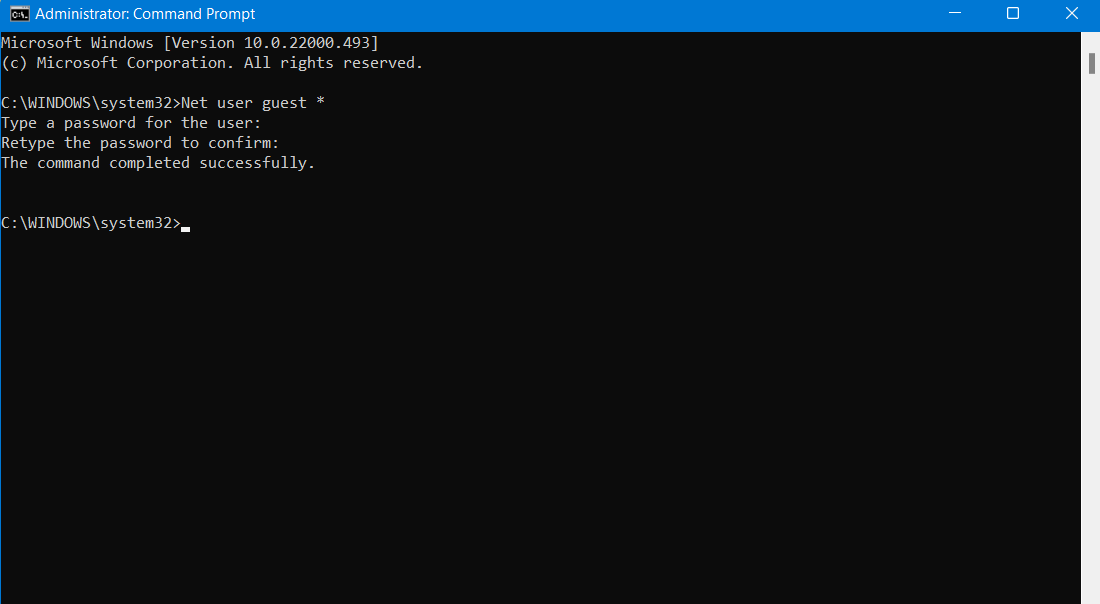
5. Once done, check if the password protected sharing feature is disabled.
So, these are two different ways to turn off password protected sharing in Windows 11. By default, this feature remains enabled. If you wish to disable it, then try out the methods mentioned in this post. If you want to enable it again, just revert the changes you’ve made.




![The mapped network drive could not be created [Detailed fix]](https://www.kapilarya.com/assets/Network-Drive-768x511.jpg)
